Game Tips
Game Tips: Until Dawn
This guide offers practical tips for surviving Blackwood Mountain and uncovering the game’s deepest secrets. Tips are categorized and graded by expertise level: Beginner (first playthrough), Intermediate (after understanding mechanics), and Advanced (for completionists and those aiming for specific endings).
---
General Tips – Foundation for Any Playthrough
- Save Often (Manual Save Feature): Until Dawn auto-saves at chapter breaks, but you can manually create additional save slots from the pause menu. Use this before major decisions or collectible-heavy areas to revert easily if you miss something or want to see another outcome.
- Listen to the Characters: Each character has unique personality traits that influence their behavior and dialogue. Pay attention to their fears, likes, and dislikes—this affects relationship scores and survival chances (e.g., Mike is brave but impulsive, Sam is cautious and observant).
- Understand the Don’t Move Mechanic: During tense segments, the game prompts you to hold the controller perfectly still. Even slight movements (e.g., breathing heavily, adjusting grip) can cause failure. Place the controller on a flat surface or your lap to minimize tremors. On PS5 DualSense, gyro sensitivity is higher; consider turning the controller upside down if you have shaky hands.
- Keep a Steady Frame of Mind: Until Dawn rewards patience. Rushing into choices can lead to unintended deaths. Take your time reading dialogue options and consider the long-term consequences.
- Every Choice Matters: The “Butterfly Effect” system ensures that even seemingly minor decisions (like whether to investigate a noise) can have cascading effects hours later. Always think ahead.
- Character Relationships: Treating characters kindly or rudely affects their willingness to cooperate later. For example, being supportive toward Ashley early on may influence her actions in Chapter 8.
- Save Everyone If Possible: The trophy/achievement “They All Live” requires every main character to survive until dawn. To achieve this, you must make near-perfect choices and pass every QTE. Use a guide on subsequent playthroughs.
- Weapon Usage: Picking up a gun or an item early can change outcomes. For instance, Mike finding the flare gun in Chapter 5 allows him to defend against a threat later. Always search thoroughly in areas where a character is alone.
- The Dog vs. the Deer: In Chapter 2, Chris can either shoot the barrel near the deer or spare it. Shooting scares away the deer but also alerts the Wendigo to your presence. Sparing is safer for immediate survival but may affect Chris’s relationship with Ashley.
- Hiding vs. Running: When confronted by a Wendigo, your options are usually to hide, run, or fight. Fighting is risky unless you have a weapon. Hiding is the safest if the “Don’t Move” segment succeeds. Running can lead to tripping if you fail QTEs.
- Manipulating Character Survival: For a perfect ending, ensure that no character is left alone for too long. Keep the group together as much as possible; splitting up often leads to isolation and death. However, some solo sequences are unavoidable—practice those QTEs.
- The Stranger’s Advice: The mysterious “Stranger” (the old man in the mine) gives crucial information about Wendigos: they are blind but track by sound. Do not run or make noise when they are near. He also warns against the wendigo’s weakness to fire. Use this knowledge in later chapters (e.g., Chapter 9).
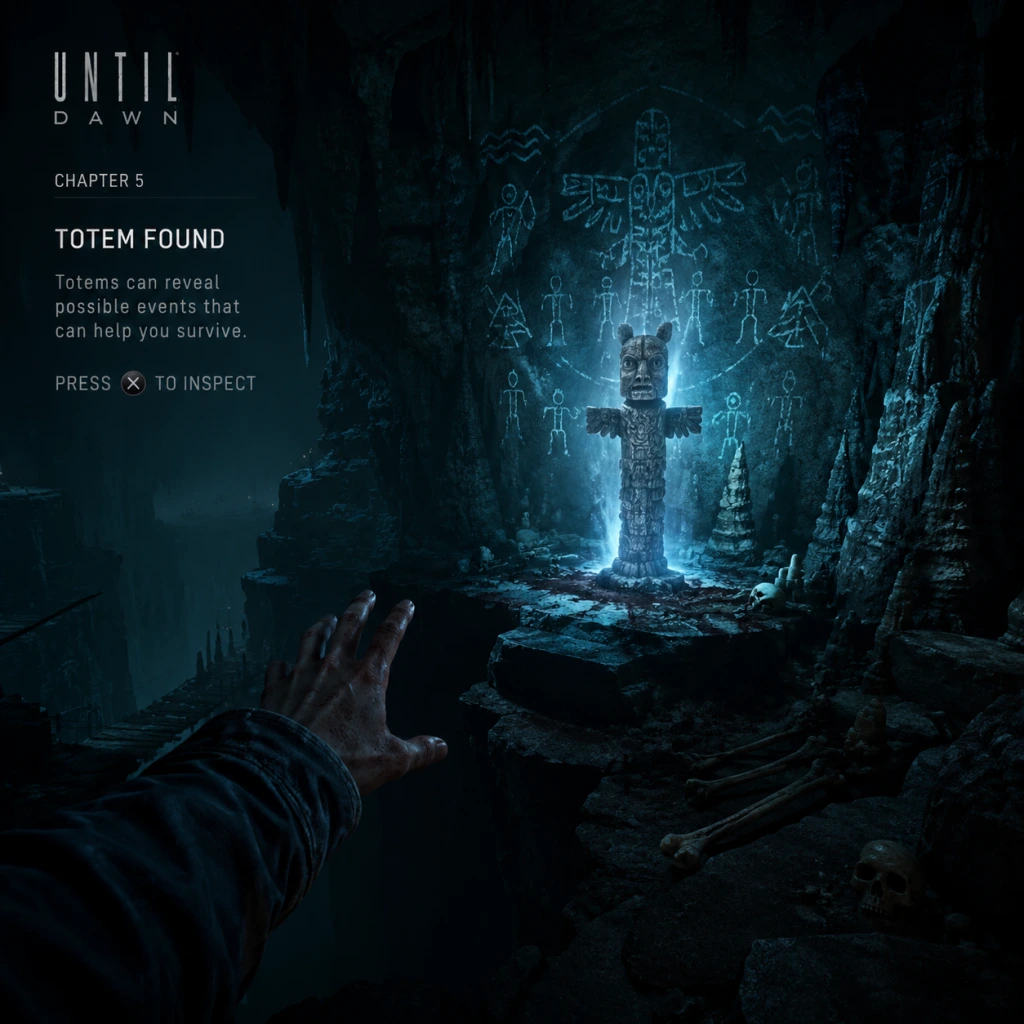
- Totems and Pre-Vision: Collecting totems reveals short flash-forwards of possible futures. Use these to inform your choices. For example, a “Danger” totem showing a character dying in a specific location tells you to avoid that area or take extra precautions.
- Stay Relaxed: QTEs are often fast, but panic causes mistakes. Keep your thumbs relaxed over the buttons. The game usually gives a brief pause before a QTE appears—use that to anticipate.
- Know the Pattern: Left/right stick flicks are common for dodges. Button presses (Square, Circle, etc.) appear for actions like grabbing ledges or punching. Repeated button mashing (e.g., running sequences) requires an even rhythm; don’t flail rapidly as it wastes energy.
- Practice on Easy: The game’s “Easy” mode reduces QTE speed and leniency. Use this on your first playthrough to learn the rhythm without frustration.
- Save Your Strength: In long, multi-phase QTEs (e.g., Mike’s chase in Chapter 5), pace yourself. The game will not let you fail early—only later phases matter. Conserve your energy for the final button sequences.
- Memorize Key Sequences: Some QTEs are nearly identical across playthroughs. For example, the sequence where Mike runs through the sanatorium always has the same patterns. After your first playthrough, you can predict most inputs.
- Use the Pause Trick: If you need a breather during a series of QTEs, pause the game immediately after a successful input. The game pauses for a few seconds before the next prompt, giving you time to reset.
- No Mistakes Speed Run: For trophies like “The Quickest of Hands” (perfect QTE completion in a single playthrough), you must get every QTE right. On subsequent runs, disable vibration in settings – it can distract. Also, sit in a quiet room to minimize external noise.
- Gyroscope Calibration: For “Don’t Move” sections, calibrate the DualSense gyro by holding the controller in your natural resting position before the prompt appears. If the controller is tilted, the game may think you moved.
- Backup Save Method: If you fail a QTE and want to redo it, close the game immediately after failure (before the game autosaves the death). Restart from the last save point. This works only if you haven’t triggered an autosave after the death.
- Search Every Room: The game is linear but has many side areas with clues, totems, and documents. Rotate the camera fully to spot items on shelves, behind furniture, or in corners. Use the flashlight (on characters like Sam) to illuminate dark areas.
- Totems Are Key: There are 30 totems hidden throughout the game. Each gives a brief vision of a future event—either helpful (Guidance totems) or warning (Danger, Death). Collect as many as possible to prepare for upcoming threats.
- Clues Build the Story: Over 100 clues explain the mystery of Hannah, Beth, and the Wendigo. Read every one in the menu to fully understand the lore and unlock the “Truth” ending.
- Missable Collectibles: Many totems and clues are available only during specific chapters or if certain characters are alive. For example, the “Hannah’s Diary” entry in Chapter 6 is only reachable if Mike survives a certain door. Prioritize keeping characters alive to get full collectible sets.
- Use the Map Wisely: When exploring large areas like the mine, look for branching paths. A dead end often hides a collectible. Listen for audio cues (e.g., the sound of a totem) to know you’re near.
- Chapter Select after Completion: After finishing the game, you can replay any chapter to grab missed items without starting over. However, decisions made in earlier chapters may affect availability. A second full playthrough is often needed for 100% completion.
- Complete the Truth Ending: To unlock the “Truth” ending (where the police investigate and learn the Wendigo truth), you must collect all 12 mysterious totems hidden in the final chapter. These totems require specific characters to be alive. Plan your playthrough to ensure the right characters survive.
- Time-Sensitive Collectibles: In Chapter 4, while playing as Ashley, there is a brief window to find a clue about the “Wendigo Camp.” If you dawdle, the sequence ends and the clue is lost. Be efficient.
- Using Collectibles for Trophy Progress: The “Rookie” trophy (all clues) and “Mystery” trophy (all totems) are easier with a checklist. Print a written guide or use the in-game menu’s percentage tracker to avoid missing anything.
- Don’t Split Up: The classic horror trope “Don’t split up” is literally the best advice. When given the option to stay together or separate, always choose to stick as a group. The Wendigo attacks isolated individuals more often.
- Protect Sam: Sam is the most versatile survivor. She can run fast, hold her breath, and is present in critical late-game segments. Keeping her alive is essential for the best ending. Never make her act recklessly.
- Avoid the Flamethrower Guy’s Death: In Chapter 6, Mike encounters the Stranger in the sanatorium. If you fail the QTE to shoot the Wendigo, the Stranger dies, and you lose critical advice later. Practice that QTE.
- Jessica’s Survival: Jessica is in the most danger early. In Chapter 2, Mike can choose to run to the lodge or take a shortcut. Taking the shortcut (and failing the QTE) results in Jessica being dragged. To save her, run directly to the lodge and succeed in the chase QTEs. Also, later in the mine, she can be saved again if Mike finds her quickly.
- Josh’s Fate: Josh is not a playable character after Chapter 6, but his fate is determined by earlier choices. If you explore Josh’s room and find the “Psycho” mask, you can trigger his “Saw” sequence differently. For the best outcome, avoid being too aggressive with him, but don’t be completely passive either.
- Mike’s Sacrifice: In the final chapter, Mike can sacrifice himself to save Sam. To avoid this, make sure Sam is safe and has a clear path to the exit. Mike’s death is optional – only happens if you fail the final “Don’t Move” segment while controlling Sam.
- Perfect Run Route: To keep all eight characters alive, follow this golden path:
- Emergency Exit: If a character dies, you can still continue the story. Do not restart unless you want a perfect run. Deaths affect collectibles and endings.
- Collect Every Type: There are five totem colors: Black (Death – shows a character dying), White (Guidance – shows correct action), Gold (Fortune – shows a beneficial outcome), Cyan (Danger – warns of threat), and Red (The Stranger – shows his fate). Each gives a short clip. Use these to know what not to do (e.g., if you see Mike falling from a ledge in a Black totem, avoid that path).
- Totems Are Replayable: Once collected, you can view their visions in the menu at any time. Replay them before making a major decision to refresh your memory.
- Matching Visions to Choices: For instance, a Guidance totem showing Sam pressing a switch in the lodge means you should later press the switch instead of hiding. If you see a Danger totem of Mike being impaled, avoid the mine elevator in Chapter 8.
- Hidden Totems in “Strange” Positions: Some totems are only visible if you change the camera angle or backtrack. Example: In Chapter 4, after climbing the ladder to the fire tower, look behind it – there’s a Moth totem (white).
- Totems for Trophy “Totemist”: Collect all 30 totems to unlock a special secret (a note from the developers) and the related trophy. Use a comprehensive guide to find each location. Organize your collectible hunt by chapter.
- Exploiting Totem Knowledge: Because you can predict future events, you can intentionally make bad choices to see different totem outcomes, then reload. This is useful for seeing all possible visions.
- Weapons Are Limited: The game only gives you a few weapons: the flare gun, a shotgun, a machete, and a knife. Always pick up any weapon you see, even if you don’t plan to use it immediately. Later, it may be your only defense.
- Ammo Conservation: The flare gun has one shot. Use it only when absolutely necessary (e.g., to kill a Wendigo attacking a friend). The shotgun has two shells; save them for the final confrontation.
- Flashlight Management: In dark sections, the flashlight battery is infinite, but you can toggle it on/off. Turning it off makes you harder to detect by Wendigos, but you may miss clues. Use short bursts when searching.
- The Psychology of “Items”: Some items are not physical but are “information” (e.g., a note about the Wendigo’s weakness to fire). These are just as valuable as weapons. Read every document to gain tactical knowledge.
- Weapon-Specific Survival: The machete found in the Hunter’s Lodge can be used to cut ropes or break locks. Keep it equipped on characters who are likely to face physical obstacles (e.g., Mike).
- Flare Gun Strategy: The flare gun can be used to distract a Wendigo by firing it into the air. This can buy time while another character escapes. Use it wisely – you only have one.
- No Resource Grind: Until Dawn has no inventory system like RPGs. You can only hold one weapon per scene. If you have a weapon, you cannot drop it for another unless the game forces a swap. Plan ahead which character carries what.
- Hidden Items: In the mine, there is a hidden crossbow that can kill a Wendigo instantly. It’s only accessible if you solved a puzzle earlier (the hanging lanterns). Seek it out for an easier final battle.
- The Stranger’s Items: In Chapter 6, the Stranger gives Mike a protective talisman. This talisman can save Mike from a death later if he wears it. Do not refuse it – always accept.
- The Psycho Mask: In Josh’s room, you can find a mask and various tools that reveal his identity earlier. This changes some dialogue.
- The Bat: A large bat creature appears as an Easter egg if you catch it in the camera during certain mine scenes. It is a reference to another game.
- Mine Map Secret: Underneath the mine’s map table, there is a hidden note from the developers. To see it, you must lower the camera and look under the table.
- The Wendigo’s True Form: If you thoroughly explore Chapter 8, you can find a hidden Wendigo corpse that is not an enemy – a jumpscare intended to unnerve you.
- The “Original” Ending: There is an early concept ending accessible via a glitch. Stand in a specific spot in Chapter 10 while holding a particular item to trigger a cut scene not meant to be seen. (This requires precise timing and a PS4 original version; patched in later releases.)
- Developer Commentary: After 100% completion, a special developer commentary mode unlocks. Listen to it for behind-the-scenes insights.
- Pass & Play Tips: Assign characters to players based on personality: give brave players Mike or Sam, cautious players Ashley, etc. This makes the story more immersive.
- Online Leaderboards: Not available in remake versions, but the original PS4 version had leaderboards for QTE performance. They are no longer active.
- Replayability Is High: The game is short (8–10 hours) but has hundreds of branching paths. Play through at least three times: once blind, once for perfect survival, once for all collectibles.
- Use Chapter Select for Alternate Paths: After your first completion, you can replay chapters to see what would have happened if you made different choices. This is a great way to see all deaths without full replay.
- Play with Friends: If you want a chaotic and fun experience, play Pass & Play with friends who have different playstyles. It can lead to surprising outcomes.
- Don’t Trust the Dogs: The dog that appears in the sanatorium can be saved, but it doesn’t affect the main plot – it’s purely a moral choice. Saving it gives a warm moment but no gameplay advantage.
- Stay Calm in the Face of Death: Deaths in Until Dawn are permanent and often brutal. Accept that your first playthrough will likely have casualties. Embrace the horror and learn from mistakes.
---
Choices & The Butterfly Effect
#### Beginner Tips
#### Intermediate Strategies
#### Advanced Optimizations
---
Quick Time Events (QTEs)
#### Beginner
#### Intermediate
#### Advanced
---
Exploration & Collectibles
#### Beginner
#### Intermediate
#### Advanced
---
Character Survival – Keeping Everyone Alive
#### Beginner
#### Intermediate
#### Advanced
- Chapter 1: Take all dialogue options that build trust.
- Chapter 2: Save Jessica via the lodge path.
- Chapter 3: As Chris, aim the gun away from Ashley.
- Chapter 4: As Ashley, explore until the basement but do not open the trapdoor.
- Chapter 5: As Mike, succeed at all sanatorium QTEs, and save the dog.
- Chapter 6: Save the Stranger.
- Chapter 7: As Sam, hide successfully in the lodge.
- Chapter 8: As Mike, don’t shoot Emily (even if she’s bitten).
- Chapter 9: As Matt, choose to save Emily, and as Emily, jump through the window.
- Chapter 10: Final lodge – Sam must succeed at both “Don’t Move” segments and turn on the switch.
---
Totems – Reading the Future
#### Beginner
#### Intermediate
#### Advanced
---
Resources – Items & Equipment
#### Beginner
#### Intermediate
#### Advanced
---
Economy – Not Applicable
Until Dawn has no currency or shop system. However, the “economy” here refers to how you spend your attention. Time is the only resource: you have limited opportunities to explore, converse, and act. Prioritize exploration over combat if you want collectibles; prioritize relationship points if you want everyone to trust each other. Balanced priorities yield the best story.
---
Hidden Secrets & Easter Eggs
#### Beginner
#### Intermediate
#### Advanced
---
Multiplayer / Social Features
Until Dawn is primarily a single-player game. However, it includes Pass & Play mode (also known as Party Mode). In this mode, up to 8 players can each control a different character, passing the controller during character swaps. This is excellent for group play.
---
Final Tips – Mastering Blackwood Mountain
---
Good luck, and may you survive until dawn.