Getting Started
Getting Started
Game Introduction
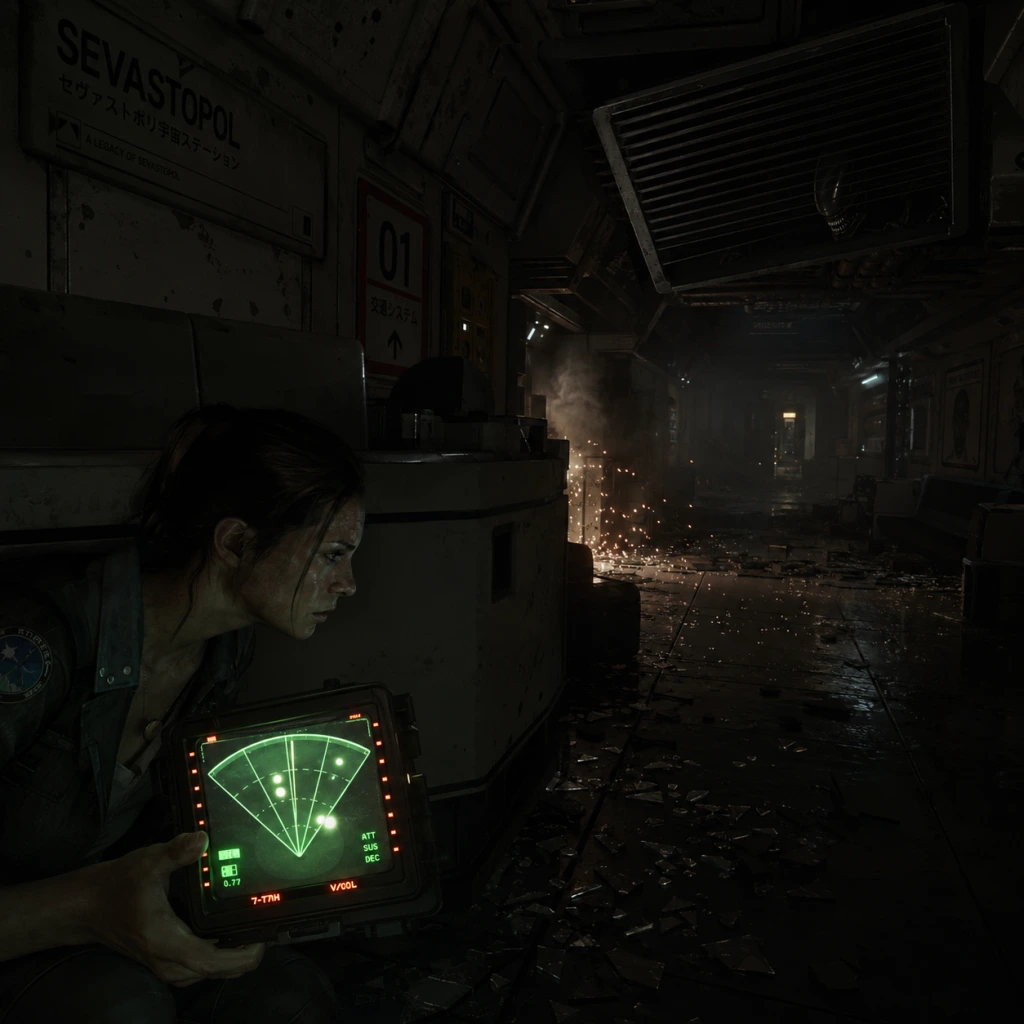
Alien: Isolation is a first-person survival horror game that masterfully captures the claustrophobic terror of Ridley Scott's original 1979 film. Developed by Creative Assembly and published by Sega, it was initially released on October 7, 2014, for Windows, PlayStation 3, PlayStation 4, Xbox 360, and Xbox One. Later ports include Nintendo Switch (2019) and backward compatibility on PS5 and Xbox Series X/S. You play as Amanda Ripley, daughter of Ellen Ripley, 15 years after the events of the first film. You board the derelict space station Sevastopol to recover the flight recorder from the Nostromo—and soon discover you are not alone.
No Character Creation
Alien: Isolation does not feature character creation. You play as a predefined character: Amanda Ripley. Your appearance, name, and backstory are fixed. This guide focuses entirely on gameplay, survival, and navigation.
---
First Hour Walkthrough (Steps 1–10)
1. Opening Cinematic: Watch the cutscene. You’ll see Amanda arriving at Sevastopol station. Pay attention to the setting—the station is in disrepair.
2. Control Tutorial: After the cinematic, you’re in the Torrens (Samuels’ ship). Follow the on-screen prompts to move, look, interact, crouch, and sprint. Complete the short tutorial: pick up the flashlight (E on PC, X on Xbox, Square on PS, Y on Switch) and use the terminal.
3. First Hacking Mini-Game: The tutorial introduces the hacking tool. A simple rotation puzzle: rotate the rings until all segments align. Time is limited, but you can retry infinitely.
4. Exiting the Torrens: You’ll dock with Sevastopol. Walk down the ramp into the station. The atmosphere changes—lights flicker, emergency alarms sound.
5. First Corridor & Save Point: Immediately after entering, you find a Save Station (a tall, beeping device shaped like a dome). Use it to save your game. Save often—there is no autosave in combat areas.
6. Finding the Mission Terminal: Follow the objective marker to a terminal showing a map of the station. You learn your first goal: reach the Anesidora (the salvage ship) at the Gemini Exoplanet Solutions lobby.
7. First Human Enemy: Shortly after, you encounter hostile survivors. They are armed and aggressive. Do not fight—hide in lockers or under desks until they pass. The game encourages stealth, not combat.
8. First Working Joe (Synthetic): You’ll enter the Gemini Exoplanet Lobby. Here you meet your first Working Joe—a friendly android that initially offers no threat. Interact if you want, but avoid attacking; it only triggers hostility later.
9. Using the Motion Tracker: When you receive the motion tracker (G on PC, up on D-pad on consoles), equip it. It detects movement in a 180-degree arc. Use it constantly—it’s your best survival tool.
10. First Alien Encounter: The Alien is scripted to drop from a vent in the medical bay area (Mission 1). You cannot kill it. Hide immediately—do not run, do not use the flashlight. Crouch behind a desk or inside a locker. Wait for the Alien to leave. Then proceed to the objective: the Anesidora dock.
---
Controls on All Platforms
| Action | PC (Keyboard/Mouse) | PlayStation (PS4/PS5) | Xbox (One/Series X | S) | Nintendo Switch |
|---|---|---|---|---|---|
| Move | WASD | Left stick | Left stick | Left stick | |
| Look/Aim | Mouse | Right stick | Right stick | Right stick | |
| Interact/Use | E | Square | X | Y | |
| Crouch | Ctrl | Circle (hold) | B (hold) | B (hold) | |
| Sprint | Shift (hold) | L3 (click left stick) | L3 (click left stick) | L3 (click left stick) | |
| Flashlight | F | R1 | RB | R | |
| Motion Tracker | G | Up on D-pad | Up on D-pad | Up on D-pad | |
| Inventory / Crafting | Tab | Touchpad | View | Minus (-) | |
| Equip Item | 1–4 | D-pad | D-pad | D-pad | |
| Use Medkit | Q | Triangle | Y | X | |
| Reload | R | Square (in aiming?) | X (in aiming?) | Y (in aiming?) | |
| Hacking Tool | Automatically equipped when near a hackable terminal | - | - | - | |
| Aim Weapon | Right mouse button | L2 | LT | ZL | |
| Fire/Throw | Left mouse button | R2 | RT | ZR | |
| Map | M | Options | Menu | + | |
| Pause Menu | Escape | Options | Menu | + |
---
UI Overview
1. HUD Elements: Minimal. No health bar on screen—check health via inventory screen (Tab/view button). The only persistent HUD element is the Flashlight Indicator (corner of screen) and Motion Tracker when active.
2. Flashlight Indicator: A small icon shows if your flashlight is on. Red when on, white when off or low battery. Battery drains quickly—use sparingly.
3. Motion Tracker: When equipped, it covers most of the screen. Green blips are moving objects; larger, faster blips mean danger. The Alien appears as a large green circle. The tracker uses batteries too.
4. Inventory Screen: Shows health, resources, equipped items. Health is a bar; when it’s low, you see blood on screen edges. Craft items from resources.
5. Notification Text: Objective updates and story notes appear in the lower-left. Small font.
6. Save Station Beacon: A tall, cylindrical device with blinking lights. Activate it to save—nearby safe zones.
7. Map: Accessed via M/Options/Menu/+. Overhead view of current area with objective markers, locked doors, and your location. Use it constantly.
---
Essential Early Objectives (First 2 Hours)
- Mission 0: Welcome to Sevastopol – Navigate from docking bay to Gemini Lobby. Learn basic movement, interaction, and stealth from human enemies.
- Mission 1: Find the Anesidora – Reach the ship dock. You’ll encounter the Alien for the first time. You must hide and wait for it to leave. Then board the Anesidora and return to station.
- Mission 2: The Core – You need to access the station’s core systems. This introduces working joes (enemy androids) and the flamethrower (first real weapon against the Alien). Obtain the flamethrower by exploring the core area.
- Save at every station you see. Death can send you back 15 minutes.
- Read the hint posters and notes. They explain game mechanics like how to distract enemies with noise makers.
- Crouch when you hear the Alien or Androids. Walking upright creates noise.
- Use the environment: lockers, vents, under desks. The Alien can break vents but rarely locker doors.
- Turn off your flashlight when hiding. A bright light attracts the Alien from across the room.
- Collect resources: scrap, components, alcohol, adhesive. You’ll craft medkits, noise makers, pipe bombs, and EMP mines.
- Learn the motion tracker rhythm: Pause every few seconds to listen for the Alien’s heavy footsteps and hissing.
- Running in non-combat zones. Footsteps attract enemies. Only sprint when you know the area is clear.
- Using the flamethrower too early. Ammo is scarce. Use it only as a deterrent—one quick burst makes the Alien flee, but it returns.
- Attacking Working Joes head-on. They are bullet sponges and alert other joes. Use stealth or EMP mines.
- Staying in one place too long. The Alien patrols randomly. If you stop for too long, it may find you.
- Ignoring the crafting menu. Craft noise makers and medkits early; they are life-savers.
- Hacking without knowing the minigame. Practice with the first few puzzles. They get harder, and failing too many times can lock the terminal temporarily.
Progression Tip: You do not have to memorize all objectives. The game always shows a waypoint marker and a brief description. Just follow them, but explore for resources.
---
What to Do First and What to Avoid
#### Do First:
#### Avoid:
---
Early Resource Priorities
| Resource | Use | Priority | Notes |
|---|---|---|---|
| Scrap Metal | Craft noise makers, pipe bombs | High | Most common. Loot lockers, drawers. |
| Alcove (Alcohol) | Craft medkits, fuel for flamethrower | High | Found in bathrooms, kitchens. |
| Adhesive | Craft noise makers, medkits | Medium | Less common; be conservative. |
| Revolver Ammo | Use for human enemies | Low | Avoid combat with humans if possible. Save ammo for emergencies. |
| Shotgun Shells | For androids or critical moments | Low | Very scarce early. |
| Flamethrower Fuel | Craft from alcohol & scrap | Medium | Only use to scare off Alien. |
| EMP Parts | Craft EMP mines for androids | Low | Found later; mine early only if you find components. |
| Flare / Flare Gun | Distraction | Medium | Flares can lure the Alien away. Use sparingly. |
| Blueprints | Unlocks new crafts | High | Always pick up blueprint tapes. They upgrade your crafting. |
---
Common Beginner Mistakes
1. Staying in the open when the Alien is near. Always have a hiding spot in mind. Use vents and lockers.
2. Forgetting to save. The game has no autosave in large sections. Save manually at every station.
3. Using the flashlight in the dark near enemies. The Alien sees it. Use the motion tracker instead.
4. Running through rooms without checking corners. Listen—if you hear heavy breathing, that’s the Alien near you.
5. Not using distractions. Tossing a flare or noisemaker sends the Alien to investigate. Use this to cross open areas.
6. Attacking the Alien. It cannot be killed. Shooting it only wastes ammo and alerts it. Use the flamethrower briefly to scare it away.
7. Ignoring the map. The map shows locked doors and alternate routes. Study it to avoid dead ends.
8. Hoarding resources. Use crafted items early; you will find more. A dead player loses everything.
9. Trying to fight multiple humans. Stealth takedowns (from behind) are silent. Group fights attract the Alien.
10. Not adjusting difficulty. If you’re too frustrated, lower the difficulty to “Novice” for more resources and less aggressive Alien. No shame—focus on narrative.
---
Day-One Checklist for New Players
- [ ] Read the Control Options: Set invert, sensitivity, button layout as preferred. Test run in the tutorial area.
- [ ] Adjust Graphic Settings (PC): Turn off V-Sync if input lag bothers you. Set FOV to at least 85. Lower shadows for performance.
- [ ] Adjust Audio: Headset is recommended. Play with volume high; audio cues are vital.
- [ ] Save at the first station you see after entering Sevastopol.
- [ ] Loot everything in the first rooms: the derelict office drawers, lockers, and tables.
- [ ] Craft at least one medkit and one noise maker before reaching the Gemini Lobby.
- [ ] Memorize the save station locations in the early area (Gemini Lobby has one in the back room).
- [ ] Practice hiding in lockers and crouch-walking without running.
- [ ] Use the motion tracker every 10–15 seconds when moving through unknown areas.
- [ ] Read the notes you find—they contain lore and sometimes hints about safe paths.
- [ ] Avoid the Alien’s initial scripted encounter by hiding in a desk (not a locker) in the medical bay area—it checks lockers first.
- [ ] Set a mental rule: never sprint unless you are certain the area is clear.
- Binge-playing without breaks. The tension is exhausting. Take 10-minute breaks every hour.
- Playing in a brightly lit room. Dim lights or play at night for immersion.
- Watching walkthroughs for every corner. Exploration is rewarding. Only use guides if stuck for >15 minutes.
- Over-relying on the revolver. It makes noise and attracts the Alien. Use it only for human enemies blocking a necessary corridor.
- Ignoring the “Distraction” options. They are essential for managing the Alien’s path.
Success Tip for the First Hour: The game is designed to be tense. Panic leads to mistakes. When the Alien appears, take a deep breath, find cover, and wait. It will leave. Use the motion tracker to time your escape.
---
What to Avoid on Day One
Now you are ready to begin your terrifying journey through Sevastopol. Remember: hide, listen, survive.