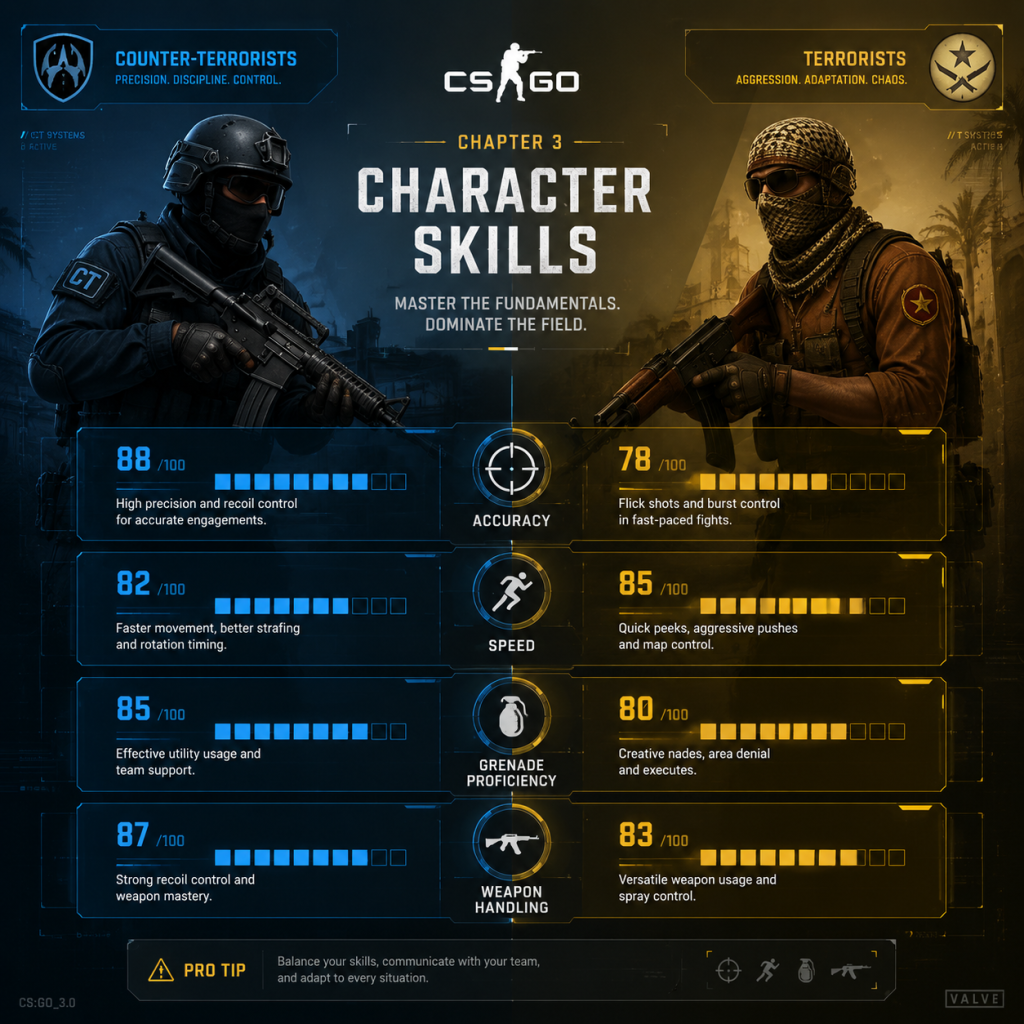
Character Skills
Character Skills Guide for Counter-Strike: Global Offensive (Counter-Strike 2)
Introduction
Counter-Strike: Global Offensive (CS:GO) — now Counter-Strike 2 — does not feature traditional character classes, skills, abilities, spells, or talents like RPGs or MOBAs. Every player in both teams (Terrorists and Counter-Terrorists) has identical base capabilities. The “skills” in CS:GO refer to player-developed techniques, role-specific responsibilities, and utility management that define success. This guide covers all actionable skill categories, including player aim, movement, game sense, utility usage, and team roles. Each skill is described with effects, cooldowns (where applicable), upgrades, combos, synergies, recommended builds, and optimal timing.
---
1. Player Skills (Core Mechanics)
1.1 Aim
- Description: The ability to place your crosshair on an enemy and land shots. Includes crosshair placement, recoil control, flicking, and tracking.
- Effects: Higher accuracy, faster kills, better headshot percentage.
- Cooldowns: None (continuous skill).
- Upgrades: Practice via deathmatch, aim maps (e.g., aim_botz, yprac), and workshop maps. Use lower sensitivity (400–800 DPI) for consistency.
- Combos: Combine with counter-strafing (see Movement) to reset inaccuracy.
- Synergies: Good aim synergizes with every weapon and role.
- Recommended Builds: Rifle (M4A4, AK-47) for spray control; AWP for precision flicking.
- When to Use: Always. Critical during peek duels, holding angles, and clutch situations.
- Description: Techniques to navigate the map efficiently while minimizing noise and vulnerability. Key skills: counter-strafing, bunny hopping (bhop), air strafing, and jiggle peeking.
- Effects: Faster peeks, reduced exposure time, silent movement when walking.
- Cooldowns: None.
- Upgrades: Practice on KZ (climb) servers, surfing maps, and deathmatch with movement focus.
- Combos: Counter-strafe before shooting for instant accuracy. Bunny hop to maintain speed after a kill.
- Synergies: Essential for entry fraggers and AWPers who need quick peeks.
- Recommended Builds: No equipment required, but lighter weapons (pistols, SMGs) allow faster movement.
- When to Use: Counter-strafe when peeking; bhop when rotating or retreating; jiggle peek to gather info without committing.
- Description: Map awareness, economy management, timing, and prediction of enemy behavior.
- Effects: Better decisions, improved survival rate, efficient money usage.
- Cooldowns: None (learned experience).
- Upgrades: Watch demos (POV of pros), play retake servers, analyze mistakes.
- Combos: Combine with communication (callouts) and utility usage.
- Synergies: Supports every role, especially In-Game Leader (IGL).
- Recommended Builds: Headset and sound settings (HRTF) for audio cues.
- When to Use: Constantly—plan buys based on team economy, pre-aim common angles, expect common timings (e.g., early rush, mid-round rotate).
- Description: Explodes with a bright light and loud bang, blinding enemies who see it.
- Effects: Near-full screen whiteout for ~2–3 seconds (if facing explosion), reduced vision if partially exposed.
- Cooldown: Buy time only; no cooldown on use (can throw multiple per round if carried).
- Upgrades: Learn to pop-flash (explodes in air) vs. bounce-flash (off walls) to avoid self-blind.
- Combos: Flash before entering a site (for teammate entry); pop-flash over smoke to blind enemies behind it.
- Synergies: Works with aggressive entry fraggers and site retakes.
- Recommended Builds: CTs: 1–2 flashes per player for retake. Ts: 2–3 flashes for execute.
- When to Use: Before peeking a corner, during site executes, to counter an enemy push, or to escape.
- Description: Creates a dense cloud that blocks vision and sound slightly.
- Effects: Obscures line of sight for ~18 seconds. Can be used to block chokepoints, cover defuses, or fake a position.
- Cooldown: Buy time only.
- Upgrades: Learn lineups for key smokes (e.g., Mirage A ramp, Inferno banana).
- Combos: Smoke + molotov to block a path (enemy takes fire if they run through). Smoke + flash for a safe peek.
- Synergies: Essential for CTs holding angles; Ts use for site entry.
- Recommended Builds: Always buy at least one smoke per player if possible. Use two smokes for crucial areas.
- When to Use: Block enemy sightlines, obscure bomb plant/defuse, cut off rotates, or fake an execute.
- Description: Deals area damage (up to ~57 HP) in a small radius.
- Effects: Damage scales with proximity. Can deal splash damage through thin walls.
- Cooldown: Buy time only.
- Upgrades: Learn to cook the grenade to time explosion above or near enemies.
- Combos: HE + Flash: Flash to blind, then HE to damage. Pre-nade common camp spots (e.g., Inferno balcony) to weaken enemies.
- Synergies: Useful for clearing corners and denying plant/defuse.
- Recommended Builds: 1–2 HE grenades for anti-eco rounds (low enemy armor). Less useful against full armor.
- When to Use: To finish off low-HP enemies, clear tight spaces, or damage multiple enemies grouped together.
- Description: Creates a pool of fire that burns enemies who step in it. Lasts ~7 seconds.
- Effects: Instant damage (40 DPS) and damage-over-time (burn). Prevents enemy movement through area.
- Cooldown: Buy time only.
- Upgrades: Learn lineups to block bomb defusal, or to flush enemies from cover.
- Combos: Molotov + Smoke: Smoke for vision block, molotov to deny push. Molotov + HE: Area denial plus burst damage.
- Synergies: Key for post-plant defense (block defuse) and site retake (clear corners).
- Recommended Builds: Ts: one molotov per player for executes. CTs: optional, but useful for slowing rushes.
- When to Use: Stop a bomb defuse, clear a corner, prevent enemy rush through a choke, or force an enemy to move.
- Description: Mimics gunfire and appears as a red dot on radar. Costs only $50.
- Effects: Fools enemies briefly (sound and radar presence). No damage.
- Cooldown: Buy time only.
- Upgrades: Use to fake a position or fake an execute.
- Combos: Send decoy to one site while team goes to another (high-level fake). Combine with flash to sell the fake.
- Synergies: Budget utility for economy rounds.
- Recommended Builds: Buy only when you have spare cash or need to fake.
- When to Use: During fake rushes, to draw attention, or to test if an angle is watched.
- Description: First player to push into a site. Aggressive, high death rate.
- Key Skills: Aim (fast flicks), movement (sharp peeking), utility usage (flashbangs).
- Abilities: Relies on flashbangs and SMGs/rifles. Prioritizes opening kills.
- Recommended Builds: Desert Eagle (eco) or AK-47/M4 with flashbang. No armor on second round? Buy P250.
- When to Play: As Terrorist on execute rounds. On CT, rarely entry; instead play forward position (aggressive hold).
- Description: Provides utility, covers teammate flanks, trades kills.
- Key Skills: Utility lineups, game sense, communication.
- Abilities: Carries extra flashbangs, smokes, molotovs. Drops weapons for teammates.
- Recommended Builds: Rifle + full utility (flash, smoke, HE, molotov). Drop weapon to entry when possible.
- When to Play: Any round; especially when your team lacks utility.
- Description: Primary sniper using the AWP (or SSG 08 on eco).
- Key Skills: Precision aim, crosshair placement, patience.
- Abilities: Instant kill on body shot. Requires careful positioning and quick scoping.
- Recommended Builds: AWP + pistol (preferably P250 or CZ). Consider buying a smoke to hold long angles.
- When to Play: Long-range maps (Dust2, Mirage) or when team can protect you.
- Description: Plays away from main team, catches rotates and flanks.
- Key Skills: Map awareness, stealth movement, timing.
- Abilities: Uses silencers (M4A1-S, USP-S) and no utility to stay quiet.
- Recommended Builds: Silenced rifle, knife (for quiet movement), no flashbangs (to avoid noise).
- When to Play: On Terrorist side when team executes one site; lurk towards opposite site to catch CT rotates.
- Description: Calls strategies, manages economy, sets pace.
- Key Skills: Game sense, communication, economy math.
- Abilities: No special mechanic, but team relies on their decisions.
- Recommended Builds: Generally plays support or entry depending on style. Must know utility lineups.
- When to Play: Every round; IGL role is permanent for the team.
- Description: Melee weapon. Left-click for slash (35 damage), right-click for stab (100 damage).
- Cooldowns: None (continuous swing).
- Effects: Instant kill on stab (any armor). Slower than gun but silent.
- Upgrades: Practice knife aim (lunging stab) and movement for behind-enemy kills.
- Combos: None significant.
- Synergies: Stealth approach (lurker) or final kill when out of ammo.
- Recommended Builds: Default knife (no upgrade).
- When to Use: When enemy is unaware, as a finisher after emptying magazine, or for humiliation.
- Description: Plant the C4 at a designated site. Takes 3 seconds (hold mouse1).
- Cooldowns: Only one per round (requires bomb carrier).
- Effects: After 40 seconds, bomb explodes and CTs lose the round unless defused.
- Upgrades: Plant in open positions (not behind boxes) to cover from multiple angles.
- Combos: Plant then hide; use smokes/molotovs to block defuse.
- Synergies: Post-plant defense role.
- When to Use: After clearing site. Delay plant until teammates are positioned.
- Description: Defuse the planted bomb. With defuse kit: 5 seconds. Without: 10 seconds.
- Cooldowns: Requires alive CT and bomb planted. One per round.
- Effects: CT team wins round if successful.
- Upgrades: Buy defuse kit ($400) as standard. Use smoke to cover defuse sound.
- Combos: Smoke + defuse; teammate flashes/molly to protect defuser.
- Synergies: Support players should drop kits to teammates if needed.
- When to Use: Immediately after ensuring site is clear. Fake-defuse to bait enemy peek.
- Description: In hostage maps (e.g., Office, Militia). Press ‘E’ to pick up hostage, then bring to rescue zone.
- Cooldowns: Multiple hostages available.
- Effects: CTs win if they rescue majority of hostages.
- Upgrades: None.
- Combos: Use smoke to cover rescue path.
- Synergies: Coordination with team to clear extraction route.
- When to Use: After clearing area around hostage. Avoid running through open fire.
1.2 Movement
1.3 Game Sense
---
2. Utility Skills (Abilities)
Each grenade type acts as a reusable “ability” with a 15–20 second timer (buy cooldown) and a unique effect. All utility requires purchase during buy time.
2.1 Flashbang
2.2 Smoke Grenade
2.3 High Explosive (HE) Grenade
2.4 Molotov Cocktail (T) / Incendiary Grenade (CT)
2.5 Decoy Grenade
---
3. Roles (Taem Responsibilities)
While CS:GO has no locked roles, players often specialize. Each role emphasizes certain skills.
3.1 Entry Fragger
3.2 Support
3.3 AWPer
3.4 Lurker
3.5 In-Game Leader (IGL)
---
4. Special Moves (Unique Actions)
4.1 Knife Attack
4.2 Bomb Plant (Terrorist)
4.3 Defuse (Counter-Terrorist)
4.4 Hostage Rescue (CS:GO Legacy)
---
5. Combos and Synergies
5.1 Utility Combinations
| Combo | Effect | When to Use |
|---|---|---|
| Flash + Smoke | Blinds enemies behind smoke | Site execute – pop flash over smoke |
| Smoke + Molly | Denies vision and movement | Post-plant defense, block defuse |
| Molly + HE | Area denial plus burst | Clearing a corner or flushing enemies |
| Decoy + Flash | Fake noise + blind | Fake a rush on one site while team hits another |
5.2 Player Synergies
- Entry Fragger + Support: Support throws flash for entry, then trades the kill if entry dies.
- AWPer + Lurker: AWP holds long angles; lurker catches rotates short.
- Trade Training: Practice trading kills – player A peeks, dies, player B immediately peeks to kill the enemy (requires coordination).
- Double Peek: Two players peek same angle at same time to overwhelm one enemy (use in retake scenarios).
- Terrorist: AK-47 + full armor + helmet + flash + smoke + HE + molotov. Optional: defuse kit if playing support.
- Counter-Terrorist: M4A4 or M4A1-S + full armor + flash + smoke + HE + defuse kit. Optional: AWP for AWPer.
- Use SMGs (MAC-10, MP9) or shotguns. Buy armor but no helmet (to save $350). Often used after losing pistol round.
- No armor, only pistols (Glock/USP). Sometimes Desert Eagle if skill is high. Focus on staying alive, getting one kill, stealing weapon.
- T: Glock + 1–2 utility (usually flash + smoke). No armor.
- CT: USP-S + 1–2 utility + defuse kit (if you can afford). Armor is optional; some buy utility over armor.
---
6. Recommended Builds (Economy-Based)
6.1 Full Buy (Team Cash >$20k total)
6.2 Force Buy (Low Cash, ~$8k–12k total)
6.3 Eco (Save Round)
6.4 Pistol Round
---
7. When to Use Each Skill — Summary
| Skill / Role | Best Timing | Notes |
|---|---|---|
| Aim practice | Daily warm-up | 10 minutes before matches |
| Movement practice | Offline (KZ/surf) | Improves peeking efficiency |
| Utility lineups | Pre-match or during saving rounds | Learn 2–3 lineups per map per side |
| Entry Fragger | Round start / Execute | Must have support |
| Support | All rounds | Prioritize dropping utility |
| AWPer | Long-angle maps / Anti-eco | Rotate quickly if short on time |
| Lurker | Post-plant / Mid-round | Avoid noise and early contact |
| IGL | Entire match | Keep team calm and informed |
| Knife | Stealth kill / Last resort | High risk, high reward |
| Bomb Plant | After site control | Plant with cover |
| Defuse | After clearing site | Use smoke/molotov for cover |
8. Conclusion
While Counter-Strike: Global Offensive lacks traditional character skills, its depth lies in mastering player mechanics, utility usage, and team roles. Focus on improving your aim, movement, and game sense. Practice utility lineups for each map and understand when to play which role. Remember: teamwork and communication are the ultimate “skills” that transcend individual ability. Good luck on the battlefield!