Character Skills
Character Skills Guide for NieR: Automata
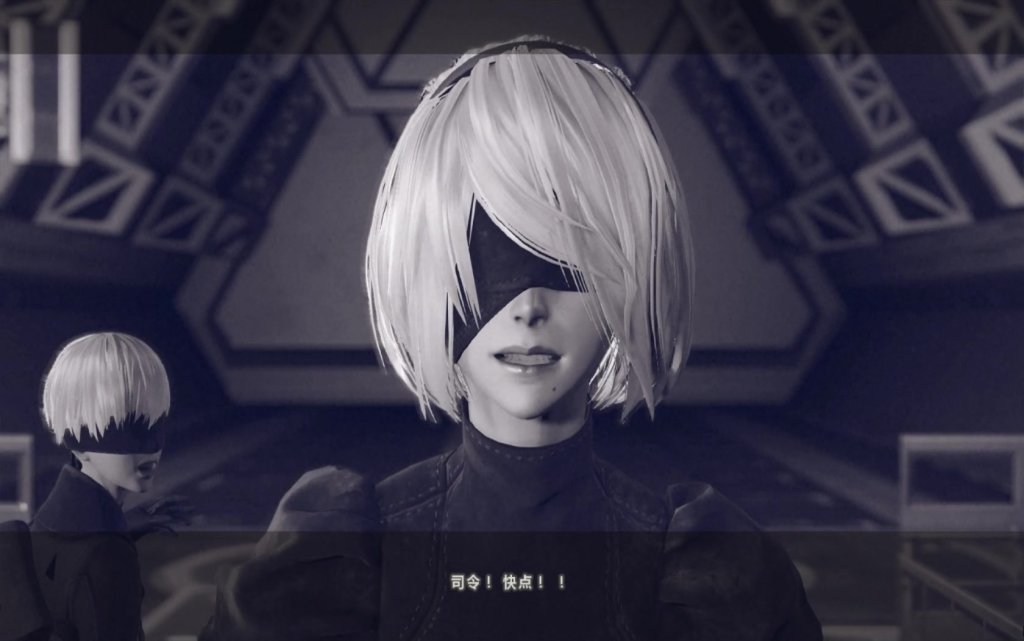
This guide covers every active skill, special move, and Pod Program available to the three playable characters: 2B, 9S, and A2. Passive abilities (Plug-in Chips) are not included. All skills are described with effects, cooldowns, upgrades, combos, synergies, and use cases.
---
2B (YoRHa No.2 Type B)
2B is a balanced fighter focusing on direct melee combat. Her unique active skill is Self-Destruct.
#### Self-Destruct
- Activation: Hold L3 + R3 (or assigned button) until the Pod sequence completes.
- Effect: 2B detonates herself, dealing massive AoE damage (based on remaining HP) and destroying all enemy projectiles in range. 2B is reduced to 1 HP (if not killed outright) and is staggered for a few seconds.
- Cooldown: None, but can only be used when HP is above a threshold (cannot use if at 1 HP). The cooldown is effectively the time to heal back to safe HP.
- Upgrades: None (fixed).
- Combos: Use before a heavy attack combo to clear surrounding enemies, then follow up with a Pod Program like Wave or Volt.
- Synergies: Pairs with Auto-Heal chips to recover quickly after explosion. Also useful as a desperation move when surrounded.
- When to use: Crowded fights, boss adds, or as a last resort. Avoid using against single strong enemies because the damage is proportional to HP lost.
- Activation: Press Up on D-Pad (default).
- Effect: 2B performs a taunting gesture. No damage, but can attract enemy aggro briefly in multiplayer? (Single player still triggers enemy response animation). Mostly cosmetic.
- Cooldown: None.
- Use: Only for style or to interrupt enemy attack patterns.
- Activation: Press R1 (or assigned button) when a hacking target is highlighted.
- Effect: 9S interfaces with the target (enemy, machine, or object) and initiates a hacking minigame. The minigame involves shooting a green dot into a circle while avoiding red obstacles. Success deals massive damage, stuns, or grants control of the target. Failure causes 9S to take damage and be staggered.
- Hack Levels:
- Cooldown: None, but must be close enough to the target. Some enemies have a cooldown before they can be hacked again.
- Upgrades: Hacking damage and difficulty are tied to 9S's level and the target's level. No specific upgrades, but using higher-level chips can reduce hazard damage.
- Combos: Hacking is best used from a distance or after a dodge. Follow a successful hack with a Pod Program or melee combo to finish off stunned enemies.
- Synergies: Pair with Pod Wire to pull enemies closer before hacking. Use Slow Pod Program to make the minigame easier (slower obstacles).
- When to use:
- Risks: Hacking leaves 9S vulnerable; if interrupted, he takes damage. Avoid hacking when surrounded by aggressive enemies.
- Activation: Press R3 (default) to toggle scanner vision.
- Effect: 9S can see enemy health, weaknesses, and hidden items. Also reveals hackable objects.
- Cooldown: None (toggle).
- Use: Always have it active in new areas to spot secrets. In combat, use it to identify weak points for hacking.
- Unlock: After a certain story point, 9S can hack at range by having his Pod fly to the target.
- Effect: Same as normal hacking but from a distance. The Pod returns to 9S after hacking.
- Use: Allows hacking of flying or distant enemies without approaching.
- Activation: Hold L3 + R3 (or assigned button) until the Pod sequence completes. Requires at least 30% HP.
- Effect: A2 enters a rage state for a limited time (approx. 10 seconds). During Berserk:
- Cooldown: Once Berserk ends, it cannot be reactivated until the meter recharges (takes about 45 seconds out of combat).
- Upgrades: None (fixed). Duration and damage are static.
- Combos: Activate Berserk, then use charge attacks and Pod Programs like Wave or Volt for massive AoE. Follow with a Heavy combo finisher.
- Synergies: Use with Auto-Heal chips to offset HP drain. Best with high-damage chips to end fights quickly. Avoid in prolonged encounters.
- When to use: When facing a single strong enemy or a tightly packed group. Use as a last resort when low on health? Not recommended because of drain.
- Activation: Hold Heavy Attack button (R2 default) for a short charge, then release.
- Effect: A2 charges her current weapon and releases a powerful thrust or slam, depending on weapon type. The charge time is about 1 second. Fully charged attacks have increased range and damage (approx. 2x normal heavy attack).
- Cooldown: None, but requires a short wind-up.
- Combos: Use after a dodge for a guaranteed hit. Combine with Berserk for massive burst.
- Synergies: Use Pod Slow to freeze enemies, then charge attack for high damage.
- When to use: Against slow enemies or after knockdowns. Avoid using on fast-moving enemies without slowing them first.
- Effect: A2's dodge has a unique property – after a perfect dodge, she can immediately counter with a strong attack that has a wider hitbox than 2B's counter. The counter also grants temporary invincibility frames.
- Use: Essential for aggressive play. Chain dodges and counters to maintain pressure.
- Effect: Fires a rapid stream of bullets forward for 3 seconds. Moderate damage, good for breaking enemy shields/armor.
- Cooldown: 4 seconds (base). Reduces with Pod upgrades.
- Upgrades: Increases bullet count and damage per bullet.
- Combos: Use while jumping to hit aerial enemies. In melee combos, weave in between hits.
- Best for: General DPS, shield breaking.
- Effect: Fires a continuous laser beam for 2 seconds that pierces through enemies. High damage per second.
- Cooldown: 5 seconds (base).
- Upgrades: Faster fire rate and longer duration.
- Combos: Use after a knockdown to maximize damage. Excellent against large hitbox enemies.
- Best for: Boss fights, crowd control.
- Effect: Pod creates a shockwave cone that deals heavy damage and knocks back enemies. Has a slight area of effect.
- Cooldown: 8 seconds (base).
- Upgrades: Increased range and damage.
- Combos: Knock enemies away to create space, then follow with a charge attack.
- Best for: Defensive pushes, interrupting enemy attacks.
- Effect: Fires a projectile that creates a gravity well, pulling enemies toward its center. Enemies are briefly stunned.
- Cooldown: 6 seconds (base).
- Upgrades: Larger pull radius and longer stun duration.
- Combos: Use before a heavy area attack (e.g., Berserk slam, Blade program). Great for grouping enemies.
- Best for: Crowd control, setup for AoE.
- Effect: Fires a volley of small homing missiles that track enemies. Each missile does moderate damage. Excellent for distant or fast enemies.
- Cooldown: 7 seconds (base).
- Upgrades: More missiles and better tracking.
- Combos: Use while evading to keep up DPS. Combine with Slow to ensure hits.
- Best for: Finishing fleeing enemies, airborne targets.
- Effect: Creates a glowing shield around the character for 3 seconds that blocks incoming attacks and projectiles. Does not block all status effects.
- Cooldown: 12 seconds (base).
- Upgrades: Longer duration and larger shield area.
- Combos: Activate before charging into enemy fire or using slow recovery moves.
- Best for: Surviving heavy enemy barrages, boss laser attacks.
- Effect: Fires a wire that grabs a single enemy and pulls them toward the character. If the user is airborne, they are pulled toward the enemy instead. Stuns the enemy briefly.
- Cooldown: 5 seconds (base).
- Upgrades: Faster pull speed, longer range.
- Combos: Pull an enemy into a heavy melee combo. Can yank flying enemies down.
- Best for: Initiating combos, repositioning enemies.
- Effect: Creates 3 afterimages of the character that dash forward and attack enemies along their path. Each afterimage deals moderate damage and can hit multiple times. Afterimages disappear after a short distance.
- Cooldown: 9 seconds (base).
- Upgrades: More afterimages and higher damage.
- Combos: Use while dashing through a group for extra hits. Afterimages track slightly.
- Best for: Hit-and-run tactics, clearing corridors.
- Effect: Summons a large energy sword that slashes downward in front of the character. Deals very high damage and has a small AoE. Can be charged slightly for more damage but no charge needed.
- Cooldown: 10 seconds (base).
- Upgrades: Larger sword and extra damage.
- Combos: Use after a gravity pull for massive damage. Great as a finisher.
- Best for: High burst damage against single targets or small groups.
- Effect: Creates a bubble that slows down all enemies inside it for 5 seconds. Movement speed and attack speed are reduced by approximately 30%.
- Cooldown: 15 seconds (base).
- Upgrades: Larger bubble radius and longer slow duration.
- Combos: Use before any slow heavy attack (charge, Blade, etc.). Enables easier hacking for 9S.
- Best for: Controlling fast enemies, supporting 9S hacking.
- Effect: Creates a wide shockwave that travels forward, dealing damage to all enemies in a line. Good for clearing rows of enemies.
- Cooldown: 8 seconds (base).
- Upgrades: Wider wave and more damage.
- Combos: Use after gathering enemies with Gravity Shot. Also useful in narrow corridors.
- Best for: Crowd clearing.
- Effect: Fires a bolt of lightning that strikes a targeted area (or nearest enemy), dealing heavy damage and stunning all enemies in a small radius.
- Cooldown: 12 seconds (base).
- Upgrades: Larger AoE and longer stun.
- Combos: Stun a group, then follow with Blade or Berserk.
- Best for: Interrupting boss attacks, stunning large groups.
- Effect: Summons a large energy spear that strikes the ground, creating a delayed explosion. The explosion damages all enemies in a wide area. The spear can be aimed manually.
- Cooldown: 14 seconds (base).
- Upgrades: Faster spear drop, larger explosion.
- Combos: Use on a group that is slowed or grouped together.
- Best for: AoE damage on clustered enemies.
- Unlock: Most programs are bought from the Resistance Camp merchant (starting Chapter 2) or found as quest rewards. A few (Gravity Shot, Homing Missiles, Guard) are obtained via side quests. Check the "All Game Items" guide for specific locations.
- Upgrade: Each Pod (A, B, C) can be upgraded at the Resistance Camp mechanic. Upgrading a Pod increases the effectiveness of its programs (damage, cooldown reduction). Programs themselves cannot be individually leveled; all programs equipped to a pod benefit from the pod's upgrade level. A pod at Level 4 has the best performance.
- Active Skill: Self-Destruct as emergency.
- Pod Programs: Homing Missiles (consistent damage), Slow (setup for combos), Blade (burst).
- Playstyle: Use melee combos with occasional Pod programs. Self-Destruct only when surrounded.
- Active Skill: Hacking (primary), Scanner Mode always on.
- Pod Programs: Slow (makes hacking easier), Wire (pull enemies into hack range), Gravity Shot (group enemies for area hack).
- Playstyle: Avoid direct melee; hack from a distance. Use Pod programs to control enemy positioning.
- Active Skill: Berserk Mode, Charge Attacks.
- Pod Programs: Slow (setup for charges), Volt (stun), Blade (finisher).
- Playstyle: Activate Berserk only when you can quickly eliminate the threat. Use dodge counters liberally.
- PC (Keyboard/Mouse): Pod Program 1 is middle mouse button (default), Pod Program 2 is V. Self-Destruct/Berserk is G (hold). Hack is E. Customizable.
- PlayStation 4/5: Pod Program 1 is R2, Pod Program 2 is L2. Self-Destruct/Berserk is L3+R3. Hack is R1.
- Xbox One/Series: Pod Program 1 is RT, Pod Program 2 is LT. Self-Destruct/Berserk is LS+RS. Hack is RB.
#### 2B's Taunt
#### 2B's Dodge / Evade
While not a skill per se, 2B's dodge has a unique Perfect Dodge that triggers a slow-motion counter window. This is universal but 2B's counter attacks are standard.
---
9S (YoRHa No.9 Type S)
9S is a hacker/scanner. His primary unique ability is Hacking. He also has a Scanner Mode (passive) and can perform Remote Hacking.
#### Hacking (Active Skill)
- Basic Hack: Simple pattern, low damage.
- Virus Hack: Unlocked later, faster but with more obstacles; higher damage.
- Area Hack: Can hack multiple small enemies at once.
- Machine Control: Temporarily take over a machine enemy to fight for you.
- Against large groups: hack one to cause chain explosions.
- Against bosses: weak points can be hacked for huge damage (e.g., Simone, Engels).
- To disable dangerous attacks (e.g., stop a boss laser).
#### Scanner Mode (Passive/Active)
#### Remote Hacking (Pod Skill)
---
A2 (YoRHa Type A No.2)
A2 is an aggressive melee fighter with a unique Berserk Mode and Charge Attacks. She also has a unique Dodge Counter that differs from 2B/9S.
#### Berserk Mode
- Attack power increases by 50%.
- Movement speed increases.
- All attacks become unblockable.
- Defense is reduced by 50% (takes double damage).
- HP continuously drains (approx. 1% per second).
- Can perform a special Berserk Slam (heavy attack) during the mode.
#### Charge Attacks
#### A2's Dodge Counter (Unique)
---
Pod Programs (Common to All Characters)
Pod Programs are special skills that can be equipped to any Pod (up to 2 programs per Pod, 1 assigned to R2/L2). They have cooldowns and can be upgraded at shops. Below is the complete list, including effects and use cases.
#### R010: Machine Gun (Default for Pod A)
#### R020: Laser (Default for Pod B)
#### R030: Hammer (Default for Pod C)
#### R040: Gravity Shot
#### R050: Homing Missiles
#### R060: Guard
#### R070: Wire
#### R080: Mirage
#### R090: Blade
#### R100: Slow
#### R110: Wave
#### R120: Volt
#### R130: Spear
---
Unlock Conditions & Upgrades for Pod Programs
---
Recommended Skill Builds
#### For 2B (Main DPS)
#### For 9S (Hacker Focus)
#### For A2 (Aggressive Burst)
---
Platform-Specific Controls
---
Combat Synergies Table
| Skill Combo | Characters | Effect |
|---|---|---|
| Slow + Blade | All | Immobilize enemies then high burst |
| Gravity Shot + Wave/Volt | All | Group enemies then AoE |
| Wire + Hack (9S) | 9S only | Pull enemy close for easy hack |
| Berserk + Charge Attack (A2) | A2 only | Massive single-target damage |
| Slow + Self-Destruct (2B) | 2B | Ensure enemies are gathered before explosion |
| Homing Missiles + dodge | All | Keep DPS while evading |
| Guard + any charging skill | All | Safe setup |
This guide covers all active skills in NieR: Automata. Use the recommended builds and synergies to maximize your combat effectiveness across all three playthroughs.