Core Gameplay
Core Gameplay Guide for NieR: Automata
This guide breaks down the core gameplay systems of NieR: Automata into four distinct progression tiers: Early Game, Mid Game, Late Game, and Endgame. Understanding how each tier changes the game’s loop will help you maximize your efficiency and enjoyment.
---
Foundation: Universal Mechanics
Before diving into tiers, here are the key systems you will use throughout the entire game:
- Main Gameplay Loop: Explore → Encounter enemies → Combat/Pod hacking → Loot/Progress story → Upgrade equipment → Repeat.
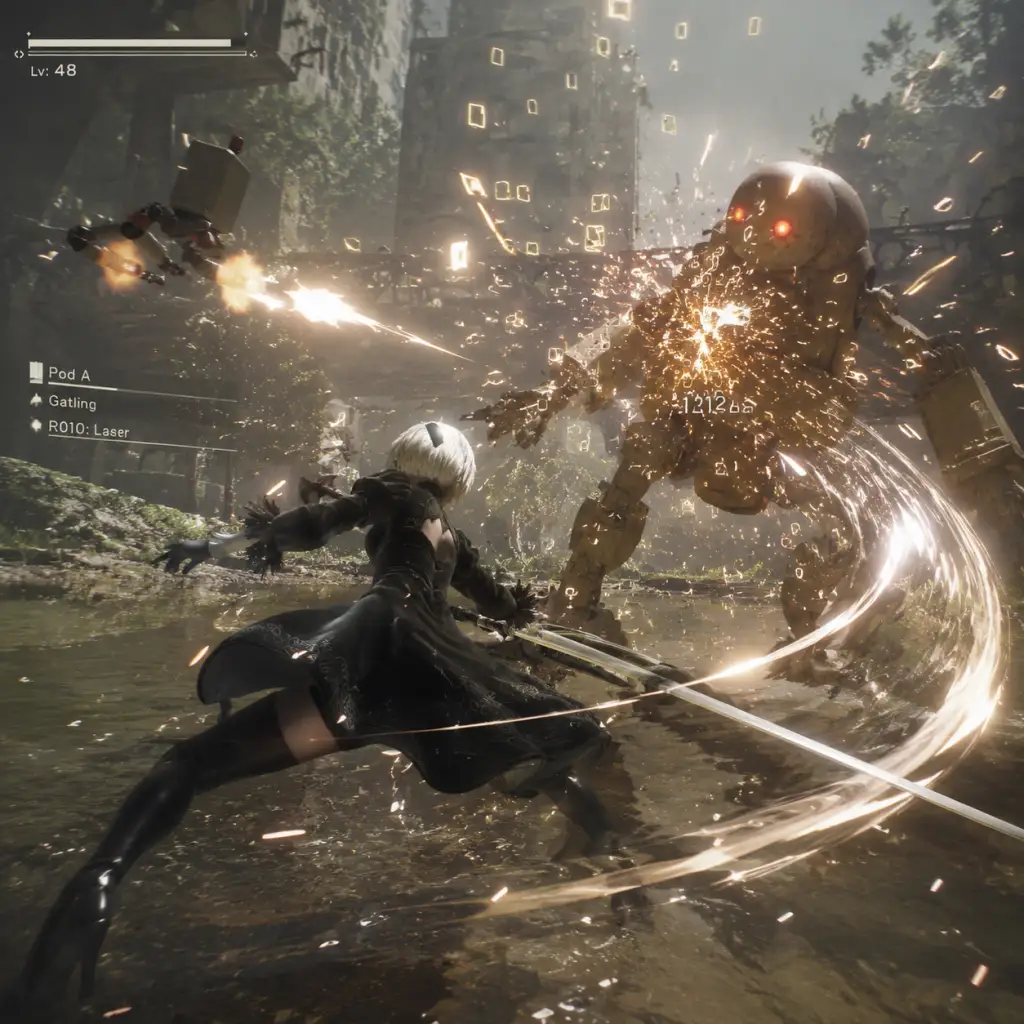
- Combat Basics: Two attack buttons (Light/Heavy), jump, dodge (with i-frames), Pod fire (hold for auto-fire), Pod programs (special attacks on cooldown), self-destruct (hold L1+R1 on PS4, limited uses per area).
- Plug-in Chips: Equippable items that modify stats and abilities (e.g., Auto-Heal, Shockwave, Movement Speed). Chips take up memory; better chips take more space or are more efficient.
- Hacking (9S only): A bullet-hell mini-game that replaces combat. Successful hacks instantly kill weaker enemies, deal big damage to strong ones, open shortcuts, disable obstacles, and loot items.
- Exploration Tools: Pod can scan for materials, enemies, and quest markers. Later you gain a Pod upgrade for breaking glowing walls.
- Leveling: XP from kills increases max HP and base stats. Chip fusion and weapon upgrades are the main form of stat progression beyond level.
- Combat: You control 2B (with 9S as follower). Use Light attack strings (square) and Heavy attacks (triangle). Dodge (R2) is your best friend; timing gives brief invincibility. Combine attacks: light-light-heavy for a launcher, then aerial combo. Pod fire (R1) deals chip damage and can be toggled to auto-fire. Pod programs (L1+R1) unlock after finding Pods in the world (Pod A, Pod B, Pod C). Recommended early programs: Mirage (decoy), Wire (grapple enemies).
- Plug-in Chips: You start with a few basic chips. Buy Auto-Heal (recover health after no damage for a few seconds) from the Resistance Camp vendor (cost: 500G). Also grab Shockwave (damages enemies near killed ones) – both are cheap and make early fights much easier. Equip chips wisely; you have limited memory. Don’t overload with +Attack or +Defense crystals; use smaller chips to free space.
- Quests: Side quests become available after finishing the first City Ruins encounter. Prioritize: “Amnesia” (gives a weapon), “The Lost Girl” (gives upgrade materials), “The Mercenary” series (early money). Main story quests scale with your level; side quests are usually underleveled but offer valuable items.
- Exploration: The world map opens after Chapter 2. Key early areas: City Ruins (main hub), Abandoned Factory (story), Desert Zone (optional). Look for glowing doors (locked, need hacking or later ladders). Do not climb ladders into flooded area until you’re around level 20. Gather Memory Alloys and Titanium Alloys from the Resistance Camp trader.
- Economy: Money is scarce early. Sell unneeded vendor trash like Animal Parts, Machine Parts (keep some for upgrades). Fishing is a reliable early money-maker: buy a fishing rod (500G) from the fishing spot in City Ruins near the fountain. Fish in the City Ruins pond for Tin Fish Small (sell for 1,500G each) – best early game income.
- Weapon Upgrades: You can upgrade weapons at the Resistance Camp blacksmith (up to level 2 with simple materials). Focus on one weapon type per character: for 2B, the Virtuous Contract (your starting sword) is excellent for the whole game. Upgrade it to level 2 as soon as you have 5 Copper Ore and 5 Silver Ore (drops from small machines in City Ruins).
- Use Pod fire to break its arms. Dodge the swipes. When it falls, unleash a light-heavy-combo then Pod program (Mirage) to distract it. Stay mobile.
- Character Growth: By now you have both 2B and 9S at similar levels. Use 9S’s hacking against medium enemies (Stubby, Medium bipeds) – it’s faster and safer. For bosses, hacking after depleting their health bar can insta-kill them, skipping phases. Level up hacking damage via the Hacking Attack chip.
- Plug-in Chips: Mid game offers higher capacity chips (8 slots per chip). Craft Movement Speed Up +2 or +3 by fusing chips from vendor (Resistance Camp sells base chips). Weapon Attack Up and Melee Defence chips become essential. Also get Anti-Chain Damage (prevents infinite stun). Start specializing: for 2B, prioritize damage; for 9S, hacking buffs and defense.
- Weapon Upgrades: Now you can upgrade weapons to level 3 (requires Pure Tungsten and Metal Batons – farmable from Amusement Park machines and desert enemies). Don’t spread resources; upgrade two weapons max. For 2B, Virtuous Contract and Type-40 Sword (found in Abandoned Factory) are top choices. For 9S, the Combat Bracers (Forest Kingdom) are strong.
- Quests: Many side quests open in midgame. Important ones: “The YoRHa Deserter” (ends in Chapter 10ish – gives a rare chip). “The Roaming Centipede” (exploration, rewards Movement Speed Up +3 chip). “The Reaper” (boss fight – gives Weapon Attack Up +3). Focus on quests that reward unique chips or weapons.
- Exploration: Unlock the Forest Castle and Flooded City areas. The Flooded City requires the Pod upgrade Scanner (found in Amusement Park secret area) to break certain walls. Explore the Desert: Underground Cave for rare materials (Pyrite, Gold Ore). Use Pod Program Wire to swing across gaps.
- Economy: Sell small fish from earlier; upgrade to bigger fish in Flooded City (use Sardines bait). Alternatively, farm Machine Cores from heavy machines in the Desert (30G each, drop rate ~20%). Endgame money is less important than chips.
- Pod Programs: Obtain Pod A (starting), Pod B (City Ruins – after leaving factory), Pod C (Forest Kingdom – after beating the boss). Each Pod learns programs from found or bought upgrade items (e.g., R010: Laser – buy from Resistance Camp for 10,000G, or find in Desert). Use R030: Blade for high burst damage.
- Phase 1: Stay at range, dodge her arm swings. Use Pod fire to build chain. Attack from behind when she’s distracted by 9S’s hacking.
- Phase 2: She fires lasers. Use dodge i-frames. After her barrage, close in for melee combo. Hacking the floating arms removes them quickly.
- Character Growth: Your level caps at 99. Use the Secret Areas (e.g., the “N2” arena in the Commercial Facility) to gain massive XP. Bring the XP Chips (from side quests) to speed up leveling. Route C gives access to A3 (unlockable character after Route C), who has unique attacks (berserk mode).
- Plug-in Chips: Now you can use +6 and +8 chips (found in high-level machines or fused). Best chip setup for 9S: Hacking Attack Up +8, Move Speed Up +8, Weapon Attack Up +8, Anti-Stun (3 slots), Auto-Use Items (late game optional). For A3: Berserk Mode Duration, Healing on Kill, Ranged Attack Up (Pod fire).
- Weapon Upgrades: Level 4 weapons require Pyrite and Pristine Screws (both farmable from Amusement Park boss and certain machines). A level 4 weapon gives +30% attack and a new combo string. For 9S, Type-40 Sword and Virtuous Contract (level 4) are top. For A3, Spear of the Usurper (found in Flooded City) is excellent.
- Quests (Route C): Only a few new quests appear: “The Wandering Couple” (tragic, gives Healing Orb chip). “The Weapon Story” (collect all weapons). Focus on main story to unlock endgame. Side quests in Route C are short and mainly reward chips.
- Exploration: Late game introduces The Tower (final dungeon). Secret areas: The Bunker (space station – accessible early, but late game you can revisit). The Amusement Park basement (secret boss). The Desert: Hollow – find the “Red” enemies for rare drops.
- Economy: By now you have 100,000G+ easily. Buy all Pod programs (L1+R1 variants) from the vending machine in Resistance Camp (cost ~30,000G total). Use money to buy upgrade materials (e.g., Pure Tungsten from the Flooded City vendor).
- Endgame Preparation: Before tackling Route C final boss, make sure you have:
- Phase 1 (Adam): Use 9S’s hacking to remove his arms as he charges. Stay mobile; his attacks have long range. After hacking, close in for melee.
- Phase 2 (Eve): She summons multiple copies. HACK the real one (the one with different color) to deal massive damage. Use Pod program R050: Spear to clear copies quickly.
- Phase 3 (Both): Alternate between hacking and melee. Keep Auto-Heal active.
- Route D/E: After finishing Route C, the game asks you to choose a moment to return to. Route D is a 9S-only chapter (similar to C but with different final boss). Route E is the secret chapter unlocked by starting a new game after Route D and refusing to give up during the credits sequence. Route E is the canonical end and unlocks Chapter Select for all routes.
- Chapter Select: Unlocked after Route E. You can replay any chapter with any character (including different routes’ chapters). This is used to complete all side quests, find all weapons, and battle optional superbosses.
- Optional Bosses (Superbosses):
- Weapon Collection: There are 40 weapons total (including the YoRHa-issue series from the Resistance Camp). Collect all to unlock the “Weapon Master” achievement and Emil’s side quest. Many weapons are found in secret rooms (use Pod scan).
- Chip Fusion: Endgame is about creating perfect chips. Fusion combines two chips of same type and level to increase level (e.g., two Weapon Attack Up +8 → Weapon Attack Up +9). Max chip level is +8 for most, but some can go to +9 (rare). Use the Chip Creator at the Resistance Camp to fuse chips. Optimal chip sets for each character:
- Economy: Money becomes irrelevant. Use workshop to sell excess chips. The only valuable commodity is Machine Cores (for fusing high-level chips) – farm in the Abandoned Factory.
- Completionist Tips:
---
Early Game (Routes A/B, Levels 1–30, Chapters 1–6)
Focus: Learning combat basics, understanding Pod mechanics, getting comfortable with exploration and quests. The game linearizes in the first few chapters before opening up.
Progression
Combat Example (Early Game Boss: Marx)
---
Mid Game (Routes A/B, Levels 30–50, Chapters 7–12)
Focus: Transition to 9S’s hacking, deeper chip customization, weapon fusion, and tackling harder optional content. The world expands to the Forest Kingdom and flooded city.
Progression
Combat Example (Mid Game Boss: Simone)
---
Late Game (Route A/B, Levels 50–70, Post-Ch. 12 / Route C)
Focus: Route C (9S exclusive chapters) and high-level optional content. The game shifts to 9S’s perspective with permadeath (once during route C) and a more linear story.
Progression
- All three Pods at level 4 (each requires a specific material: Machine Arm, Large Battery, Memory Alloy – farm from heavy machines).
- At least one weapon at level 4.
- Chips: Auto-Heal +3, Weapon Attack +8, Hacking Attack +8 (for 9S), Move Speed +3.
- Complete “The Lost World” side quest (gives an extra chip slot).
Combat Example (Late Game Boss: Adam and Eve)
---
Endgame (Post-Game / Route D/E, Level 80–99)
Focus: Completing all endings, fighting optional bosses, achieving 100% completion, and unlocking the final true ending (E).
Progression
- Emil’s Determination (secret boss in City Ruins, needs all weapons at level 4? Actually just talk to Emil after getting all weapons + beating his story quest). A massive boss that drops Emil Heads (unique plug-in chips).
- Socrates (Engels A/B variant) – found in the Flooded City after finding all three Pod upgrade items. Drops Gold Chips.
- Machines in the Commercial Facility – high-level enemies respawn that drop +8 chips.
- The Arena (Colosseum) – located in the Desert. Fight waves of enemies for rewards. Best source of +6 chips and money.
- 2B: Weapon Attack +8, Shockwave +8, Move Speed +8, Auto-Heal +3, Offensive Heal +3.
- 9S: Hacking Attack +8, Move Speed +8, Weapon Attack +8, Anti-Stun, Auto-Use Potion.
- A3: Berserk Duration +8, Ranged Attack +8, Move Speed +8, Healing +8.
- Complete “The Weapon Story” quest by speaking to Emil after collecting all weapons (he appears in City Ruins north of the commercial facility).
- Unlock all Pods (there are 3 totals – you have them by endgame) and get all Pod programs (buy them all from Resistance Camp machine).
- Beat the “Colosseum: Secret” (desert arena) to get “Machine Hacking” (hacking entry for enemies).
- For Route E, you will play a long bullet-hell shooter. Accept help from other players in the network – it makes the section much easier.
Endgame Activities Structure
| Activity | Purpose | Recommended Level | Rewards |
|---|---|---|---|
| Emil’s Determination | Superboss | 80+ | Emil Head chips (unique) |
| Colosseum (all tiers) | Arena waves | 50-99 | +6 chips, money, titles |
| Secret Machine Room (Flooded City) | Farming +8 chips | 60+ | High-level chip drops |
| Fish for Royal Fish | Money | Any | 25,000G per fish |
| Chip Fusion | Optimize build | Any | Perfect chip sets |
| All Endings | Story completion | N/A | Achievements, Chapter Select |
Summary of Progression Tiers
| Tier | Levels | Focus | Key Systems |
|---|---|---|---|
| Early | 1–30 | Learn combat, basic chips, quests | Pod fire, dodge, simple chip sets |
| Mid | 30–50 | Master hacking, weapon upgrades, chip fusion | Hacking, pod programs, weapon level 3 |
| Late | 50–70 | Route C, high-level chips, secret bosses | Pod level 4, weapon level 4, chip fusion |
| Endgame | 80–99 | Superbosses, 100% completion, perfect chips | Chapter Select, arena, chip optimization |
By following this tier-based approach, you will understand how the game evolves and what to prioritize at each stage. Enjoy your journey through NieR: Automata.