Core Gameplay
Core Gameplay in Phasmophobia: A Progression Tier Guide
Phasmophobia is a cooperative horror investigation game where players must identify a ghost type by gathering evidence while surviving its hostile activity. There is no traditional combat; the only way to survive a ghost hunt is to hide, run, or use defensive items. The game’s core loop revolves around contracts — missions to a procedurally generated haunted location. This guide breaks down the gameplay by progression tiers, covering the main loop, interaction systems, progression, economy, and endgame content.
Core Gameplay Loop
The cycle repeats with every contract:
1. Select Contract — Choose a difficulty (Amateur, Intermediate, Professional, Nightmare, or Custom) and a location from the van map.
2. Loadout — Purchase equipment from the van’s item cabinet using in-game money. Items are shared among the team.
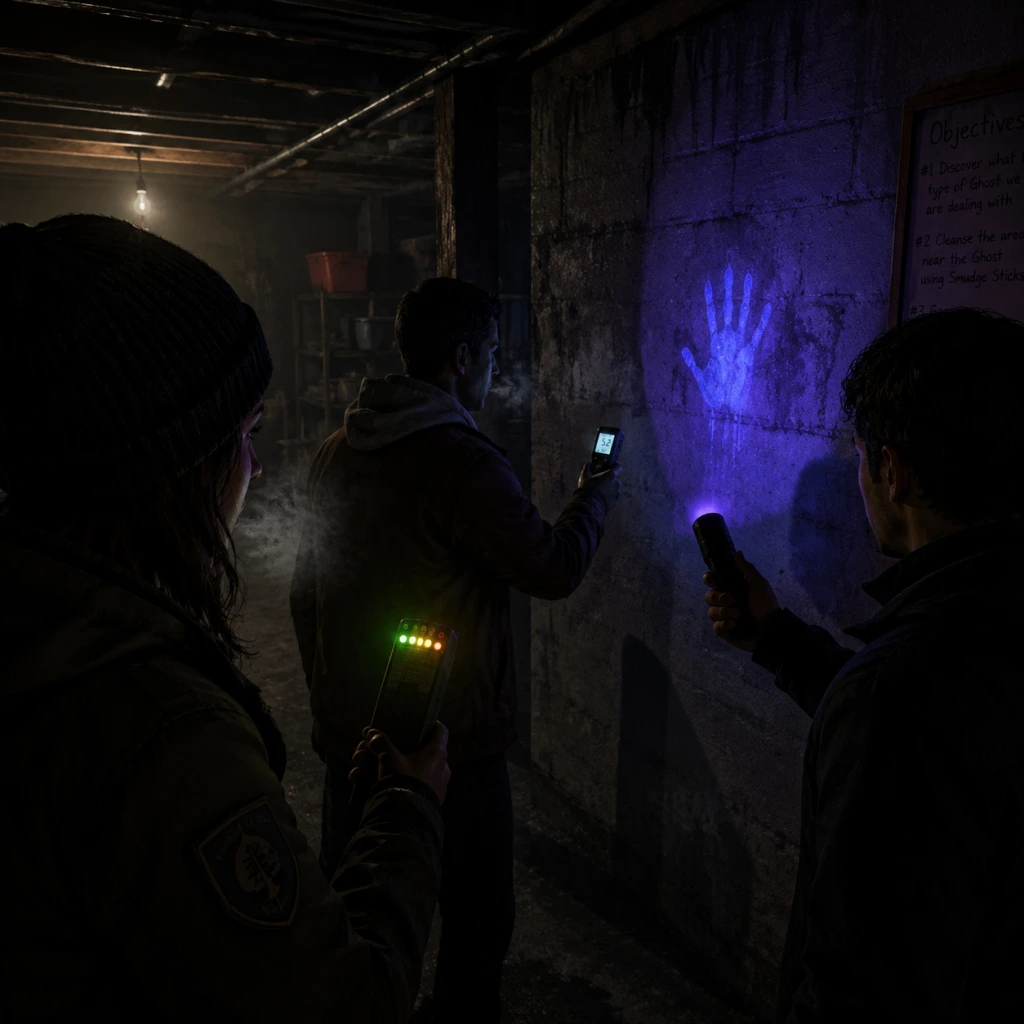
3. Investigate — Enter the location, find the ghost room (where the ghost is most active), and gather evidence (EMF, Spirit Box, Ghost Writing, Freezing Temperatures, D.O.T.S., Ghost Orbs). Use tools like thermometers, UV lights, and video cameras.
4. Survive — The ghost becomes more aggressive as sanity drops. It may initiate a hunt (teleports nearby, closes doors, hunts players). Survive by hiding in lockers/closets, turning off electronics, or using smudge sticks/incense.
5. Identify — Based on evidence collected, choose the correct ghost type in the Journal. Correct identification gives bonus cash and XP.
6. Complete Optional Objectives — Each contract has 1–3 optional objectives (e.g., take a ghost photo, smudge the ghost during a hunt, prevent a hunt with a crucifix). These provide extra rewards.
7. Exit — Return to the van (dead players spectate). Surviving players gain sanity back. Cash earned is added to your balance.
Combat / Interaction Systems
Phasmophobia has no direct combat. Instead, players interact with the ghost through:
- Equipment: Thermometers, EMF readers, Spirit Box, UV flashlight, video camera, D.O.T.S. projector, parabolic microphone, sound sensor, motion sensor, etc. Each has a specific use for evidence or tracking.
- Defensive Items: Crucifix (prevents hunts, with a limited radius), Smudge Sticks / Incense (can stop a hunt temporarily and blind the ghost), and Salt (makes the ghost leave footprints, but only useful for UV evidence).
- Hiding: During a hunt, players must hide behind furniture, in closets, or in lockers. Turn off all electronics (including head-mounted cameras) or the ghost can hear/see them. Holding a candle or lighter does not attract the ghost if you are still.
- Sanity Management: Every player starts with 100% sanity. Sanity drops over time when in the dark, seeing ghost events, or being near the ghost. Low sanity increases hunt frequency. Use sanity pills (unlock later) to restore sanity.
- Ghost Behaviour: Ghosts have unique traits. Some are more aggressive (e.g., Demon), others hide their evidence (e.g., Shade). Understanding ghost types is key to survival.
- Equipment (new items at certain levels, e.g., Tier I flashlight at level 1, Tier II at level 18, Tier III at level 36)
- Difficulty Options (higher difficulties unlock as you reach certain levels, plus custom difficulty settings at level 30)
- Prestige (after reaching level 100, you can reset to level 1 with a prestige badge and some cosmetic rewards)
- Income: Earned per contract based on difficulty, correct ghost identification, optional objectives completed, and any bonus objectives like taking photos of the ghost or bone (a random human bone that appears in each map – photo + retrieval gives money).
- Expenses: Equipment costs money only if you lose it (die or leave it behind). You can buy items for free in the van if you already own them (they are stored in your account). To get new items, you pay once (e.g., Tier I flashlight costs $15, Tier II costs $90).
- Saving Money: Always retrieve your equipment before leaving. Dying means you lose all gear you had on you (except any inventory items like the flashlight).
- Nightmare Difficulty: Only two pieces of evidence are guaranteed (the third is hidden, so you must deduce the ghost via its behaviour). High risk, high reward (double money).
- Custom Difficulty: Unlocked at level 30, allows full control over ghost speed, aggression, sanity drain, evidence count (0-3), and more. Players create “challenge modes” for extreme difficulty or fun.
- Prestige: After reaching level 100, you can prestige, resetting to level 1, gaining a unique badge and potentially new cosmetic Tier I items (different colors). You keep your money and equipment (but item unlocks are tied to level, so you lose access to higher-tier items until you re-unlock them). There is no level cap after prestige; you can prestige multiple times, each giving a distinct badge.
- Achievements: Over 50 achievements, some requiring extreme feats (e.g., identify ghost with 0 evidence on Nightmare, survive a hunt without hiding, complete Apocalypse challenge).
- Weekly Challenges: “Apocalypse” challenges (three tiers) that force a specific high-difficulty setting on a specific map, with special rewards.
- Competition: While not directly competitive, players compare high scores, speedrun times, and challenge completions.
- Focus: Learn the basics. Stick to Amateur or Intermediate difficulty on small maps (Tanglewood, Willow, Edgefield).
- Equipment: Start with Tier I flashlight, EMF, Spirit Box, UV light, camera, video camera. Save money for Tier II items.
- Ghost Evidence: You always get 3 evidence pieces on Amateur (and 2 on Intermediate). Use the journal to check possible ghosts.
- Survival: Sanity drains slowly. Hunts are rare (starts at 50% average sanity). Practice hiding in closets and turning off electronics.
- Goals: Complete all optional objectives on each run. Unlock Tier II flashlight, parabolic microphone, and head gear.
- Money Tips: Always take a photo of the ghost (if you catch it) – that gives bonus cash. Also find the bone (glowing white) and take a photo of it, then pick it up (worth $5–$15).
- Focus: Move to Intermediate/Professional difficulty. Start playing larger maps (farmhouses, prison). Start using evidence deduction more efficiently.
- Equipment: Unlock Tier II items – much better performance. Example: Tier II Spirit Box has longer range. Tier II flashlight has better battery.
- Ghost Hunting: Ghosts become more aggressive. Hunt frequency increases. Use smudge sticks and crucifixes strategically. Learn ghost behaviours (e.g., Wraith cannot step in salt, Phantom blinks out when photographed).
- Optional Objectives: Harder optional objectives appear, like smudging the ghost during a hunt or taking a photo of the ghost within 5 meters.
- Custom Difficulty: At level 30, experiment with custom settings to prepare for Nightmare.
- Economy: Start saving for Tier III items. Avoid dying to not lose expensive gear.
- Focus: Nightmare difficulty (or high custom difficulty). Master all ghost types.
- Equipment: Unlock Tier III everything. These are costly but provide best efficiency (e.g., Tier III flashlight never runs out of battery while on, Tier III head gear has night vision).
- Evidence: On Nightmare, you only get 2 evidence pieces; you must deduce the third from ghost activity. For example, if you have EMF 5 and Ghost Writing, the ghost must be a type that has those two plus a unique third – like a Yokai (Spirit Box). But if you can’t get a Spirit Box response, you rule out Yokai and check other possibilities.
- Survival: Hunts are frequent and dangerous. Use salt, motion sensors, sound sensors to track ghost location. Coordinate with team. Use paramic to hear ghost from a distance.
- Challenges: Attempt Apocalypse challenges (Gold, Silver, Bronze) on Sunny Meadows (asylum) with insane custom settings. This is the hardest content.
- Prestige: At level 100, decide whether to prestige. Prestiging gives you a new badge (Bronze, Silver, Gold, Diamond, etc.) and resets all item unlocks to level 1. You keep money, so you can buy Tier I items immediately. However, you lose access to higher tiers until you level up again. This extends replayability.
- Status: Multiple prestiges (some players have prestige 20+). All items unlocked again but with cosmetic variants from prestige rewards.
- Focus: Optimizing runs for maximum money, solo challenges (Apocalypse Gold), speedrunning, or role-playing. Participate in community challenges.
- Custom Difficulty: Create extreme settings: 0 evidence, ghost speed 150%, sanity drain 200%+, no hiding spots, instant hunts at 60% sanity. Complete for bragging rights.
- Economy: Money is essentially infinite once you have all items. You may still need to buy equipment if you die, but with high skill, death is rare.
- Goals: Earn all achievements, reach max prestige level (currently max prestige badge is Nightmare or similar?), or complete 100% of weekly challenges.
- Bronze: Complete a contract on Sunny Meadows with custom difficulty settings: 1 evidence, ghost speed 75%, player speed 100%, sanity drain 150%, no hiding spots, no electronics, etc. You must identify the ghost correctly and survive.
- Silver: Same but with 0 evidence, ghost speed 100%, player speed 100%, etc.
- Gold: 0 evidence, ghost speed 125%, lingering fog, higher sanity drain, and must complete all optional objectives (smudge, photo, prevent hunt) while identifying ghost. Only the best players achieve Gold.
Progression Systems
Player progression is purely based on level and money. There is no skill tree or character classes. Leveling up unlocks:
Money is earned from contracts and spent on buying equipment (one-time purchases that are then available permanently in the van). Equipment has three tiers: Tier I (basic, cheap), Tier II (better range/effectiveness, moderate cost), Tier III (best, expensive). Higher tiers are unlocked at higher levels.
Exploration / Quests & Missions
Each contract is a self-contained mission on one of many maps (e.g., Tanglewood Street House, Willow Street House, Ridgeview Road House, Grafton Farmhouse, Bleasdale Farmhouse, Prison, Asylum, Camp Woodwind, Point Hope). Map size and complexity vary. Exploration is essential to find the ghost room and evidence. Players must navigate dark environments, use flashlights, and communicate via local voice or proximity chat (in-game radio for van communication). Quests are the optional objectives; there are no story missions beyond the investigation.
Economy
Character/Build Growth
There is no character customization beyond cosmetic items (outfits, gloves, badges) unlocked via achievements and prestige. Player skill growth is entirely knowledge-based: learning ghost patterns, evidence combinations, map layouts, and effective hiding spots. The only “build” comes from equipment choices – e.g., bringing a strong flashlight vs. a head-mounted camera, or choosing to invest in Tier III items before tackling harder difficulties.
Endgame Structure
The endgame in Phasmophobia begins around level 50+ and continues indefinitely:
Progression Tiers Breakdown
#### Early Game (Levels 1–15)
#### Mid Game (Levels 16–50)
#### Late Game (Levels 51–99)
#### Endgame (Prestige + 100+)
Endgame: The Apocalypse Challenge
This is the ultimate test. Three tiers:
Summary Table
| Tier | Levels | Difficulty Focus | Key Unlocks | Survival Tips |
|---|---|---|---|---|
| Early | 1–15 | Amateur/Intermediate | Tier I items, basic maps | Stay together, hide in closets |
| Mid | 16–50 | Professional, start custom | Tier II items, custom difficulty | Use smudge sticks, learn ghost traits |
| Late | 51–99 | Nightmare, high custom | Tier III items | Deduce evidence, aggressive hiding |
| Endgame | 100+ / Prestige | Custom/Apocalypse | Prestige badges, all items | Master knowledge, challenge runs |