Getting Started
Getting Started with Resident Evil 2 (2019)
This guide is for brand-new players. It covers the first hour, controls, UI, early objectives, common mistakes, and a day-one checklist. For download/installation or game introduction, refer to the previous sections.
1. Character Selection (No Character Creation)
Resident Evil 2 offers two story campaigns: Leon S. Kennedy (rookie cop) and Claire Redfield (college student). There is no character creation. The choice affects weapons, key items, and some story events. For your first playthrough, both are equally valid. We recommend Leon for a slightly more straightforward early weapon (handgun vs. Claire's handgun with less stopping power), but Claire has a stronger early area (the Jail). You can play the other character in a second run (2nd Run mode) after finishing one. Tip: Save both characters' campaigns for a complete story.
2. Controls (All Platforms)
Default controls are listed. You can customize in the Options menu. Essential actions:
| Action | PC (Keyboard + Mouse) | PlayStation 4/5 | Xbox One/Series X\ | S |
|---|---|---|---|---|
| Move | W/A/S/D | Left Stick | Left Stick | |
| Look | Mouse | Right Stick | Right Stick | |
| Aim | Right Mouse Button | L2 | LT | |
| Shoot | Left Mouse Button | R2 | RT | |
| Interact / Pick up | E | R1 | RB | |
| Run | Shift (hold) | R2 (hold) | RT (hold) | |
| Reload | R | Square (PS5: X) | X | |
| Knife Melee | V | R3 (press stick) | R3 (press stick) | |
| Map | M | Touchpad (left) | View button | |
| Inventory | Tab | Options | Menu | |
| Examine Item | E (while holding item) | R1 (in menu) | RB (in menu) |
3. User Interface (UI) Overview
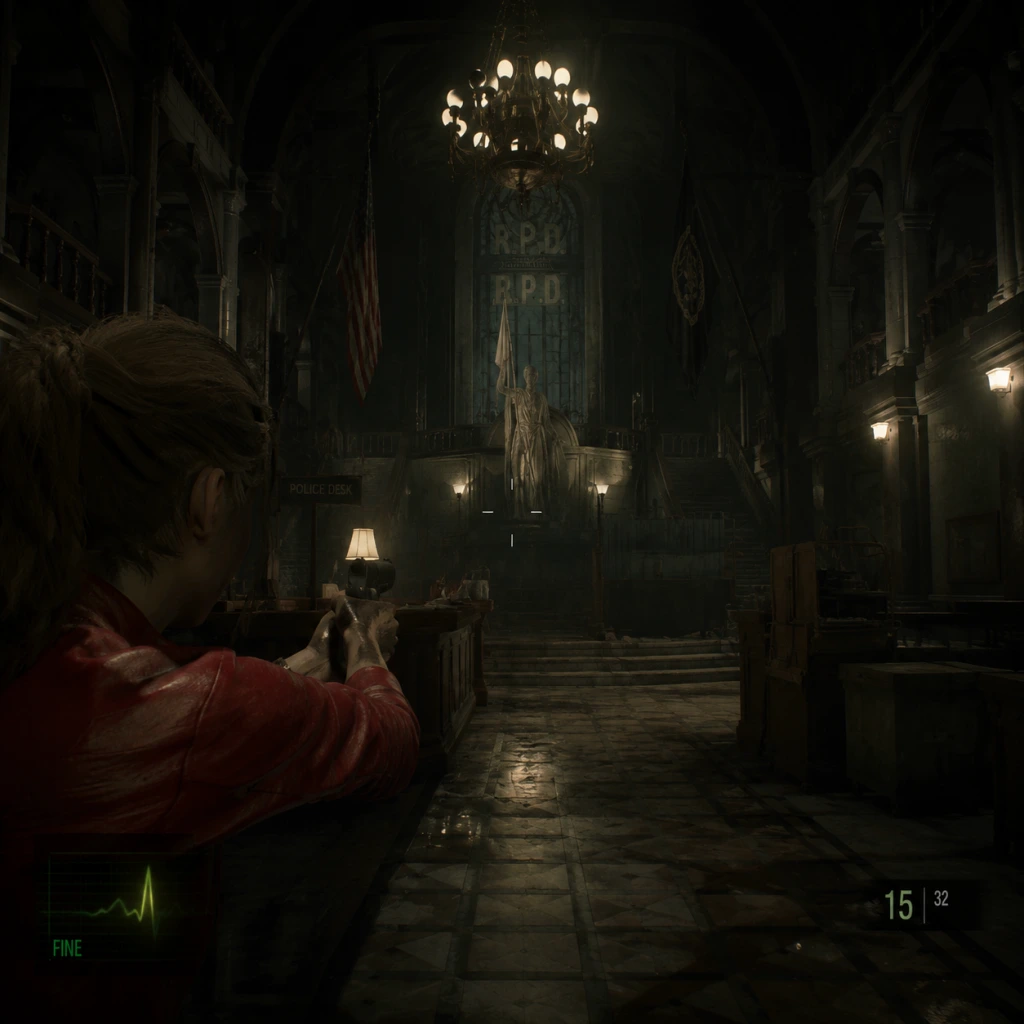
- Health Indicator: Bottom left – a heart icon changes from green (healthy) to yellow (caution) to red (danger). Red means you are about to die from one more hit. Status effects (poison) show a skull icon.
- Ammo Counter & Weapon Icon: Bottom right – shows current weapon and ammo count. Reload when safe.
- Inventory Grid: Press Tab/Menu – limited slots (initially 8). Manage items here. You can combine herbs, examine items, and discard.
- Map: Press M/View – reveals rooms you’ve visited. Blue rooms are unexplored; red means you have cleared all items? (actually red indicates all items collected). Map shows locked doors (red icons) and key items needed.
- Subscreen: Inventory, Map, Files, Options. Files contain lore and hints.
- You start in a gas station. Pick up the Handgun and Handgun Ammo from the officer’s body. Immediately equip it (inventory menu).
- Pick up the Key from the cash register. Loot everything: ammo, green herb (heals), and the Film Roll (important for later).
- Exit through the back door. You'll meet your first zombie. Do not waste ammo – just run past it. Run toward the car blocking the road; a cutscene triggers.
- After the cutscene, follow the path to the Raccoon City Police Department (RPD). Through the front gate, you’ll see a helicopter crash. Enter the station through the main doors.
- Inside the main hall: grab the Shotgun (Leon) or Grenade Launcher (Claire) from the front desk (only if you have the The 4th Survivor DLC? No, standard game has shotgun behind the reception desk glass – you need the Keycard from the West Office later). Actually, for early game: you can’t get it yet. Focus on looting the Red Herb and Handgun Ammo from the main hall. Go left to the West Office.
- In the West Office, pick up the Bulletin Board Key (Leon) or Claire’s Key (unlocks a locker). Examine any file for lore.
- Find the Darkroom (connected to West Office). Inside, pick up the Film Roll if you missed it, and use the Darkroom Developer to process the film. This reveals a safe combination later.
- First Save: Use the typewriter in the Darkroom. Save before proceeding. Use Ink Ribbons – they are limited! Save only when you’ve made significant progress (e.g., solved a puzzle, reached a new area).
- Use the Bulletin Board Key to open the door near the main hall stairs (leads to the Press Room). Inside, get the Spade Key (Leon) or Heart Key (Claire).
- Now explore the second floor. Go up the stairs in the main hall. Use the Spade/Heart Key to open rooms like the Waiting Room and S.T.A.R.S. Office. In the S.T.A.R.S. Office, you’ll find the Weapon Locker Key Card (temporarily) – but you need a Battery to power it. That’s for later. For now, grab the Shotgun (if you have the card) or focus on collecting Green Herbs and Handgun Ammo.
- Avoid the Licker in the West Corridor (second floor) – it’s fast and deadly. Run away.
- Return to the Darkroom (your first safe room). Combine Green Herb + Green Herb to make a stronger healing item, or Green Herb + Red Herb for full heal. (Green + Green = 50% heal; Green + Red = 100% heal; Green + Blue = poison cure.)
- Put items you don’t need immediately into the Item Box (blue box in safe rooms). Always keep: Ink Ribbon, at least one knife (for escape from grabs), and your best weapon.
- Proceed to the East Office (through main hall). You’ll encounter more zombies. Conserve ammo – headshots are good but not guaranteed kills.
- Don’t waste ammo on downed zombies – They can get up again. Only shoot if you must push through. Use the knife to finish off crawling zombies to save bullets.
- Don’t ignore the map – Unexplored rooms (blue) may hide items. But locked doors waste time; check map icons.
- Don’t hoard ink ribbons – Use them only at typewriters after major progress. Running out of saves can be frustrating.
- Don’t run everywhere – Zombies can break doors if you run near them. Walk when sneaking.
- Don’t discard key items – You can’t drop story items unless you solve a puzzle and they transform. Keep everything until you know it’s safe to discard.
4. The First Hour – What to Do
#### First 5 Minutes: The Gas Station
#### 5-15 Minutes: Arriving at RPD Station
#### 15-30 Minutes: West Office & Darkroom
#### 30-50 Minutes: The First Key & Locked Doors
#### 50-60 Minutes: First Safe Room & Combine Herbs
5. Essential Early Objectives (What to Do First)
1. Reach the RPD Station – The game truly begins here.
2. Find the Darkroom – Your first safe room. Save, combine herbs, store items.
3. Obtain the Spade Key (Leon) / Heart Key (Claire) – Opens several doors on first and second floors.
4. Pick up all Green Herbs you see – Combined, they keep you alive.
5. Acquire the Shotgun (Leon) / Grenade Launcher (Claire) – Crucial for stronger enemies. For Leon: get the Shotgun from the S.T.A.R.S. Office using the Weapon Locker Key Card (requires a battery from the Parking Garage later). For Claire: the Grenade Launcher is in the Fire Escape after the garage. Both are priority.
6. Solve the Safe Combination in the West Office – Using the developed film roll, you get the combination (left 9, right 15, left 7 – varies per difficulty? Standard: 9-15-7). The safe contains a valuable W-870 Shotgun Stock (Leon) or MUP Handgun (Claire).
6. What to Avoid
7. Early Resource Priorities
| Item | Priority | Reason |
|---|---|---|
| Green Herbs | High | Combine for heals; you’ll take damage early. |
| Handgun Ammo | Medium | For standard zombies; don’t waste on walls. |
| Shotgun Shells (Leon) / Grenades (Claire) | High | For Lickers and boss fights; limited supply. |
| Knife | High | Use to escape zombie grabs (press V/R3). Also effective for finishing off downed enemies. |
| Ink Ribbons | Medium | Only use at save points. Each ribbon = 1 save. |
| Blue Herbs | Low | Only when poisoned (icon appears). |
| Red Herbs | Medium | Combine with Green for full heal. |
| Keys (Spade, Heart, Club, Diamond) | High | Required to progress; keep them until used. |
8. Common Beginner Mistakes
- Running out of ammo too early – Acknowledge that you don’t have to kill every zombie. Avoid combat unless necessary.
- Ignoring the map – The map shows item locations with a red dot after you examine an area. Use it to know where you’ve been.
- Forgetting to use the item box – You only have 8 inventory slots. Store extra herbs, ammo, and keys to free space.
- Not examining items – Sometimes a key item has a clue on the back (e.g., a drawing). Press Examine to rotate and see all sides.
- Saving too often or too rarely – Try to save every 20-30 minutes or after unlocking a new area. Don’t waste ribbons on every room.
- Not combining herbs – Green+Green is fine, but Green+Red is more efficient. Learn herb combinations early.
9. Day-One Checklist
Follow this order on your first play session:
1. Start a new game – Choose Leon or Claire (see section 1).
2. Adjust settings – Set difficulty to Standard (or Assisted if you struggle with aiming). Disable auto-aim if you want challenge. Change controller layout if needed.
3. Play through the gas station – Grab handgun, ammo, film roll, green herb. Run past first zombie.
4. Enter the RPD – Explore main hall, West Office, get the Spade/Heart Key.
5. Find the Darkroom – Save, combine herbs, store film roll.
6. Solve the safe puzzle – Use developed film photo: 9-15-7 (if standard). Get the upgrade.
7. Open doors with your first key – Especially the Press Room and second floor rooms.
8. Locate the Shotgun/Grenade Launcher – Follow the path to the second floor S.T.A.R.S. Office (Leon) or Fire Escape (Claire). You need a battery – go to the Parking Garage (through the East Office).
9. Loot the Parking Garage – Get the Battery (from the broken police car in the garage). Return to the S.T.A.R.S. Office to unlock the weapon locker.
10. Save before proceeding – Use an ink ribbon at the Darkroom. You now have a solid weapon and the basics down.
Pro Tip: If you die, you lose progress from your last save. Reload and try a different approach – conserve resources. Good luck, rookie!