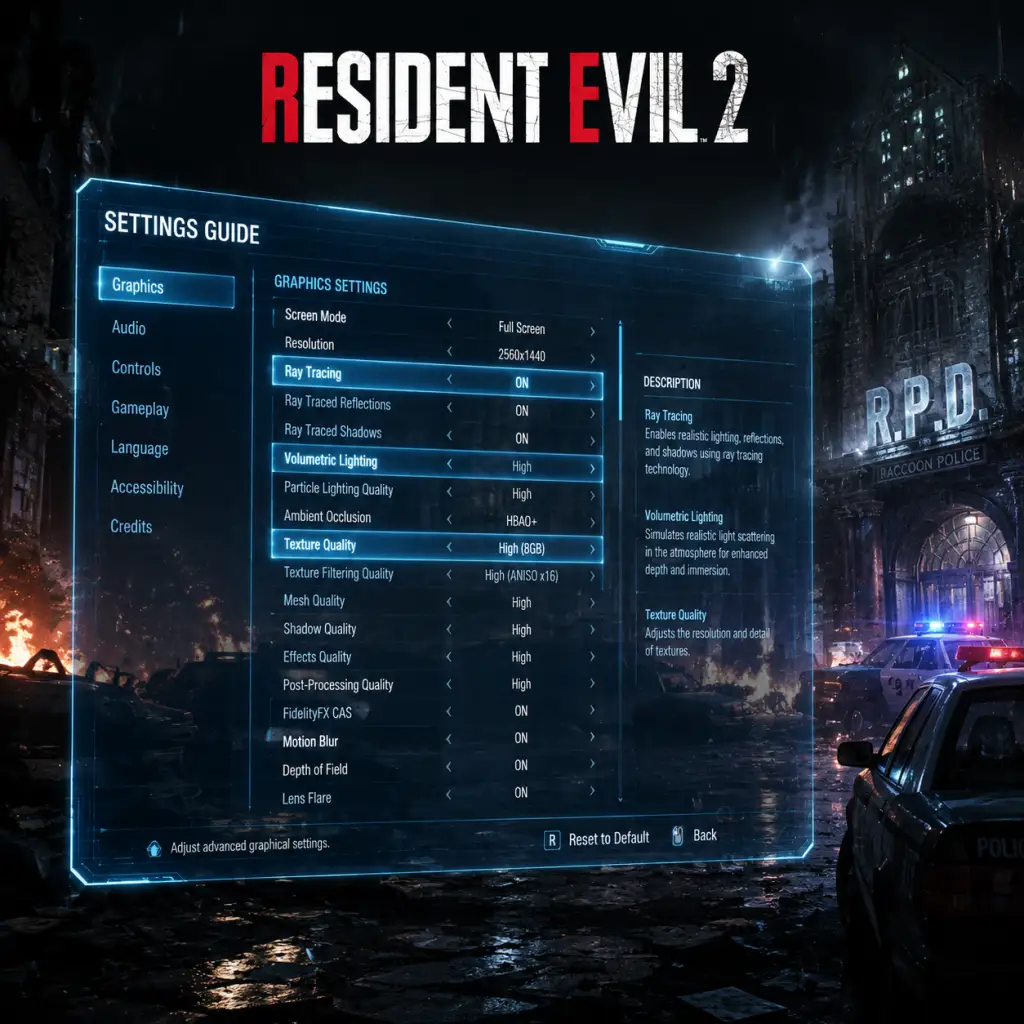
Game Settings
Resident Evil 2 (2019) – Comprehensive Game Settings Guide
This guide covers every setting in Resident Evil 2 (2019) across PC (Steam, Epic Games Store), PlayStation 4/5, and Xbox One/Series X|S. We explain what each setting does, recommend optimal values for different hardware tiers, and highlight settings that are easy to misconfigure.
---
Graphics Settings
PC Graphics Tiers (Recommended Presets)
| Tier | GPU Example | Resolution | Target FPS | Quality Preset | Notes |
|---|---|---|---|---|---|
| Low | GTX 1050 Ti / RX 560 | 720p-1080p | 30-60 | Low | Use 50% resolution scaling if needed. |
| Medium | GTX 1060 / RX 580 | 1080p | 60 | Medium (custom: textures High, shadows Medium, AA FXAA) | |
| High | RTX 2060 / RX 5600 XT | 1440p | 60 | High (with ray tracing off) | |
| Ultra | RTX 3070 / RX 6800 | 4K | 60 | Max (ray tracing on, DLSS Quality if available) |
Key Graphics Settings Explained
- Graphics Preset: Quick way to set quality. Custom is recommended for fine control.
- Display Mode: Fullscreen (best performance), Windowed, Borderless (alt-tab friendly).
- Resolution: Native monitor res. For consoles, automatic based on output.
- Render Scale: Adjusts internal resolution. 100% = native. Lower for performance but causes blur.
- Image Quality (Resolution Scaling): Alternative to Render Scale, uses dynamic resolution scaling. Easy to misconfigure – setting this too low will make the game very blurry. Keep at 100% unless desperate for FPS.
- Anti-Aliasing: TAA (smooth but softens image), FXAA (light, good for low-end), SMAA (sharp but more taxing). TAA + sharpening is best for most.
- Texture Quality: High uses more VRAM (4GB+). If VRAM is low, drop to Medium to avoid stutter.
- Texture Filter: Affects distant texture clarity. Anisotropic 16x has near-zero performance cost.
- Shadow Quality: Medium looks decent; High+ for clarity. Very performance-heavy on low-end.
- Ambient Occlusion: Adds depth shadows. SSAO (cheap), HDAO (better), HBAO+ (best, heavy). Turn off on low-end.
- Volumetric Lighting: Atmosphere effects. Off/Low for performance.
- Contact Shadows: Extra shadow detail on objects. Minor cost.
- Bloom: Glow effects. Personal preference.
- Depth of Field: Blur on distant objects. Turn off for sharper image.
- Lens Flare: Can cause distractions. Off recommended.
- Ray Tracing (PC & PS5/XSX): Adds realistic reflections and shadows. Very demanding. Recommended only for high-end GPUs (RTX 3060+ or equivalent) at 1080p/1440p. On PS5/XSX, RT runs at lower resolution – use Quality mode for RT.
- Variable Rate Shading (VRS, PC only): Increases performance by reducing quality in non-essential areas. May cause flickering – test per scene.
- FidelityFX CAS (PC): AMD sharpening filter. Use with TAA for improved clarity.
Console Graphics Modes
| Console | Mode | Resolution | Target FPS | Features |
|---|---|---|---|---|
| PS4 / Xbox One | Standard | 1080p | 30 | No RT |
| PS4 Pro / Xbox One X | Quality | 2160p (checkerboard) | 30 | Higher shadows, textures |
| PS4 Pro / Xbox One X | Performance | 1080p-1440p | 60 | Lower settings |
| PS5 / Xbox Series X | Quality | 2160p | 30 | RT on, max effects |
| PS5 / Xbox Series X | Performance | 2160p (dynamic) | 60 | RT off, high settings |
| PS5 / Xbox Series X | Ray Tracing | 2160p (lower res) | 45-60 | RT reflections, variable |
---
Audio Settings
- Master Volume: Overall loudness.
- Music Volume: Background score. Can increase tension; keep default.
- Sound Effects: Footsteps, gunshots, zombie groans. Increase to hear threats.
- Voice Volume: Dialogue and cutscenes.
- Surround Sound: Choose Stereo (headphones), 5.1, or 7.1. Headphones recommended for directional audio.
- Audio Quality: High (full dynamic range) or Low (compressed). High always.
- Reduce Loud Sounds: Compresses audio to prevent sudden loud explosions (for hearing safety). Recommended ON if using headphones.
- Voice Language: See Language section.
- Surround Sound with headphones can cause weird spatial effects – stick to Stereo.
- Reduce Loud Sounds may mute important audio cues if set too aggressively. Keep at default.
- Keyboard & Mouse (PC): Default is good. Remap:
- Controller (All platforms): Default (Type A/B). Type B swaps run/aim triggers.
- Aim Sensitivity: Fine-tune for precise headshots. Start at 50%, adjust upwards.
- Camera Sensitivity: Higher for quick turns, lower for steadier aim. Default is manageable.
- Invert Camera: Y-axis invert for flight-sim style.
- Aim Assist (PC & Consoles): Auto-aim to nearest enemy. Easy to misconfigure – turning OFF makes game harder but forces skill. ON for beginners.
- Vibration: ON provides tactile feedback (door opens, damage). OFF saves battery.
- Quick Turn: Double-tap back (controller) or default key. Essential for escaping danger.
- Run by Default: Toggle or Hold. Hold is safer to control sprint.
- Auto-Fire (PC): Hold trigger for continuous fire. Not recommended – ammo conservation is key.
- Cutscene Subtitles: ON recommended; shows spoken lines.
- Subtitle Background: Dark background makes text readable. ON.
- Subtitle Size: Small/Medium/Large. Choose Large if sitting far from screen.
- Colorblind Mode: Protanopia, Deuteranopia, Tritanopia – changes UI colors (health, ammo) for clarity. Test in pause menu.
- Screen Shake: Reduces camera shake during explosions. OFF if prone to motion sickness.
- Motion Blur: Blurs during camera movement. OFF for clarity, ON for cinematic feel.
- Player Health Display: Shows approximate health (danger, caution, fine) instead of numbers. Fine for casual.
- High Contrast Mode (PC only): Enhances object outlines. Use if needed.
- Camera Auto-Aim: Snap to enemy when drawing weapon. ON simplifies targeting.
- Colorblind Mode affects map symbols as well – test early in the RPD.
- Subtitle Background can obscure on-screen action; small background is fine.
- Audio Language: Choose English, Japanese, French, German, etc. Japanese audio with English subtitles is popular for authenticity.
- Subtitle Language: Separate from audio. Set to your preferred language.
- Menu Language: Only available at first launch. To change later, edit the game config file (PC) or change console system language.
- If you cannot read menus, check your console/PC region settings. RE2 does not have an in-game menu for UI language change on consoles – you must reboot with a different system language. On PC, open "re2_config.ini" and change "Language=" value.
- Ghost Survivors / No Way Out (DLC): Leaderboards for survival modes. Requires internet connection for scores.
- Automatic Updates: Check for updates on startup (console/pc).
- Data Sharing: Option to send anonymous usage data. Disable if privacy-conscious.
- Assisted: Auto-aim, enemies do less damage, more item drops. Best for learning. No trophy/achievement penalty.
- Standard: Balanced survival horror. Recommended for first playthrough.
- Hardcore: Enemies tougher, less ammo, no auto-saves (only ribbon saves). For veterans.
- Auto-Save Interval: Only relevant in Assisted/Standard (Hardcore uses manual saves). Default every 15 minutes. Set to 5 minutes if you forget to save often.
- Auto-Heal: Automatically uses healing items when low health. OFF to conserve resources.
- Auto-Equip Sub-Weapon (e.g., knife): Automatically readies sub-weapon when grabbed. ON helps survival.
- Item Auto-Sort: Organizes inventory automatically. ON reduces micromanagement.
- Chat Window (PC): For keyboard only – not used in single-player.
- Auto-Heal can waste valuable herbs and first-aid sprays when you are only slightly injured. Turn OFF for better resource management.
- Auto-Save Interval set too long can lose progress; set to short.
- Hardcore difficulty cannot be changed mid-game. Choose carefully.
Easy to Misconfigure
---
Controls Settings
Recommended Layouts
- Reload (R) to side mouse button.
- Melee (F) to middle mouse.
- Sub-weapon (Q) to thumb button.
Sub-Settings
---
Accessibility Settings
Important Note
---
Language Settings
Easy to Misconfigure
---
Network Settings
Resident Evil 2 is a single-player game with limited online features:
There are no multiplayer or co-op settings. Network has minimal impact.
---
Gameplay Settings
Difficulty Selection (New Game)
In-Game Options
Easy to Misconfigure
---
Special Attention Points During Setup (Checklist)
1. PC only: After first launch, the game may default to 30 FPS in windowed mode. Switch to Fullscreen and disable V-Sync if you want 60+ FPS.
2. FOV (Field of View): Not adjustable in vanilla game. Use config file edits (PC) or 3rd-party tools at your own risk.
3. HDR Settings: If using HDR TV/Monitor, ensure Windows HDR is ON before launching. In-game HDR brightness calibration – set to make darkest areas visible, but not gray.
4. Controller dead zone: Default is fine, but if joystick drifts, increase dead zone in config file (PC) or as per platform.
5. Save file corrupt prevention: Do not exit during auto-save or manual save icon. Wait for save confirmation.
6. Keyboard input lag: If using mouse with high polling rate (1000Hz), reduce to 500Hz if stutter occurs.
7. Razer/Logitech software: Close overlays to avoid crashes.
---
Conclusion
Optimize your Resident Evil 2 settings for your hardware and playstyle. Start with the preset that matches your GPU tier, then fine-tune with the details above. Remember that survival horror benefits from high frame rate (60 FPS) for responsive dodging and aiming, and good audio for immersion. Use the checklist to avoid common pitfalls during setup.