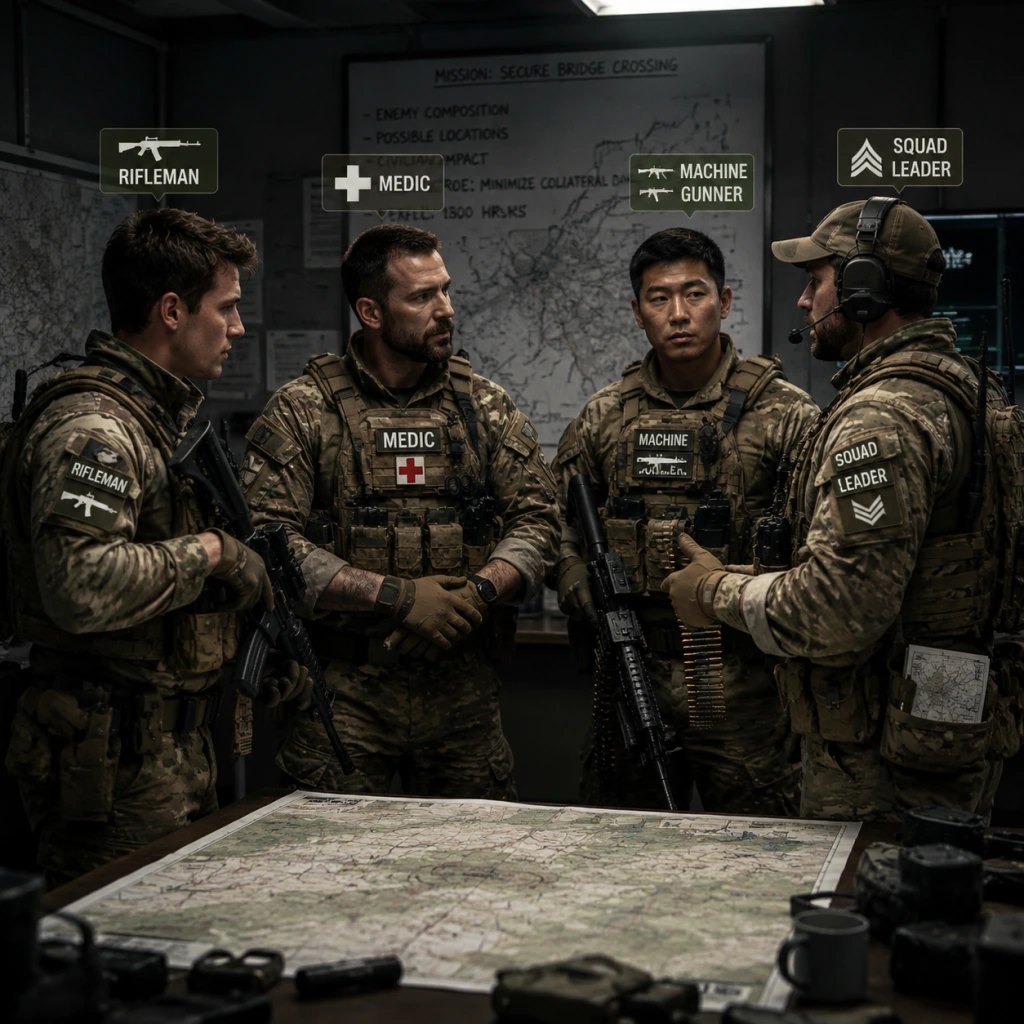
Characters & Roles
Characters & Roles in Squad
Squad does not feature named heroes or unlockable characters. Instead, it offers roles (kits) that define a player's equipment and responsibilities within a 9-player squad. Each role is available from the start—no progression gates—but a squad can only have one of each specialist role at a time. The composition is managed by the Squad Leader. Below is a comprehensive breakdown of every major role, including background, strengths, weaknesses, playstyle, recommended equipment, and team synergy.
Squad Roles Overview Table
| Role | Abbreviation | Primary Weapon (Example) | Special Equipment | Squad Limit |
|---|---|---|---|---|
| Squad Leader | SL | Assault Rifle + Binoculars | Radio, Rally Point, Command Chat | 1 per squad |
| Rifleman | RFLM | Assault Rifle | Ammo Bag, Frag Grenades | Unlimited |
| Automatic Rifleman | AR | Light Machine Gun (e.g., M249) | Bipod, Frag Grenades | 1 per squad |
| Light Anti-Tank | LAT | Assault Rifle + Rocket Launcher | Single AT rocket | 1 per squad |
| Heavy Anti-Tank | HAT | Assault Rifle + Heavy Launcher | Two AT rockets, Tripod | 1 per squad |
| Medic | MED | Carbine or Assault Rifle | Medic Bag, Bandages | 1 per squad |
| Grenadier | GRN | Assault Rifle + Underbarrel GL | HE and Smoke grenades | 1 per squad |
| Marksman | MARK | Designated Marksman Rifle | Binoculars, Frag Grenades | 1 per squad |
| Combat Engineer | CE | Assault Rifle | Explosives, Mines, Repair Tool | 1 per squad |
| Crewman | CREW | Submachine Gun or Carbine | Repair Tool (crewman kit) | Vehicle crew only |
| Pilot | PILOT | Carbine | Repair Tool (pilot kit) | Helicopter crew only |
Detailed Role Descriptions
#### Squad Leader (SL)
- Background: The backbone of the team. SL leads the squad, places rally points (RPs) for respawns, builds forward operating bases (FOBs) with the support of the team, and coordinates with other squad leaders via command channel.
- Strengths: Only role that can place RPs; has binoculars for scouting; can mark targets for the entire team.
- Weaknesses: No specialist firepower; must balance leading and fighting; high responsibility.
- Playstyle: Stay alive, keep your squad moving toward objective, communicate constantly. Use your binos to spot enemy infantry and vehicles. When possible, build a HAB near the objective.
- Equipment: Rifle with optic (or iron sights), binos, frag and smoke grenades, rally point, radio for FOB construction.
- Team Synergy: Works best with a medic and a rifleman who can supply ammo. Never go alone—always have a battle buddy.
- Background: The most flexible role, available to any player. The rifleman is the grunt of the squad, carrying extra ammunition for teammates.
- Strengths: Unlimited squad availability; carries an ammo bag that can resupply grenades, rockets, and bandages for any teammate.
- Weaknesses: No unique firepower; lacks scopes on some factions; ammo bag has limited uses (5 refills total).
- Playstyle: Stick with specialists (AR, LAT, Grenadier) and drop your ammo bag near them frequently. Always have a frag and smoke grenade ready. Use your rifle to suppress and kill enemies at medium range.
- Equipment: Assault rifle (with optic or irons), ammo bag, frag and smoke grenades, entrenching tool (shovel).
- Team Synergy: Essential for keeping AT soldiers and medics resupplied. Pair with AR to keep them firing.
- Background: The squad's base of fire. Carries a light machine gun (e.g., M249, RPK) to suppress and pin down enemies.
- Strengths: High sustained fire; bipod for stability; large magazine (100-200 rounds). Can lay down covering fire that makes enemies keep their heads down.
- Weaknesses: Slow movement while firing; vulnerable when reloading; less effective at long range after first burst.
- Playstyle: Deploy your bipod on windows, rocks, or trench edges. Fire in short bursts to conserve ammo and accuracy. Prioritize suppressing known enemy positions rather than seeking kills. Reposition after every few engagements to avoid being flanked.
- Equipment: LMG with bipod, frag grenades, entrenching tool.
- Team Synergy: Works with a rifleman to supply extra ammo. Medics should stay close as AR draws heavy fire. SL can mark targets for you.
- Background: The first line of defense against enemy armor. Carries a single-use light rocket launcher (e.g., RPG-7, M72 LAW) that can disable or destroy lightly armored vehicles.
- Strengths: Portable, one-shot AT capability; can also be used against infantry in buildings (with HE rockets on some factions).
- Weaknesses: Only one rocket; long reload; minimal damage against heavy tanks (requires multiple hits to critical components).
- Playstyle: Stay with your squad. Only fire when you have a clear shot at vulnerable parts of a vehicle (engine, tracks, turret) or to finish off a damaged target. Use cover and flanks. After firing, retreat and request ammo from a rifleman.
- Equipment: Assault rifle (irons or optic), one rocket launcher with one rocket, frag grenades.
- Team Synergy: Pair with a rifleman for immediate resupply. Coordinate with HAT to focus fire on heavy armor. SL can mark vehicle positions for you.
- Background: The dedicated tank killer. Carries a heavy launcher (e.g., Carl Gustav, RPG-29) with two rockets, often including a tripod for additional stability and a thermal sight (on some factions).
- Strengths: High damage to all armor; can destroy tanks with two well-placed shots; tripod reduces recoil and improves accuracy at long range.
- Weaknesses: Slow movement while carrying the launcher; must deploy tripod to use; limited ammo; easy target while stationary.
- Playstyle: Stay at medium-long range from enemy armor. Use terrain to hide. Deploy the tripod only when you have a clear sightline and a reliable escape route. Always aim for the engine compartment or turret ring. After firing, move immediately.
- Equipment: Assault rifle, heavy launcher with two rockets, tripod (on some factions), entrenching tool.
- Team Synergy: Essential for killing heavy armor. LAT can soften targets; a rifleman can provide one extra rocket (if the HAT uses a launcher that accepts loose rockets, like the RPG-29) or simply keep you in the fight longer with ammo bags.
- Background: The savior of the squad. Heals and revives downed teammates using medical supplies and a medic bag.
- Strengths: Can bring soldiers back from incapacitation; heals faster than bandages; revives without consuming a ticket (unlike giving up).
- Weaknesses: Weak weapon (usually carbine); no grenades (except smoke); fragile due to being a priority target.
- Playstyle: Stay in the middle of the squad. Prioritize reviving over fighting. Use smoke grenades to cover teammates while you work. Communicate with downed players to confirm it's safe to revive. Keep your medical bag stocked (use rifleman ammo).
- Equipment: Carbine or short-barreled rifle, medic bag (limited uses, refilled by ammo), bandages, smoke grenades (2), entrenching tool.
- Team Synergy: Stay close to SL and AR. Riflemen can resupply your bandages and medic bag charges. Never neglect your own safety—a dead medic helps no one.
- Background: Provides indirect fire and area denial. Uses an underbarrel grenade launcher attached to an assault rifle to fire 40mm high-explosive (HE) and smoke grenades.
- Strengths: Can clear rooms, destroy enemy FOBs, and suppress large areas with HE. Smoke can obscure enemy lines of sight.
- Weaknesses: Slow muzzle velocity; limited ammo for GL (5-10 rounds); long reload between shots; vulnerable while using launcher.
- Playstyle: Use HE to target known enemy positions (windows, trenches, bushes). Use smoke to cover your squad's advance or to block enemy snipers. Conserve GL ammo for critical moments. Your rifle is still effective in close quarters.
- Equipment: Assault rifle with underbarrel GL, frag and smoke grenades for the rifle, entrenching tool.
- Team Synergy: Works well with a rifleman for extra grenade launcher ammo. SL can mark targets for you. AR can suppress while you reload.
- Background: The designated marksman of the squad, providing accurate fire at long range. Carries a semi-automatic DMR (e.g., M110, SVD) with a high-power scope.
- Strengths: Can engage targets at distances beyond typical assault rifles; scope helps spot enemies for the squad; high damage per shot.
- Weaknesses: Slow rate of fire; limited ammo; less effective in close quarters; often tempted to lone-wolf.
- Playstyle: Stay with your squad, not far away. Use your scope to scan for enemies and report contacts via local or squad chat. Take shots at stationary or slow-moving enemies. Prioritize high-value targets like enemy SLs, medics, and AT soldiers. Reposition after 2-3 shots to avoid detection.
- Equipment: DMR with scope, binos (on some factions), frag grenades, entrenching tool.
- Team Synergy: Provide overwatch as the squad moves. A rifleman can give you extra DMR ammo. SL can use your eyes to mark positions for the rest of the squad.
- Background: The demolition and construction expert. Carries explosives (C4, mines) and a repair tool to sabotage enemy assets and repair friendly ones.
- Strengths: Can destroy enemy FOBs, vehicles, and fortifications with satchels; can place anti-tank mines; can repair friendly vehicles and structures with the welding tool.
- Weaknesses: No unique combat gear; satchel has a long fuse; easy to spot when placing mines; vulnerable while repairing.
- Playstyle: Sneak into enemy territory to place mines on roads and near FOBs. When assaulting a FOB, use your satchel on the radio. Assist engineers from other squads by repairing friendly vehicles. Your rifle is your primary weapon—use it to fight alongside the squad when not on special tasks.
- Equipment: Assault rifle, satchel charge or C4 (1-2), anti-tank mines (2), repair tool, entrenching tool.
- Team Synergy: Work closely with SL to identify high-value targets. Medics should be nearby if you're operating near enemies. Other engineers can coordinate mine placements.
- Background: The driver and gunner of armored vehicles and logistics trucks. Crewmen have the ability to drive any land vehicle and operate its weapons effectively.
- Strengths: Only role that can drive certain armored vehicles without penalties (e.g., faster repairs, better stabilization); can repair vehicle tracks and engines using the repair tool.
- Weaknesses: Limited anti-infantry capability; often confined to vehicle for prolonged periods; vulnerable when dismounted.
- Playstyle: Stay with your vehicle. When driving, keep moving and avoid ambushes. Use smoke screens (if available) to disengage. As a gunner, prioritize enemy vehicles and then infantry. Dismount only to repair or to fight on foot if the vehicle is destroyed.
- Equipment: Submachine gun or carbine, repair tool, smoke grenades (vehicle-specific).
- Team Synergy: Your squad may be the vehicle crew or you may be attached to another squad. Communicate with other vehicle crews. Infantry can spot targets for you. A combat engineer can help repair your vehicle faster.
- Background: The helicopter pilot and crew chief. Flies transport and attack helicopters. The pilot role is automatically given to the player occupying the pilot seat of a helicopter.
- Strengths: Can rapidly transport troops and supplies across the map; can provide CAS with door guns (e.g., M240D).
- Weaknesses: Requires extensive practice to fly well; helicopters are fragile and loud; easy target for small arms and AA weapons.
- Playstyle: For transport: pick up troops from main base and deliver them to safe landing zones near objectives. For attack: use door guns and rockets to support ground troops. Always maintain situational awareness—listening for engine damage, watching for AT missiles. Land carefully to avoid crashing.
- Equipment: Carbine (for self-defense when grounded), repair tool, vehicle-specific loadout (no changeable kit).
- Team Synergy: Coordinate with SLs to know where they need pickups and drops. Keep command informed of enemy positions you spot. Avoid hovering over active combat zones.
- Unlock Conditions: None. All roles are available from the start. However, team-wide limits exist: e.g., typically 2 HATs per team, 2 Marksmen, etc. Squad-level limits are 1 per squad for specialists.
- Choosing a Role: When you spawn at a HAB or main base, walk to the ammo crate and interact to open the Role Selection menu. Roles that are already taken are grayed out. If your squad already has a Marksman, that option is locked for your squad.
- Role-Specific Training: There is no tutorial for individual roles, but practice on a local co-op server (offline or with bots) to learn the recoil patterns, rocket drop, and helicopter controls.
- Team Synergy Summary: A balanced squad typically includes: 1 SL, 1 Medic, 1 Rifleman, 1 AR or Grenadier, 1 LAT or HAT, and fill the rest with Riflemen. Avoid taking two heavy AT kits in the same squad unless you have multiple riflemen to supply ammo.
#### Rifleman (RFLM)
#### Automatic Rifleman (AR)
#### Light Anti-Tank (LAT)
#### Heavy Anti-Tank (HAT)
#### Medic (MED)
#### Grenadier (GRN)
#### Marksman (MARK)
#### Combat Engineer (CE)
#### Crewman (CREW)
#### Pilot (PILOT)
Special Considerations
Conclusion
Mastering your role's equipment and responsibilities is essential to contributing effectively in Squad. Always communicate your ammo needs, repair status, and spotted enemies. No role is a "hero"—success comes from team coordination and staying alive to support your squadmates.