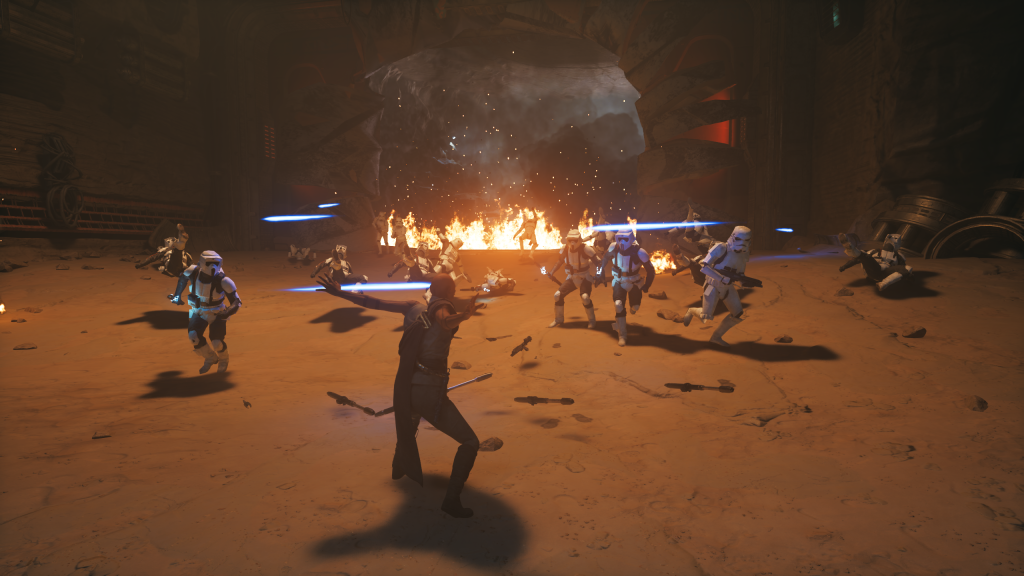
Character Skills
Star Wars Jedi: Survivor – Character Skills Guide
This guide covers all abilities, stances, Force powers, and passive skills available to Cal Kestis in Star Wars Jedi: Survivor. Only Cal is playable, but his versatility comes from five distinct lightsaber stances, a variety of Force abilities, and three skill trees (Survival, Force, Lightsaber). Each skill is detailed with effects, unlock requirements, upgrades, combos, synergies, and recommended usage.
Skill System Overview
Skills are unlocked using Skill Points earned from combat and exploration. Spend points in three trees: Survival (health, healing, defense), Force (Force powers and upgrades), and Lightsaber (stance-specific moves and combos). Some skills are unlocked by progression or trainers (e.g., Doma Dendra in the Saloon).
---
Lightsaber Stances
Cal can wield his lightsaber in five stances, each with unique attack sets, speeds, and strengths. Switch stances at any time with the weapon wheel or mapped buttons (e.g., hold left bumper + face button). Each stance has its own skill tree within the Lightsaber tree.
Single Stance
Balanced, all-around lightsaber combat.
- Basic Attacks: Fast horizontal and vertical slashes; good damage and range.
- Hold Attack – Overhead Smash: Charging attack (hold square/X) – slow but deals high stagger and damage. Good for breaking guards.
- Sprint Attack & Jump Attacks: Standard lunges and slams.
- Air Assault: Aerial combo – jump + attack twice for a descending slash.
- Rush Attack: Dash forward (hold L3 + attack) – quick gap closer, can chain into combos.
- Unlockables: (Lightsaber tree – Single Stance branch)
- Combos: Light > Light > Light > Heavy (knockdown). Light > Hold Heavy (charge overhead). Sprint + Light > Heavy (lunging stab).
- Synergies: Works with any Force power. Best for duelists who want a mix of speed and power.
- Recommended Build: Survival tree + Lightsaber Single Stance upgrades for parry-focused play. Use with Force Slow to land charged heavies.
- When to Use: Boss fights with telegraphed attacks; 1v1 situations where you need reliable damage and block meter management.
- Basic Attacks: Spin attacks (wide arcs) – excellent against groups. Slower swings but heavy stagger.
- Hold Attack – Spin Cycle: Continuous spinning attack (hold square/X) – drains stamina but hits all around. Great for mobs.
- Sprint Attack – Lunge Spin: Lunges forward with a spin, hitting multiple enemies.
- Jump Attack – Ground Slam: Aerial slam that creates a shockwave (unlockable: Slam Shockwave – upgrades to push enemies).
- Unlockables:
- Combos: Light > Light > Heavy (swirling knockback). Sprint + Heavy (wide spin). Air > Light > Light (double aerial).
- Synergies: Force Push to scatter enemies into the spin area. Combine with Confuse (Rage) to make enemies attack each other, then mop up with spins.
- Recommended Build: Force tree upgrades for crowd control (Buff Push, Confuse duration). High stamina perks to sustain spinning.
- When to Use: Groups of 3+ enemies; shielded enemies (spins break shields quickly). Avoid in tight corridors or narrow ledges (risk of falling).
- Basic Attacks: Quick slashes with both blades – low stagger but high DPS. Short range.
- Hold Attack – Flurry (Unlockable): Rapid five-hit combo (hold attack) – deals massive damage but leaves you open. Unlock via skill point.
- Sprint Attack – Dash Slash: Quick lunge with a double slash.
- Jump Attack – Cross Slash: Aerial X-shaped attack that hits twice.
- Unlockables:
- Combos: Light > Light > Heavy (spinning finisher). Light > Hold Heavy (flurry). Dodge > Light > Heavy (gap closer + flurry).
- Synergies: Force Pull to bring enemies closer before flurrying. Use with Force Slow to guarantee full flurry.
- Recommended Build: Max out Lightsaber Dual Wield and Survival (to offset low block meter). Focus on aggression.
- When to Use: Fast enemies like bounty hunters or animals. High-risk boss fights when you know openings (e.g., after dodging). Avoid against groups due to short range.
- Basic Attacks: Slow but powerful overhead and horizontal slams. Heavy stagger, high damage per hit.
- Hold Attack – Clash Slam (Unblockable): A charged overhead slam that cannot be blocked – drains enemy block meter quickly. Unlock via skill point.
- Sprint Attack – Heavy Lunge: A powerful thrust that travels far.
- Jump Attack – Slam: Descending heavy attack that knocks down.
- Unlockables:
- Combos: Heavy > Heavy (double slam). Light > Heavy (pommel strike – fast). Sprint + Heavy > Heavy (lunging slam).
- Synergies: Force Lift to levitate enemies, then use Clash Slam to smash them into the ground. Force Push to stagger before heavy.
- Recommended Build: Max Survival (poise and health) – you'll take hits. Force tree (lift upgrades). Perk: Endurance (stamina regen).
- When to Use: Bosses with big block meters; slow, heavily armored enemies like Droidekas. Avoid against fast enemies (you'll get hit before your attack lands).
- Basic Attacks: Lightsaber slashes (similar to Single but weaker) and blaster shots (press R2/RT).
- Hold Attack – Charged Shot: Hold blaster button for a powerful energy shot that stuns. Can be charged while moving.
- Sprint Attack – Stab + Shot: A lunge stab followed by a point-blank shot.
- Jump Attack – Aerial Shot: Fires a blaster bolt while jumping.
- Unlockables:
- Combos: Light > Light > Blaster (stab + shot). Sprint + Blaster (running shot). Dodge + Blaster (side shot).
- Synergies: Force Slow to line up headshots. Use confusion to create chaos, then pick enemies from range.
- Recommended Build: Force tree (slow duration, push distance). Perks: Blaster Ammo Regeneration, Accuracy.
- When to Use: Sniping weak points (e.g., B1 droids, flying enemies). Opening fights from range before switching stances. Ammo management – blaster shots deplete a gauge that recharges over time.
- Effect: Knocks back enemies and objects. Can stagger or knock down large enemies.
- Base Unlock: Story – earned on Koboh after first visit to Mantis.
- Upgrades (Force Tree):
- Cooldown: ~8 seconds (base). Cooldown reduced by skill upgrades.
- Combo: Push > Dash > Attack (close distance after knockback). Push off ledges for instant kills.
- Synergies: Confuse + Push to shove confused enemies into others. Use with Slow to line up multiple pushes.
- When to Use: Enemies on ledges; group separation; interrupting attacks.
- Effect: Pulls objects and enemies towards you. Can stagger or stun smaller enemies.
- Base Unlock: Story – after acquiring Push.
- Upgrades:
- Cooldown: ~10 seconds.
- Combo: Pull > Attack (stun lock). Pull explosive barrels into groups.
- Synergies: Lift to keep enemy suspended, then pull to slam. Pull into your Dual Wield flurry.
- When to Use: Enemies with shields (pull disables shield). Bringing distant enemies into melee range.
- Effect: Slows down enemies and projectiles in a wide area. Duration scales with upgrades.
- Base Unlock: Story – acquired during fight with Ninth Sister on Coruscant.
- Upgrades:
- Cooldown: ~20 seconds (base).
- Combo: Slow > Charged Heavy Attack (Crossguard) > Flurry (Dual Wield).
- Synergies: Pairs with any stance – guarantees hits from slow attacks. Use to escape tight spots.
- When to Use: Groups of fast enemies; blaster trooper squads; time-limited puzzles (e.g., spinning fans). Bosses with fast combos (e.g., Bode).
- Effect: Levitates smaller enemies or objects in place. Can be upgraded to lift larger enemies.
- Base Unlock: Story – on Nova Garon after Dagan Gera fight.
- Upgrades:
- Cooldown: ~15 seconds.
- Combo: Lift > Attack (cannot attack while lifting unless Slam upgrade is used). Lift > Slam > Ground attack.
- Synergies: With Crossguard, use Slam to create openings. With Confuse, lift a confused enemy to make them a hovering distraction.
- When to Use: Removing shield enemies from groups; setting up heavy combos; avoiding deadly ground attacks.
- Effect: Temporarily turns an enemy to fight for you. Affects organic and some droids.
- Base Unlock: Story – on Jedha from Sister Tasmin.
- Upgrades:
- Cooldown: ~30 seconds (base).
- Combo: Confuse toughest enemy > Wait for it to attack its allies > Clean up survivors with Double-Bladed stance.
- Synergies: Combine with Slow to keep the confused enemy alive longer. Useful against groups of Purge Troopers.
- When to Use: Big group fights (3+ strong enemies). Boss battles with adds (confuse the adds). Avoid on bosses themselves (most are immune).
- Effect: Jump and slam the ground creating a shockwave that knocks down enemies in a large radius.
- Unlock: Spend 3 points in Force tree (after Push upgrades).
- Upgrades:
- Cooldown: ~25 seconds.
- Combo: Slam > Lift > Slam (if upgraded).
- Synergies: Use before Confuse to group enemies.
- When to Use: Crowd control when surrounded; opening move in ambushes.
- Effect: A charged version of Force Push that creates a sphere of energy pushing everything away.
- Unlock: Force skill tree (replaces Push when holding the button).
- Cooldown: ~20 seconds (shorter than Slam).
- Use Cases: Emergency escape when surrounded; knocking enemies off ledges from a distance.
- Health Increase: +25% max HP (multiple nodes).
- Stamina Increase: +25% stamina bar (multiple nodes).
- Force Meter Increase: +33% Force meter (multiple nodes).
- Increased Health Regeneration: Faster regen after taking damage.
- Resilience: Reduce damage taken while blocking (especially against unblockable attacks? Actually reduces chip damage).
- Quick Recovery: Faster recovery from knock downs.
- Enduring: While at low health, damage reduction increased.
- Healing Efficiency: Each Stimpack heals more HP.
- Prize of Peace: Killing an enemy restores some Force meter.
- Recommended Allocation: 5-7 points early for new players; 3 points for veterans for stamina.
- Force Essence: increases Force meter regen rate.
- Force Potency: increases Force ability damage.
- Long Reach: increases range of Push, Pull, and Confuse.
- Force Will: reduces cooldown of all Force abilities.
- Focused Force: Force Slow costs less meter.
- Lift -> Slam, Repulse, etc. as branch nodes.
- Recommended Allocation: 6-8 points for heavy Force users. Max cooldown reduction if you use powers often.
- Each stance has a dedicated branch (4-6 nodes per stance).
- Shared Nodes:
- Recommended Allocation: Max your primary stance branch first; then shared nodes.
- Early: Survival – 5 health nodes, 3 stamina nodes. Lightsaber – Parry Mastery, Deflection Mastery. Force – Force Essence.
- Stance: Single (balanced).
- Strategy: Focus on parrying and countering; use Stim frequently.
- Max Dual Wield branch in Lightsaber tree. Force tree – Slow duration + Focused Force. Survival – 3 stamina nodes (to sustain flurries).
- Gear: Perks that increase attack speed or combo damage.
- Use Force Slow then flurry; dodge in and out.
- Force tree – Max Push upgrades (Repulse, Slam). Lightsaber – Double-Bladed Extended Reach and Whirlwind.
- Survival – Quick Recovery, Enduring.
- Group enemies with Slam, then spin attack. Use Push to scatter.
- Max Crossguard branch – especially Guard Breaker and Unstoppable Force. Survival – all health and resilience nodes. Force – Lift + Slam (to set up heavy attacks).
- Use heavy attacks to break enemy poise; trade hits confidently thanks to high HP.
- Lightsaber – Blaster branches (Quickdraw, Ricochet). Force – Confuse duration and Contagion. Survival – Force meter increase.
- Open with Confuse on a strong enemy; then pick off others from range. Use charged shots to stun.
- Stance Switching Cancels: Switching stances during an attack animation can cancel the recovery, allowing faster combos.
- Force Combos: For example: Pull > Slow > Dual Wield Flurry. Or Lift > Crossguard Slam.
- Block Meter Management: Some stances (Dual Wield) have poor block meter – use dodge liberally.
- Upgrade Priority: Get Force Slow early for combat and puzzles. Then unlock your main stance's key moves (e.g., Clash Slam for Crossguard).
- Sell Skill Points: You can respec at the Saloon on Koboh (Doma Dendra) for a small fee.
- Precision Strike (Upgraded Overhead Smash): Hold attack longer for a faster, more powerful overhead that ignores block. Unlock at Nekko Stable trainer? Actually unlocked via skill point.
- Rapid Slashes: After a block, press attack for a quick three-hit flurry. Good for punishing aggressive enemies.
- Whirlwind Slash: Dodge + attack – spinning slash that hits multiple enemies. Good crowd control.
Double-Bladed Stance
Wide sweeps, crowd control, and spinning attacks.
- Sweeping Slash (Dodge + Attack): Wide arc after a dodge – hits enemies behind you.
- Twin Spin (Block + Attack after attack): A double spin that knocks down enemies. Unlock via skill point (requires Double-Bladed progress).
- Extended Reach: Increases base range of attacks. Passive unlock.
Dual Wield Stance
Fast, aggressive, high-damage but low defense.
- Deflect Flurry (Block + Attack after stagger): A quick counter-attack that stops enemy combos.
- Momentum Boost (Dodge + Attack): A dashing forward slash that can chain into flurry.
- Quick Draw (Pressing weapon swap during attack): Instantly switch to Blaster stance for a fast blaster shot – unique synergy. Unlock at trainer? Actually unlocked via skill point in Dual Wield.
Crossguard Stance
Slow, heavy-hitting stance with unblockable attacks and block-breaker.
- Guard Breaker (Hold block + attack): A slow but guaranteed guard break on most enemies.
- Thunder Slam (Jump + Heavy): An aerial slam that creates an area shockwave (knocks down surrounding enemies). Unlock via skill point.
- Unstoppable Force: Attacks cannot be interrupted by light hits. Passive upgrade.
Blaster Stance
Ranged and melee hybrid with a lightsaber and blaster pistol.
- Quickdraw (Block + Blaster): Instant unblockable shot after a perfect block. Unlock via skill point.
- Ricochet Shot (Hold left/right + blaster): A shot that bounces off walls – hits hidden enemies. Unlock via skill point.
- Fan the Hammer (After melee combo): Press blaster rapidly after a lightsaber combo to fire multiple shots in quick succession.
- Gunslinger’s Turret (Hold block + hold blaster): Fire continuously while moving slowly – good for suppressing fire. Unlock via skill point.
---
Force Abilities
Force powers are unlocked via story progression and the Force skill tree. Each can be upgraded to increase damage, duration, or range. Cooldowns vary (generally 10-30 seconds).
Force Push
- Repulse (Alternate): Hold activate for a powerful area push that knocks down most enemies. Unlock via Force skill.
- Force Wave: Increases push range and adds damage to knocked enemies.
- Push Momentum: Pushing an enemy into a wall deals bonus damage.
Force Pull
- Wrecking Ball (Hold): Pull a large object and throw it in a direction (requires object). Unlock via skill.
- Pull Tether: Pull enemies from a greater distance and cause them to fall.
- Lift + Pull Combo: After lifting an enemy, pulling them slams them down (requires Lift upgrade).
Force Slow
- Duration Increase: +2 seconds per level (max 8 seconds).
- Radius Increase: Affects larger area.
- Slow Projectiles: Force slow now affects blaster bolts and other projectiles (makes them dodgeable).
Force Lift
- Massacre (Hold): Lifts multiple enemies in a group. Unlock via skill.
- Grip Strength: Allows lifting of medium enemies (e.g., Purge Troopers).
- Slam (Press after Lift): Slams the lifted enemy into the ground for damage and area knockback. Unlock via skill.
Force Confuse
- Duration Increase: +5 seconds (max 20 seconds).
- Rage: Confused enemies deal more damage and attack faster.
- Contagion: Confused enemy spreads confusion to nearby enemies upon death (smaller duration).
Force Slam (Unlocked via Force Tree)
- Shockwave Amplified: Increased radius and damage.
- Slam -> Lift Combo: After slam, can immediately lift enemies for follow-up.
Force Repulse (Alternate for Push)
---
Skill Trees – Passive Skills
Survival Tree (Defense & Health)
Force Tree (Force Powers Enhancement)
Lightsaber Tree (Stance Skills & Combat Upgrades)
- Parry Mastery: Perfect parry window increased.
- Deflection Mastery: Blaster bolts reflect faster, more damage, and can reflect multiple at once.
- Block Stability: Reduced block stamina drain.
- Momentum: Attacking increases force meter build slightly.
- Evasive Maneuvers: Dodges cost less stamina and have longer invincibility frames.
---
Upgrade Unlock Order & Recommended Builds
New Player Build (Survival-Focused)
Aggressive DPS Build (Dual Wield + Slow)
Crowd Control Build (Double-Bladed + Push/Slam)
Tank Build (Crossguard)
Ranged/Stealth Build (Blaster + Confuse)
---
Advanced Tips
---
This guide covers every skill in Star Wars Jedi: Survivor. Experiment with different combinations to find your preferred playstyle. May the Force be with you.