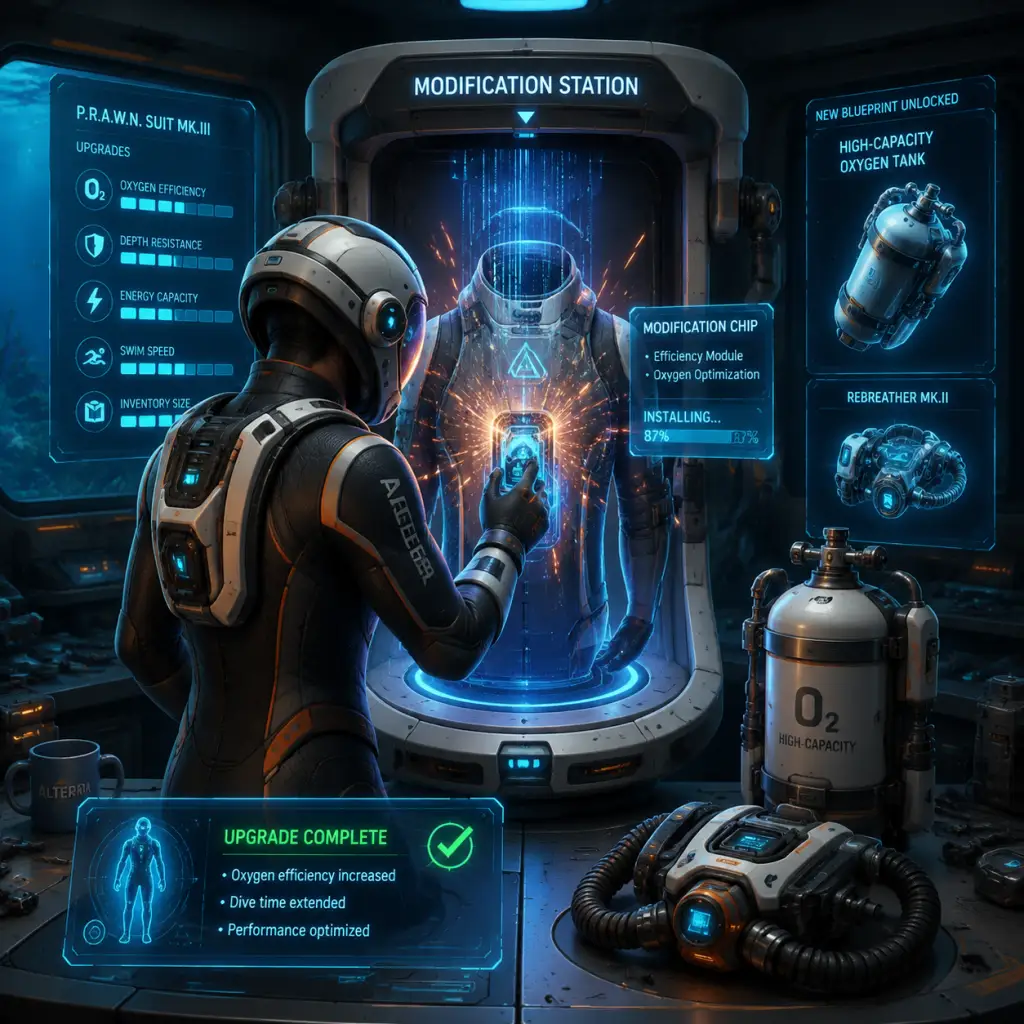
Character Skills
Character Skills Guide for Subnautica
Note: Subnautica does not feature traditional character classes, skill trees, or spells. Instead, the player’s abilities are defined entirely by the tools, vehicles, and upgrade modules they craft and equip. This guide treats each major equipment item and upgrade as a “skill,” including their effects, upgrades, combos, synergies, and optimal usage. The only playable “character” is the Lone Survivor – no class roles exist.
---
1. Handheld Tool Skills
Survival Knife
- Type: Basic Melee Tool
- Effect: Deals 20 damage per hit to small creatures (e.g., Peepers, Crashfish). Can harvest small fish for food.
- Cooldown: None (attack speed ~1 swing per second)
- Upgrades: None (cannot be upgraded; later replaced by Thermoblade)
- Combos: N/A
- Synergies: Use with Stasis Rifle to freeze predators before knife attacks.
- Recommended Builds: Early-game only; swap to Thermoblade as soon as possible.
- When to Use: Defending against small threats (Bite-sized fish, Crashfish nests). Harvesting Bleeders (alternative to dismemberment).
- Type: Upgraded Melee Tool
- Effect: Deals 40 damage per hit; passively cooks small fish on kill. Can boil water from Bladderfish.
- Cooldown: None (same attack speed as Survival Knife)
- Upgrades: N/A (already final tier)
- Combos: N/A
- Synergies: Pair with Stasis Rifle to safely kill Stalkers or Sandsharks.
- Recommended Builds: Essential in any loadout; carry at all times for efficiency.
- When to Use: Mid-to-late game melee defense, cooking food, killing hostile fauna like Bone Sharks, Ampeels, or Crabsquids (requires several hits).
- Type: Analysis Tool
- Effect: Scans fragments, flora, fauna, and objects to unlock blueprints and log entries. Scanning range ~8m.
- Cooldown: None (scan takes ~3 seconds per item)
- Upgrades: Cannot be upgraded.
- Combos: N/A
- Synergies: Use with Seamoth or Prawn Suit to approach dangerous areas for scanning.
- Recommended Builds: Always keep in inventory while exploring new biomes.
- When to Use: Any time you encounter an unknown object or creature (white hologram outline). Scanning is mandatory for progression.
- Type: Repair Device
- Effect: Repairs damaged base modules, vehicles (Seamoth/Prawn/Cyclops) and Lifepod. Restores 50 HP per use (energy cost: 1% per repair pulse).
- Cooldown: None (continuous spray while holding trigger)
- Upgrades: Cannot be upgraded.
- Combos: N/A
- Synergies: Use with vehicle upgrades like Hull Reinforcement to reduce repair frequency.
- Recommended Builds: Essential in inventory during any vehicle operation and base building.
- When to Use: After vehicle collisions, creature attacks (e.g., Reaper Leviathan), or base breaches.
- Type: Cutting Tool
- Effect: Cuts through sealed doors and panels in wrecks. Consumes 1 Battery per use.
- Cooldown: ~2 seconds between cuts (burn animation)
- Upgrades: None.
- Combos: N/A
- Synergies: Use with Scanner to access blocked compartments within wrecks.
- Recommended Builds: Carry when exploring wrecks (especially in the Aurora and deeper biomes).
- When to Use: When encountering a sealed door with a welding point (orange/red seal).
- Type: Ranged Crowd Control
- Effect: Fires a slow-moving energy orb that, on impact, creates a freezing field lasting ~10 seconds (fully charged). Creatures and objects inside are frozen. Discharges instantly if further charged shots hit the same area.
- Cooldown: ~3 seconds between shots; charge time ~2 seconds for full power.
- Upgrades: Cannot be upgraded.
- Combos: + Propulsion Cannon (throw frozen creatures), + Survival Knife/Thermoblade (freeze then kill safely), + Prawn Suit Drill Arm (drill into frozen leviathans for resources).
- Synergies: Ideal for escaping Reaper Leviathans, Ghost Leviathans, or Lava Larvae infestations.
- Recommended Builds: Must-have for exploration beyond 500m; use with Seaglide for escape.
- When to Use: Facing large aggressive leviathans, entering dangerous zones (e.g., Dunes, Mountains, Lost River).
- Type: Physics Manipulation Tool
- Effect: Grabs objects/creatures up to moderate size and launches them with force. Launched objects deal impact damage. Can also pick up small items like Crashfish.
- Cooldown: ~1 second between grabs; ~2 second reload after launch.
- Upgrades: Upgradable to Repulsion Cannon via modification station (changes behavior).
- Combos: + Crashfish (launch into creatures for AoE damage), + Stasis Rifle (freeze then launch).
- Synergies: Clear debris in wrecks, move heavy ores (e.g., Lithium), defend against medium creatures.
- Recommended Builds: Situational; replaced by Repulsion Cannon for defense.
- When to Use: Clearing obstacles, moving resources, non-lethal creature deterrent.
- Type: AoE Knockback Tool
- Effect: Fires a shockwave that knocks back all creatures and objects in a cone. Deals no damage but stuns briefly. Energy cost: 10% per blast.
- Cooldown: ~5 seconds between blasts; no charge time.
- Upgrades: N/A (final upgrade of Propulsion Cannon).
- Combos: + Stasis Rifle (freeze then push enemies away), + Cyclops Shield Generator (creates safe zone after push).
- Synergies: Excellent for defending base entrances from hostile fauna (e.g., Crabsquids).
- Recommended Builds: Swap Propulsion Cannon for this in high-danger zones.
- When to Use: When swarmed by small-to-medium creatures, pushing leviathans away from base/vehicle.
- Base Abilities: Sonar (PDA upgrade), Perimeter Defense, Torpedo System, Depth Modules.
- Effect: Emits an electric shock around Seamoth, stunning nearby creatures for ~5 seconds. Deals moderate damage.
- Cooldown: ~10 seconds after shock ends.
- Upgrades: None (one tier).
- Combos: Use after taking damage to deter attackers.
- Synergies: Works well with Hull Reinforcement to survive hits.
- Recommended Builds: Essential for Seamoth exploration beyond kelp forests.
- When to Use: When a creature (Stalker, Sandshark, Boneshark) grabs or attacks the vehicle.
- Effect: Pings a circular area revealing terrain and creatures within 100m. Requires power.
- Cooldown: ~8 seconds.
- Upgrades: None.
- Combos: N/A.
- Synergies: Useful for navigation in murky biomes (Blood Kelp, Deep Grand Reef).
- Recommended Builds: Useful for early exploration of caves.
- When to Use: When visibility is low or searching for fragments/entrances.
- Effect: Fires vortex torpedoes that disorient creatures, or gas torpedoes that create poison clouds. Each torpedo consumes crafted ammo.
- Cooldown: ~1 second between shots.
- Upgrades: Gas Torpedoes (replaces vortex after scan).
- Combos: Use with Perimeter Defense to weaken larger threats.
- Synergies: Limited use; craft only if you have extra resources.
- Recommended Builds: Not essential; situational for leviathan harassment.
- When to Use: Against Reapers or Ghosts when you lack Stasis Rifle.
- Effect: Increase maximum dive depth (200m → 300m → 900m).
- Cooldown: N/A (passive upgrade).
- Combos: Require Vehicle Upgrade Console.
- Synergies: Enable access to deeper biomes like Jellyshroom Caves.
- Recommended Builds: Mandatory for progression; always upgrade before going deeper.
- When to Use: Equip before exploring below current crush depth.
- Base Abilities: Grappling Arm, Drill Arm, Propulsion Cannon Arm, Depth Modules, Jet Upgrade.
- Effect: Fires a grappling hook that attaches to surfaces/creatures. Reel in to pull Prawn toward target. Can be used to traverse large distances horizontally.
- Cooldown: None (continuous use until retracted).
- Upgrades: None.
- Combos: + Drill Arm (boring while attached to ore veins), + Jet Upgrade (swing then activate jets for momentum).
- Synergies: Essential for escaping pits or climbing walls in Lava Zones.
- Recommended Builds: Always equip at least one Grappling Arm on each Prawn.
- When to Use: Navigating rough terrain, chasing leviathans, collecting resources from high cliffs.
- Effect: Drills into large resource deposits (e.g., Titanium, Copper, Lead, Quartz) and damages creatures. Deals 30 damage per tick to creatures.
- Cooldown: None (drains energy while drilling).
- Upgrades: None.
- Combos: + Grappling Arm to anchor while drilling.
- Synergies: Use with Prawn Suit Depth Module to reach Lava Castle deposits.
- Recommended Builds: One Drill Arm + one Grappling Arm is the standard loadout.
- When to Use: Mining large ore nodes, dealing with medium creatures (Crabsnakes, Lava Lizards).
- Effect: Same as handheld Propulsion Cannon but integrated into Prawn. Grabs objects up to large size (e.g., Crashfish, small debris).
- Cooldown: Same as handheld.
- Upgrades: None.
- Combos: N/A.
- Synergies: Useful for clearing debris in wrecks without leaving Prawn.
- Recommended Builds: Situational; replace with Drill Arm for mining.
- When to Use: When you need to move heavy objects or clear blocked paths while in Prawn.
- Effect: Gives Prawn Suit limited jumping ability (boost jump). Allows climbing steep inclines and escaping crevasses.
- Cooldown: ~5 seconds between jumps (recharge time).
- Upgrades: None.
- Combos: + Grappling Arm for high-speed traversal.
- Synergies: Essential for reaching the Lava Castle and navigating the Inactive Lava Zone.
- Recommended Builds: Mandatory upgrade for any Prawn exploration below 900m.
- When to Use: In any biome where vertical movement is required (Mushroom Forest, Lost River, Lava Zones).
- Effect: Increase crush depth to 1300m (MK1) and 1700m (MK2).
- Cooldown: Passive.
- Combos: None.
- Synergies: Needed for Lava Lakes and Primary Containment Facility.
- Recommended Builds: Always install before going below 900m.
- When to Use: Before exploring Inactive Lava Zone or Active Lava Zone.
- Base Abilities: Shield Generator, Sonar, Decoy Tube, Silent Running, Engine Overheat mechanics.
- Effect: Creates an energy shield around Cyclops for ~10 seconds, absorbing damage from all sources (including crush depth). Drains 150 energy.
- Cooldown: ~15 seconds after shield deactivates.
- Upgrades: None.
- Combos: + Decoy Tube (launch decoy while shielded to distract creatures).
- Synergies: Use when entering Lava Zones to protect from heat damage.
- Recommended Builds: Essential for Cyclops survival in late-game areas.
- When to Use: When attacked by leviathans (Reaper, Ghost) or entering extremely hot biomes.
- Effect: Pings a large area showing terrain and creature positions. Uses 10% power per ping.
- Cooldown: ~10 seconds.
- Upgrades: None.
- Combos: N/A.
- Synergies: Combine with Silent Running to avoid creatures while navigating.
- Recommended Builds: Useful for navigation through Lost River (low visibility).
- When to Use: In dark or foggy areas (Blood Kelp Trench, Lava Lakes).
- Effect: Launches a decoy that mimics Cyclops signature, attracting creatures away. Decoy floats for ~30 seconds.
- Cooldown: ~5 seconds between launches; decoys are crafted items (1 Decoy = 1 Titanium + 1 Copper Ore).
- Upgrades: None.
- Combos: + Shield Generator (shield while launching decoy to escape).
- Synergies: Use when pursued by leviathans to break aggro.
- Recommended Builds: Carry at least 5 decoys for extended expeditions.
- When to Use: When a leviathan begins attacking; launch decoy then activate Silent Running.
- Effect: Reduces Cyclops engine noise drastically, lowering detection range. Movement speed reduced, energy consumption increased.
- Cooldown: Toggle ability; no cooldown, but drains power faster.
- Upgrades: None.
- Combos: + Sonar (stealth approach + terrain mapping).
- Synergies: Essential for passing through leviathan territory without engagement.
- Recommended Builds: Use as a default mode when navigating dangerous biomes.
- When to Use: Whenever you hear creature roars and want to avoid combat.
- Effect: If engines run at full speed for too long, Cyclops catches fire causing damage. Can be extinguished with Fire Extinguisher (crafted separately).
- Cooldown: N/A (prevention by toggling engine modes).
- Upgrades: None.
- Combos: N/A.
- Synergies: Use ahead modules (Thermal Reactor) to reduce reliance on engine power.
- Recommended Builds: Not a build choice; avoid prolonged full speed.
- When to Use: Manage engine speed based on heat status (low, medium, high).
- Effect: Recharges batteries of held tools (Seaglide, Flashlight) while swimming. Slow charge rate (~1% per 2 seconds).
- Cooldown: N/A (passive while swimming).
- Upgrades: None (cannot be further upgraded).
- Combos: + Seaglide (keeps battery topped up).
- Synergies: Useful for long exploration without returning to base.
- Recommended Builds: Early-to-mid game; later swap for Ultra Glide Fins.
- When to Use: When using battery-powered tools frequently.
- Effect: Increases swim speed by 50% (more than Standard Fins or Swim Charge Fins).
- Cooldown: Passive.
- Upgrades: None (crafted from Fin Fragment and synthetic materials).
- Combos: + Rebreather (go deeper faster).
- Synergies: Pair with Seaglide for maximum speed.
- Recommended Builds: End-game mobility; best in slot for general exploration.
- When to Use: Always equipped once crafted; reduces travel time significantly.
- Effect: Reduces oxygen consumption at depth by 50%. Effective below 75m.
- Cooldown: Passive.
- Upgrades: None.
- Combos: + Ultra High Capacity Tank (extends bottom time).
- Synergies: Essential for deep diving without vehicle support.
- Recommended Builds: Must-have for any exploration below 200m.
- When to Use: Equip before diving into any biome where depth exceeds 75m.
- Effect: Increases oxygen capacity from 75% to 100%? Actually: The Standard O2 Tank holds 30 seconds extra? In Subnautica, the High Capacity Tank adds 30 seconds (total 75 seconds base? Wait.) Let's clarify: Base oxygen time is 45 seconds. Standard Tank adds +30 seconds (75 total). High Capacity Tank adds +60 seconds (105 total). Ultra High Capacity Tank adds +90 seconds (135 total). Crafting requires modification station.
- Cooldown: Passive.
- Upgrades: From Standard Tank → High Capacity → Ultra High Capacity.
- Combos: + Rebreather (maximizes time at depth).
- Synergies: Use with Seamoth for extra safety when docking.
- Recommended Builds: Late-game must-have for extensive cave diving.
- When to Use: Equipped for any excursion deeper than 300m.
- Effect: Reduces physical damage taken by 50% (stackable with other damage reduction? Actually reduces damage by 50% flat). Also protects against heat damage slightly.
- Cooldown: Passive.
- Upgrades: None.
- Combos: + Stillsuit (damage reduction + water conservation).
- Synergies: Essential for leviathan biomes.
- Recommended Builds: Equip when exploring Dunes, Mountains, or Lava Zones.
- When to Use: When entering areas with aggressive creatures (Reapers, Ghosts, Crabsquids, Lava Lizards).
- Effect: Converts 10% of damage taken into water (fed via fabricator? Actually converts a portion of damage to water in your inventory. Provides hydration during combat).
- Cooldown: Passive.
- Upgrades: None.
- Combos: + Reinforced Dive Suit (damage reduction + water generation).
- Synergies: Useful for long treks where food/water are scarce.
- Recommended Builds: Situational; good for resource gathering in dangerous biomes.
- When to Use: When exploring areas without readily available water sources (Lava Zones).
- Type: Propulsion Device
- Effect: Provides linear acceleration while swimming. Doubles swim speed. Can be used while holding items? No, two-handed. Has built-in light.
- Cooldown: None (constant thrust drains battery). Battery lasts ~10 minutes with motion.
- Upgrades: Battery can be swapped; no upgrade module.
- Combos: + Swim Charge Fins (recharge during use).
- Synergies: Essential for early movement; replace with Cyclops for long-distance.
- Recommended Builds: Craft as soon as possible; carry spare batteries.
- When to Use: All travel until you obtain a vehicle; still useful for short hops.
- Effect: Not an ability per se; walking speed varies based on terrain. No skill involved.
- Note: No player movement skills beyond swimming aids.
- Type: Navigation Aid
- Effect: Deployable floating beacons that remain visible on HUD. Mark locations.
- Cooldown: None (craftable item).
- Upgrades: None.
- Combos: Use with Cyclops Sonar to create permanent waypoints.
- Synergies: Essential for mapping safe paths through Lost River.
- Recommended Builds: Always carry 5-10 beacons when exploring new biomes.
- When to Use: To mark resource spots, base locations, or entrances to caves.
- Type: Distraction Device
- Effect: Attracts nearby hostile creatures away from Cyclops for ~30 seconds.
- Cooldown: Crafting needed; no in-use cooldown.
- Upgrades: None.
- Combos: + Cyclops Shield (launch then shield to escape).
- Synergies: Pair with Silent Running to lose aggro.
- Recommended Builds: Stockpile for leviathan encounters.
- When to Use: When a leviathan starts attacking the Cyclops.
- Tools: Survival Knife, Scanner, Repair Tool, Seaglide, Flashlight
- Vehicle: None (craft Seamoth as soon as possible)
- Personal Upgrades: Standard Fins, Standard O2 Tank, Rebreather (if available)
- Objective: Scan fragments, gather basic resources, build base.
- Tools: Thermoblade, Stasis Rifle, Propulsion Cannon, Laser Cutter, Seaglide
- Vehicle: Seamoth with Depth MK2, Perimeter Defense, Hull Reinforcement
- Personal Upgrades: Ultra Glide Fins, Ultra High Capacity Tank, Rebreather, Reinforced Dive Suit
- Objective: Explore Jellyshroom Caves, Grand Reef, Blood Kelp Zone.
- Tools: Thermoblade, Stasis Rifle, Repulsion Cannon, Prawn Repair Tool
- Vehicle: Prawn Suit with Grappling Arm, Drill Arm, Jet Upgrade, Depth MK2
- Personal Upgrades: Ultra Glide Fins, Ultra High Capacity Tank, Rebreather, Stillsuit (optional)
- Objective: Drill large deposits, navigate Lava Castle, reach Thermal Plant.
- Tools: Thermoblade, Stasis Rifle, Repair Tool, Scanner
- Vehicle: Cyclops with Shield Generator, Sonar, Decoy Tube, Thermal Reactor, Engine Efficiency Module
- Personal Upgrades: Ultra Glide Fins, Ultra High Capacity Tank, Rebreather, Reinforced Dive Suit
- Objective: Long expeditions to Lost River, Lava Lakes, and Primary Containment.
Thermoblade
Scanner
Repair Tool
Laser Cutter
Stasis Rifle
Propulsion Cannon
Repulsion Cannon
---
2. Vehicle Skills (Abilities & Upgrades)
Seamoth (Submersible)
#### Perimeter Defense System
#### Sonar
#### Torpedo System
#### Depth Modules (MK1, MK2, MK3)
Prawn Suit (Exosuit)
#### Grappling Arm
#### Drill Arm
#### Propulsion Cannon Arm
#### Jet Upgrade
#### Depth Modules (MK1, MK2)
Cyclops (Mobile Base)
#### Shield Generator
#### Sonar
#### Decoy Tube
#### Silent Running
#### Engine Overheat
---
3. Personal Upgrade Skills (Fins, Tanks, Rebreather, etc.)
Swim Charge Fins
Ultra Glide Fins
Rebreather
Ultra High Capacity Tank
Reinforced Dive Suit
Stillsuit
---
4. Special Abilities (PDA Upgrades & Fabricated Gadgets)
Seaglide
Crawl / Walk Speed
Beacons
Creature Decoys (Cyclops Decoys)
---
5. Recommended Builds (Skill Loadouts)
Since Subnautica has no skill points, builds refer to equipment loadouts.
#### Early Exploration Build
#### Deep Diver Build (Mid-Game)
#### Lava Zone Raider Build (Late-Game)
#### Cyclops Mobile Base Build
---
6. Skill Synergies & Combos Summary
| Skill A | Skill B | Effect |
|---|---|---|
| Stasis Rifle | Thermoblade | Freeze predator, then kill safely. |
| Stasis Rifle | Prawn Drill Arm | Drill into frozen leviathan for resources. |
| Propulsion Cannon | Crashfish | Launch Crashfish as explosive projectile. |
| Seamoth Perimeter Defense | Hull Reinforcement | Survive creature attacks longer. |
| Cyclops Shield | Decoy Tube | Shield while launching decoy to escape without damage. |
| Cyclops Silent Running | Sonar | Navigate silently while seeing terrain. |
| Prawn Grappling Arm | Jet Upgrade | High-speed traversal across chasms. |
| Rebreather | Ultra High Capacity Tank | Maximum oxygen efficiency at depth. |
| Swim Charge Fins | Seaglide | Recharge Seaglide battery while swimming. |
7. Conclusion
While Subnautica lacks traditional character skills, mastering the tools, vehicles, and upgrades detailed above is essential for survival. Focus on upgrading your vehicles first (especially depth modules), craft the Stasis Rifle early for safety, and always equip the Rebreather + Ultra High Capacity Tank for deep dives. Use the combo tables to create synergistic loadouts. Remember: the only true “skill” is knowing when to deploy each tool—and when to run.