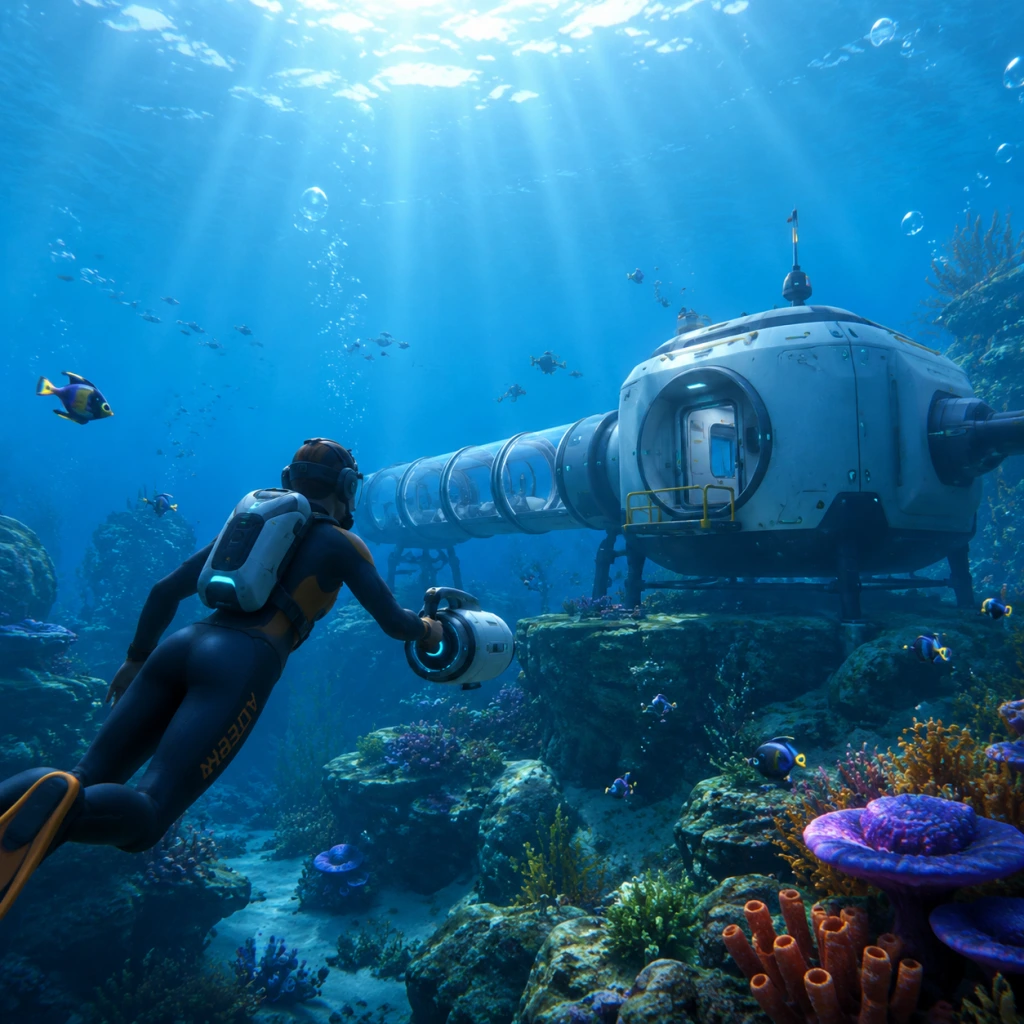
Getting Started
Getting Started: Your First Day on Planet 4546B
Welcome to Subnautica, a survival game set entirely underwater on an alien ocean planet. This guide is tailored for absolute beginners. We’ll walk you through the first hour, explain the interface, cover controls on all platforms, and give you a clear plan to survive day one.
---
Character Creation
There is no character creator. You play as Ryley Robinson, the sole survivor of the Aurora’s crash, with a fixed appearance. Your only choices are cosmetic changes to your living quarters (later on) and what gear you build. The focus is on survival, not customization.
---
First Hour Walkthrough (Spoiler‑Free Essential Path)
0. The Crash (Opening Cinematic)
- Watch the intro: your lifepod crashes into the ocean. You’ll be asked to press Space (PC) / A (Xbox) / Cross (PS) / B (Switch) to shut the rear door after the fire extinguisher lesson.
- Immediately swim straight up to reach the surface and look around. You’re in the Safe Shallows – a green, sunlit biome with coral tubes, small fish, and scattered wreckage.
- Climb back down into the pod. Scan everything: Fabricator, Radio, Storage Locker, Medkit Fabricator (if present). Scanning gives you blueprints.
- Cure thirst: Use the Fabricator to craft Filtered Water (2× Bleach = 1 Salt + 1 Coral Tube Sample). Or craft Disinfected Water (1× Salt + 1× Coral Tube Sample). Collect Salt from sandstone outcrops (small brownish rocks) and Coral Tube Samples by hitting coral tubes with your knife (knife blueprint is automatically unlocked).
- Cure hunger: Craft Cooked Fish – knife kill a Peepers or Boomeerangs (small glowing fish). Use Fabricator to turn raw fish into cooked.
- The Radio in your pod is broken. You need a Repair Tool. Craft it at the Fabricator: 1× Silicone Rubber (from Creepvine Seed Clusters – go to the Kelp Forest biome, look for tall green stalks with glowing yellow pods) + 1× Cave Sulfur (from small green gas pods inside caves; punch the pod to collect the sulfur) + 1× Titanium.
- Once built, repair the Radio. It will broadcast distress signals that trigger story events and give you waypoints.
- Also craft a Survival Knife (1× Silicone Rubber + 1× Titanium). Essential for harvesting resources and self‑defense.
- Use your scanner on fragments, fish, flora, and wreckage. Key early blueprints: Seaglide (mobile SCUBA), Oxygen Tank (for longer diving), High Capacity O2 Tank, Compass (navigation), Seamoth (later).
- Prioritize scanning Lubricant (from Creepvine Seed Clusters) and Battery Charger fragments.
- Day one you can survive without a base, but building a small habitat with a Fabricator, Storage Lockers, and a Solar Panel is highly recommended. The blueprint for the Habitat Builder is unlocked after scanning a piece of it (found in wrecks or the Aurora). If you can’t find it yet, use your life pod as a temporary base.
- Essential base components: Foundation (optional), Compartment (I‑tube), Fabricator, Storage, Power Transmitter (for solar), Locker.
1. Exit Your Lifepod
2. First Priority: Water & Food
3. Repair the Radio & Build a Survival Knife
4. Scan Everything You See
5. Build a Base (Before Night Falls – Maybe Not Day One, But Soon)
---
Controls on All Platforms
Controls are mostly consistent. Below are the default bindings for the most common actions.
PC (Keyboard + Mouse)
| Action | Key |
|---|---|
| Move | W/A/S/D |
| Swim Up / Down | Space / C (hold to descend) |
| Interact | E |
| Scan | Right Click (hold) |
| Use Tool / Attack | Left Click |
| Inventory | Tab |
| PDA / Map | Tab (or Esc) |
| Seaglide / Vehicle | LMB to boost, RMB to turn, R to exit |
| Build Mode (Habitat Builder) | R to rotate, Shift to raise/lower |
| Quick Slot Items | 1-6 |
| Pause Menu | Esc |
Xbox (One / Series X|S)
| Action | Button |
|---|---|
| Move | Left stick |
| Look | Right stick |
Better: Use the controller scheme “Standard” – Left stick move, Right stick look. A = interact, X = scan, B = exit/cancel, Y = inventory, LB = hold to ascend, LT = hold to descend, RB = use tool, RT = attack. |
| Inventory | Y |
| PDA | View button (two squares) |
| Quick Slot | D‑pad up/down |
| Pause | Menu button (hamburger) |
PlayStation (4/5)
| Action | Button |
|---|---|
| Move | Left stick |
| Look | Right stick |
| Swim Up/Down | L1 / L2 (descend) / R1 / R2 (ascend) – check in settings. Default: L1 = ascend, L2 = descend; R1 = use tool, R2 = attack. |
| Interact / Scan | Triangle (interact), Square (scan) |
| Inventory | Touchpad swipe up |
| PDA | Options button |
| Quick Slot | D‑pad left/right |
| Pause | Options button |
Nintendo Switch
| Action | Button |
|---|---|
| Move | Left stick |
| Look | Right stick |
| Swim Up/Down | L / ZL (descend) / R / ZR (ascend) |
| Interact | A |
| Scan | X |
| Inventory | Y |
| PDA | + |
| Quick Slot | D‑pad |
| Pause | + |
---
UI Overview
The Heads‑Up Display (HUD) is minimal but critical:
1. Health Bar – Bottom–left, red heart icon. If it reaches zero, you die. Regenerate slowly if you’re not starving or dehydrated.
2. Food & Water Bars – Left side, apple and water drop icons. Empty = starvation/dehydration damage.
3. Oxygen Timer – Bottom–center, blue bar. Shrinks while underwater. When empty, you black out and respawn in your last habitat or lifepod (with inventory if you have enough oxygen? Actually you lose items if you die, but you can recover them from your death location as a “grave”… But better to avoid death).
4. Depth Meter – Right side, shows current depth (m).
5. Compass – Top–center (if you’ve built it). Crucial for navigation.
6. PDA – Press Tab (PC) or appropriate button to open. Contains: Data Bank (scanned items, blueprints, story logs), Messages (radio transmissions), Map (only shows explored areas and beacons), Signals (distress signals, waypoints).
7. Inventory – 48 slots (15 quick slots, 30 inventory + 3 special slots). Open with Tab (PC) or Y (Xbox). Items stack up to 10.
8. Fabricator – When opened, shows available recipes. Craft items using raw materials.
9. Time Indicator – Day/night cycle; above the health bar shows the time (e.g., “08:30”). Night is dangerous because predators become more active.
---
Essential Early Objectives
1. Survive the first 24 hours – Manage food and water, avoid predators, keep oxygen high.
2. Build a Survival Knife – For harvesting fish, coral, and defending against hostile flora (like the Crashfish).
3. Repair the Radio – This triggers the first distress signal, leading to key locations.
4. Scan for the Seaglide – The Seaglide (found in the Safe Shallows wreck, near the top of the pod or the large wreck near the edge of the biome) dramatically improves mobility.
5. Craft an Oxygen Tank – Extends your underwater time. The basic tank gives +30 seconds. Upgrade to High Capacity later.
6. Build a Compass – Required for navigation; blueprint is in the Safe Shallows wreck room (scan the compass fragment).
7. Construct a Small Base (Optional but Recommended) – Even a single room with a Fabricator, storage, and a Solar Panel is a lifesaver.
8. Explore the Kelp Forest – Gather Creepvine Seed Clusters for Lubricant and Silicone Rubber, and Scan for the Seamoth fragments.
---
What to Do First and What to Avoid
Do First
- Immediately craft Filtered Water and a few Cooked Fish.
- Gather enough Titanium (from Seabed scrap metal) to make a Repair Tool and Survival Knife.
- Scan all fragments you see. Prioritize: Survival Knife (already unlocked), Repair Tool (unlocked), Seaglide, Compass, Oxygen Tank.
- Repair the Radio; listen to the first transmission (it will point you toward the Aurora’s drive core).
- Build a Compass as soon as you have the blueprint.
- Don’t swim too deep – Oxygen runs out fast. Stay above 50m until you have an Oxygen Tank.
- Don’t attack Stalkers – They are aggressive but not lethal if you back away. Avoid them unless necessary.
- Don’t go near the Aurora’s front – That’s the Reaper Leviathan territory. You’ll die quickly.
- Don’t neglect your lifepod’s storage – Keep it organized; don’t dump items in the world. They can despawn or be eaten by fish.
- Don’t ignore the “Low Oxygen” warning – Always have enough O₂ to swim back to the surface. If you panic, hit Space (PC) / ascend button repeatedly to rise quickly.
- Don’t build a base in the Safe Shallows’ center – It’s safe, but too shallow for solar panels (they need sunlight, but shallow is fine). However, after a few days, Titanium becomes scarce; move to a deeper biome later.
- Don’t eat raw fish – They give minimal hunger and can cause food poisoning (you lose HP). Always cook them.
- Don’t use a Seaglide without a battery – It consumes battery quickly. Craft a spare battery.
What to Avoid
---
Early Resource Priorities
Your first few days revolve around these materials:
| Resource | Location | Used For |
|---|---|---|
| Titanium | Metal scrap (white salvage) on seabed, Limestone Outcrops (small gray rocks) | Everything: tools, base, vehicles |
| Quartz | Limestone Outcrops | Glass, ladders, windows |
| Copper Ore | Sandstone Outcrops (brownish rocks) | Wiring Kit, Computer Chip, Batteries |
| Silver Ore | Sandstone Outcrops | Wiring Kit, etc. |
| Gold | Sandstone Outcrops (rare) | Computer Chip, advanced tools |
| Salt | Sandstone Outcrops | Bleach (Filtered Water), disinfected water |
| Coral Tube Sample | Coral tubes in Safe Shallows | Bleach |
| Creepvine Seed Cluster | Kelp Forest, tall glowing pods | Silicone Rubber (for tools), Lubricant (for Seaglide) |
| Silicone Rubber | Crafted from Creepvine Seed Clusters | Tools, Seaglide, Vehicle upgrades |
| Lubricant | Crafted from Creepvine Seed Clusters | Seaglide, Seamoth, Prawn Suit |
| Acid Mushroom | Safe Shallows caves | Battery (2x Acid Mushroom + 1x Copper Ore) |
| Cave Sulfur | Green gas pods in caves | Repair Tool, First Aid Kit |
| Fiber Mesh | Crafted from Creepvine samples (knife a Creepvine) | Clothing (Reinforced Dive Suit), filtration items |
| Aluminum Oxide (for later) | Coral tubes (orange) | Hardened glass, tier 2 base |
---
Common Beginner Mistakes
1. Skipping the Radio repair – You miss critical story progression and location markers. Fix it within the first hour.
2. Exploring at night – Visiblity is low, predators (especially Stalkers) are more aggressive. Sleep in your pod or base if you have a bed.
3. Not building a Compass – You’ll get hopelessly lost. The sea is featureless; a compass is essential.
4. Ignoring oxygen management – Always watch your O₂. Surface air pockets (like in caves with gas) can refill momentarily, but don’t rely on them.
5. Hoarding resources in the lifepod – The pod has limited storage (only ~4 lockers). Build a base with more lockers as soon as possible.
6. Underestimating the Seaglide’s battery – It drains fast. Carry a spare battery or build a Battery Charger in your base.
7. Swimming into the Kelp Forest without a knife – Stalkers can steal your items if you’re not careful. But you can dodge them.
8. Trying to build a base too far from resources – Start in the Safe Shallows or near the border of Kelp Forest; later expand.
9. Not scanning fish and flora – Scanning gives you clues about their abilities and sometimes unlocks crafting recipes.
10. Ignoring the “Food poisoning” from raw fish – Always cook fish. Or eat the prepackaged food bars found in life pods.
---
Day‑One Checklist
Use this checklist to ensure you’ve completed the critical steps on your first play session (roughly 1–2 hours).
- [ ] 1. Exit lifepod, swim to surface, observe surroundings.
- [ ] 2. Craft Survival Knife (1x Silicone Rubber + 1x Titanium).
- [ ] 3. Craft Repair Tool (1x Silicone Rubber + 1x Cave Sulfur + 1x Titanium).
- [ ] 4. Repair the Radio inside the lifepod.
- [ ] 5. Craft Filtered Water (2x Bleach, each bleach = 1 Salt + 1 Coral Tube Sample) – make at least 2 bottles.
- [ ] 6. Catch and cook 3–5 fish (use knife on a Peeper or Boomeerang, then cook in Fabricator).
- [ ] 7. Gather at least 4 Titanium, 2 Copper, 2 Quartz, 1 Salt, 2 Coral Tube Samples, 1 Creepvine Seed Cluster (for Silicone Rubber).
- [ ] 8. Find and scan the Seaglide fragments (look for the large wreck in Safe Shallows, near the surface, direction of the Aurora’s side). You need 3 fragments.
- [ ] 9. Once you have Seaglide blueprint, craft it (1x Battery + 1x Wiring Kit + 1x Lubricant + 1x Titanium).
- [ ] 10. Scan the Compass fragment (same wreck, on a shelf). Craft it (1x Copper + 1x Wiring Kit).
- [ ] 11. Build a Habitat Builder (1x Wiring Kit + 1x Computer Chip + 1x Battery). If you don’t have the blueprint, search small wrecks in Safe Shallows.
- [ ] 12. Construct a small base: 1× I‑compartment, 1× Solar Panel (2x Titanium + 2x Quartz + 1x Wiring Kit), 1× Fabricator, 2–3 Lockers.
- [ ] 13. Craft a Basic Oxygen Tank (2x Titanium + 1x Silicone Rubber) – this gives +30s O₂.
- [ ] 14. Save your game! (Pause menu → Save → confirm).
- [ ] 15. (Optional but recommended) Listen to first radio message – it will point to the Aurora and a nearby Life Pod 3. Investigate tomorrow.
- Save often! You can save at any time from the pause menu. The game does not autosave – only when you exit a base or reach certain checkpoints (very rare). A crash or death can cost you hours of progress.
- Stay calm when attacked. Most early predators (Stalkers, Sand Sharks) can be out‑swam if you stay at a moderate depth. The Seaglide is faster than they are.
- Learn the map using landmarks – the Aurora is a huge point of reference. The large coral arches mark the edge of biomes.
- Resource respawn – Most outcrops and fish respawn after a few minutes. But metal salvage does NOT respawn; eventually you’ll need to go deeper for more.
- Read the PDA entries – They give lore, tips, and sometimes location hints for new blueprints.
After this checklist, you’re well‑equipped to explore deeper biomes, start scanning the Seamoth, and begin unraveling the planet’s mystery.
---
Final Tips
Your adventure begins now. Good luck, survivor!