Game Tips
Game Tips
Beginner Tips
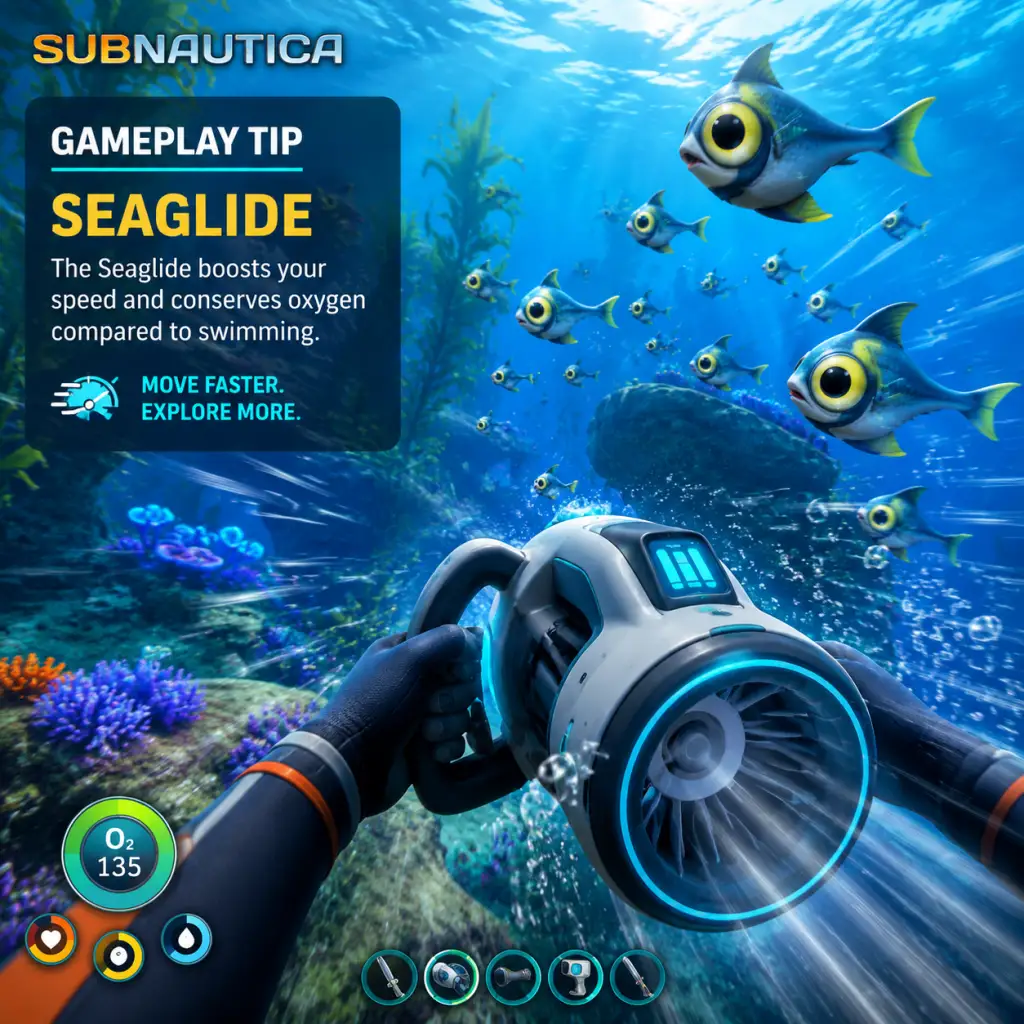
#### 1. Prioritize Building a Seaglide
- Tip: As soon as you can, craft a Seaglide (requires: Battery x1, Lubricant x1, Copper Wire x1, Titanium x1).
- Why it works: The Seaglide drastically increases your swimming speed, allowing you to escape predators, explore faster, and cover large distances without needing a vehicle. It also frees up inventory space by replacing the need for a high-capacity oxygen tank early on.
- When to use: Use it for all early exploration; keep it in your hotbar. Upgrade to the Seamoth later.
- Tip: Craft a Grav Trap (requires: Titanium x1, Battery x1) and deploy it near your Lifepod or base.
- Why it works: It attracts and holds fish, making food collection effortless. Small fish like Peepers and Boomerangs are drawn in, giving you a steady food source without hunting.
- When to use: Place it near a kelp forest or safe shallows; check it every few minutes. Relocate as you move your base.
- Tip: Keep both a Survival Knife (Titanium x3) and a Scanner (Titanium x1, Copper Wire x1) in your inventory at all times.
- Why it works: The knife is essential for defending against small predators (like Crashfish) and harvesting plants. The scanner lets you scan fragments, creatures, and flora to unlock blueprints and learn lore. Without them, progress halts.
- When to use: Scan everything you see. Knife for immediate threats and harvesting Creepvine samples.
- Tip: Initially, store excess resources in the Lifepod’s storage compartment and fabricator. Don’t build a full base until you have a reliable source of power and materials.
- Why it works: The Lifepod provides a safe point with fabricator, storage, and radio. You can survive with it for the first few hours, saving time and resources.
- When to use: Use until you have a Seamoth and enough titanium for a small multipurpose room with a solar panel.
- Tip: Always keep an eye on your oxygen meter and never let it drop below 15 seconds before heading upward. Use the Seaglide’s speed to surface quickly if needed.
- Why it works: Drowning is the most common death for beginners. The Seaglide doubles as an emergency ascent tool. Also, craft a High Capacity O2 Tank (requires: Standard O2 Tank x2) as soon as possible to double your dive time.
- When to use: Always check oxygen before entering caves or wrecks. Carry a spare O2 tank in inventory to swap when one runs out (advanced tip).
- Tip: Craft several Beacons (requires: Copper Ore x1, Cave Sulfur x1, Titanium x1) and place them at key locations: wrecks, entrances to biomes, resource caches, and alien structures. Color-code them for clarity (e.g., red for dangerous, green for safe resource spots).
- Why it works: Subnautica has no map, so beacons act as your personal GPS. They help you navigate back to important spots and avoid getting lost in deep, dark areas.
- When to use: Deploy a beacon at every wreck you find, at the entrance to the Jellyshroom Caves, at the Lost River entrance, and near your base.
- Tip: When piloting the Seamoth, always stay at least 20 meters above the seafloor to avoid sudden ambushes from sand sharks or bonesharks. Use the perimeter defense upgrade (crafted from modification station) to deter or kill aggressive creatures.
- Why it works: The Seamoth is fragile; a few bites from a Reaper Leviathan can destroy it. The perimeter defense system emits a shock that makes creatures flee, giving you time to escape.
- When to use: Use the defense module whenever you hear a roar or see a large creature approaching. Also, never venture into the Dunes or Mountains without it.
- Tip: Construct a Scanner Room (requires: Titanium x5, Copper Ore x2, Gold x1, Computer Chip x1) as soon as you have stable power. Add range upgrades and a HUD chip if possible.
- Why it works: The Scanner Room can locate specific resources (e.g., Lithium, Silver, Quartz) within a radius, revealing them as icons on your screen. This saves hours of manual searching. It also can scan for fragments, creatures, and wrecks.
- When to use: Place it in central locations near multiple biomes (e.g., at the border of Safe Shallows and Kelp Forest). Use it to find rare materials like Magnetite or Nickel Ore.
- Tip: When building a base in areas with geothermal activity (e.g., Jellyshroom Caves, Lost River, Lava Zones), use Thermal Plants (requires: Titanium x5, Magnetite x2, Aerogel x2) instead of nuclear or bioreactors. They provide infinite power with no maintenance.
- Why it works: Deep biomes lack solar light, making solar panels useless. Thermal plants convert heat from vents or lava into energy, and they work 24/7. You can place multiple for more power.
- When to use: Any base below 200 meters should rely on thermal power. Also, build a Thermal Plant near a vent and connect it via power transmitters to your base.
- Tip: Build an Alien Containment unit (requires: Titanium x2, Glass x2) inside your base and place two of the same fish species (e.g., Reginalds or Peepers) inside. They will breed, producing infinite food.
- Why it works: Instead of hunting, you can harvest fish whenever needed. Reginalds are the best for food (high caloric value). Also, you can breed Cuddlefish (if you find eggs) for eggs or companions.
- When to use: Start a farming operation before venturing into deep biomes where food is scarce. Also, use the containment to hatch rare creature eggs (e.g., Crabsquid, Ampeel) for scanner data.
- Tip: Memorize the high-yield locations: the Lost River has abundant Nickel and Uraninite Crystals; the Lava Lakes yield Kyanite and large deposits of Magnetite; the Grand Reef has deep Lithium and Diamond deposits. Use a Cyclops with a Prawn Suit docked to gather large amounts quickly.
- Why it works: Endgame crafting (Prawn Suit upgrades, Cyclops upgrades, Ion Cubes) requires large quantities of these rare materials. Systematically clearing a zone saves multiple trips.
- When to use: Before building the Neptune Rocket, you’ll need immense resources (e.g., 12 Kyanite, 8 Aerogel, 4 Plasteel Ingots). Plan a route: Lost River → Inactive Lava Zone → Lava Lakes. Bring a Prawn Suit with a drill arm and a grappling arm.
- Tip: Fully upgrade your Cyclops with power efficiency modules, engine efficiency, sonar, and shield generator. Stock it with lockers, a fabricator, and a bed. Treat it as your moving base for deep exploration.
- Why it works: The Cyclops can go anywhere (except Blood Kelp Caves) and stores your entire operation. The shield generator protects against leviathans (but drains power fast). The sonar helps navigate dark caves. You can sleep to skip night cycles.
- When to use: Move your Cyclops to the edge of each major biome and use the Prawn Suit to explore beyond. Always keep spare power cells and materials for repairs.
- Tip: Equip your Cyclops with at least one Thermal Reactor Module (requires: Kyanite x1, Advanced Wiring Kit x1) to recharge power cells when near heat sources. Combine that with the Engine Efficiency Module to reduce fuel consumption.
- Why it works: Deep biomes have many vents and lava flows; the thermal reactor converts heat into power, essentially giving you infinite energy. The efficiency module halves power usage for silent running and speed.
- When to use: When navigating the Lava Zones, enable silent running near leviathans and slow speed to avoid aggro; the thermal reactor will keep your batteries full. Always carry a spare power cell charger in your base.
- Tip: In the Prawn Suit, use the Grappling Arm to pull yourself across massive distances (like Spider-Man) and the Drill Arm to harvest large resource deposits. The Prawn Suit can also jump up vertical walls with the grappling arm.
- Why it works: The grapple allows you to traverse deep pits and caves quickly. The drill extracts huge amounts of ore (e.g., 10+ titanium from a single deposit). Together, they make you a resource gathering machine.
- When to use: Always keep the grapple arm in your hotbar. Use it to escape leviathans by grappling to a wall and jumping away. Drill every large deposit you see - especially in the Lost River (Uraninite, Nickel) and Lava Lakes (Kyanite).
- Tip: Craft a Stasis Rifle (requires: Battery x3, Wiring Kit x1, Computer Chip x1, Diamond x1) and a Thermoblade (Survival Knife + Battery + Diamond + Coral Sample). When you encounter a Reaper or Ghost Leviathan, fire the Stasis Rifle to freeze it in place (charge shot for longer freeze), then swim up and attack with the Thermoblade. It takes many hits but you can kill leviathans for practice or to clear an area.
- Why it works: The Stasis Rifle immobilizes creatures for up to 30 seconds (fully charged). The Thermoblade deals 8 damage per hit, but has a faster swing than normal. Combined, you can dispatch even the strongest enemies safely. Note: This is not required to finish the game, but it helps if you’re terrified of Leviathans.
- When to use: Use only if you want to remove a persistent threat (e.g., a Reaper blocking a wreck entrance). Otherwise, avoid killing—they respawn eventually and it wastes time.
- Tip: As soon as you get a Radiation Suit and a Seaglide, head to the Aurora. Bring a Laser Cutter and a Propulsion Cannon. Enter through the breach on the left side, clear the radiation zone, and head to the Seamoth bay (second floor left of the entrance). There you’ll find a Seamoth upgrade console fragment and Prawn Suit fragments.
- Why it works: Completing the Aurora early gives you access to Seamoth depth modules (MK1/MK2) and Prawn Suit blueprints, which are key for mid-game progression. The Aurora is also rich in batteries, medkits, and food.
- When to use: Go after receiving the radio call about the Aurora explosion (after day 2). Bring a fire extinguisher and medkits.
- Tip: Every piece of scrap metal you find (like from wrecked parts) can be processed into 4 Titanium at the Fabricator. Always collect it - titanium is the most used resource for base building, foundations, and bulkheads.
- Why it works: Titanium is required for almost everything: base rooms, vehicles, tools, lockers. Ocean floors are filled with scrap metal, especially in the Kelp Forest and Safe Shallows. One stack of scrap (10) gives 40 titanium.
- When to use: Always pick up scrap metal, even if you have titanium. Convert it only when you need space or titanium. Store extra in lockers.
- Tip: If you don’t have thermal power or nuclear, build a Bioreactor (requires: Titanium x3, Wiring Kit x1, Lubricant x1) and fill it with quick-burning organic matter: Reginald fish (best: 630 energy per), Bulbo Tree samples (420), or Gel Sack (420). Avoid using Creepvine seed clusters or acid mushrooms as they yield less.
- Why it works: The Bioreactor provides steady power as long as you feed it. It’s better than solar in darker zones and requires less rare materials than nuclear. Keep a small farm of Bulbo Trees or Reginalds nearby to provide fuel.
- When to use: Use as a primary power source in mid-game bases (e.g., in the Lost River) before you get thermal technology.
- Tip: Both Bleach (Salt x2 + Coral Tube Sample x2) and Disinfected Water (filtered water) produce 30 water units. But Bleach is easier to make because Coral Tube Samples are abundant in Safe Shallows, and Salt can be found in the Blood Kelp Zone or via a Salt deposit. The standard Water Filtration Machine produces 6 water per 10 minutes but consumes power; it’s only useful in larger bases.
- Why it works: Early game, you often have a shortage of water. Using Bleach (requires a Fabricator) is much cheaper than building a filtration machine. You can produce several bottles quickly.
- When to use: Always craft Bleach water before exploring. Late game, use the Water Filtration Machine for passive water while at base.
- Tip: The Habitat Builder can deconstruct any base piece or furniture you built, returning all (or most) materials. This allows you to relocate bases without losing resources. Also, you can deconstruct a base’s power source and other modules to rebuild elsewhere.
- Why it works: Subnautica’s bases are portable if you’re willing to disassemble. This is crucial when moving from the Safe Shallows to a deeper, more strategic location.
- When to use: Before abandoning a base, deconstruct everything to get your materials back. Build foundations only when necessary because they consume a lot of titanium and cannot be placed on top of something else.
- Tip: Memorize the behavior of key creatures:
- Why it works: Knowing whether a creature will attack prevents panic. For example, Stalkers can be easily pacified by dropping a piece of metal salvage – they’ll pick it up and leave you alone for a while. Bonesharks can be avoided by not using lights in their zone.
- When to use: Before entering a new biome, listen for sounds. If you hear a Reaper roar, stop and retreat. Use the Seamoth perimeter defense against aggressive middling creatures.
- Tip: Find the Prawn Suit Jetpack Upgrade (fragment in the Jellyshroom Caves or Lost River) to boost your vertical mobility. It lets you jump much higher than the default, allowing you to climb up obstacles and escape deep pits.
- Why it works: The Prawn Suit on its own can only jump a few feet; with the jetpack, you can reach heights needed to exit the Inactive Lava Zone or climb walls in the Lost River.
- When to use: Equip it immediately when you get the Prawn Suit. Vital for exploring the deep biomes where exits are often high above.
- Save often! The game does not autosave. Manually save before entering dangerous zones or wrecks.
- Read the PDA entries – they contain lore but also hints about where to go next.
- Pay attention to radio calls; they lead to lifepods with important blueprints.
- Upgrade your Seamoth depth module before venturing deep; it’s found in the Aurora or built at a Modification Station.
- Always keep a spare oxygen tank in your inventory for emergencies; swap it out when your primary runs low.
- Use the “flares” (beacons) to mark your Cyclops location when you leave it on silent running.
- The game’s story is linear but open-ended: the Sunbeam event, the alien bases, and the primary containment facility are all reachable with enough depth upgrades.
- Building a large room can hold two floors of lockers – ideal for massive storage.
- Finally, never go into the Dunes without a Cyclops and perimeter defense. That place is a Reaper playground.
#### 2. Build a Grav Trap
#### 3. Always Carry a Knife and a Scanner
#### 4. Use the Lifepod as a Temporary Base
#### 5. Manage Your Oxygen Carefully
Intermediate Strategies
#### 6. Use Beacons to Mark Points of Interest
#### 7. Master the Seamoth Perimeters
#### 8. Build a Scanner Room
#### 9. Utilize Thermal Power in Deep Biomes
#### 10. Farm Your Own Food with an Alien Containment
Advanced Optimizations / Endgame Tips
#### 11. Efficient Resource Routes for Endgame Materials
#### 12. Use the Cyclops as a Mobile Base
#### 13. Optimize Power Management for Deep Operations
#### 14. Master the Prawn Suit Grappling & Drill Combo
#### 15. Secret Trick: Use the Stasis Rifle + Thermoblade for Leviathan Hunting
#### 16. Speedrun the Aurora Seamoth Bay
Economy & Resource Management
#### 17. Never Throw Away Scrap Metal
#### 18. Use the Bioreactor for Sustainable Power
#### 19. Craft Water Efficiently: Bleach vs. Disinfected Water
#### 20. Use the Habitat Builder to Deconstruct Unwanted Structures
Combat & Creature Behavior
#### 21. Know Which Creatures Are Passive vs. Aggressive
- Passive: Peepers, Boomerangs, Hoverfish, Reginalds, Cuddlefish.
- Aggressive: Stalkers (can be distracted with metal salvage), Sand Sharks (lay on the bottom), Bonesharks (attracted to vehicles), Crashfish (stay away from sulfur plants), Amp eels (discharge if you touch).
- Leviathan-class: Reaper (roars, extremely dangerous), Ghost (area damage), Sea Dragon (ranged fireballs).
#### 22. Use the Prawn Suit’s Jetpack Upgrade for Vertical Mobility