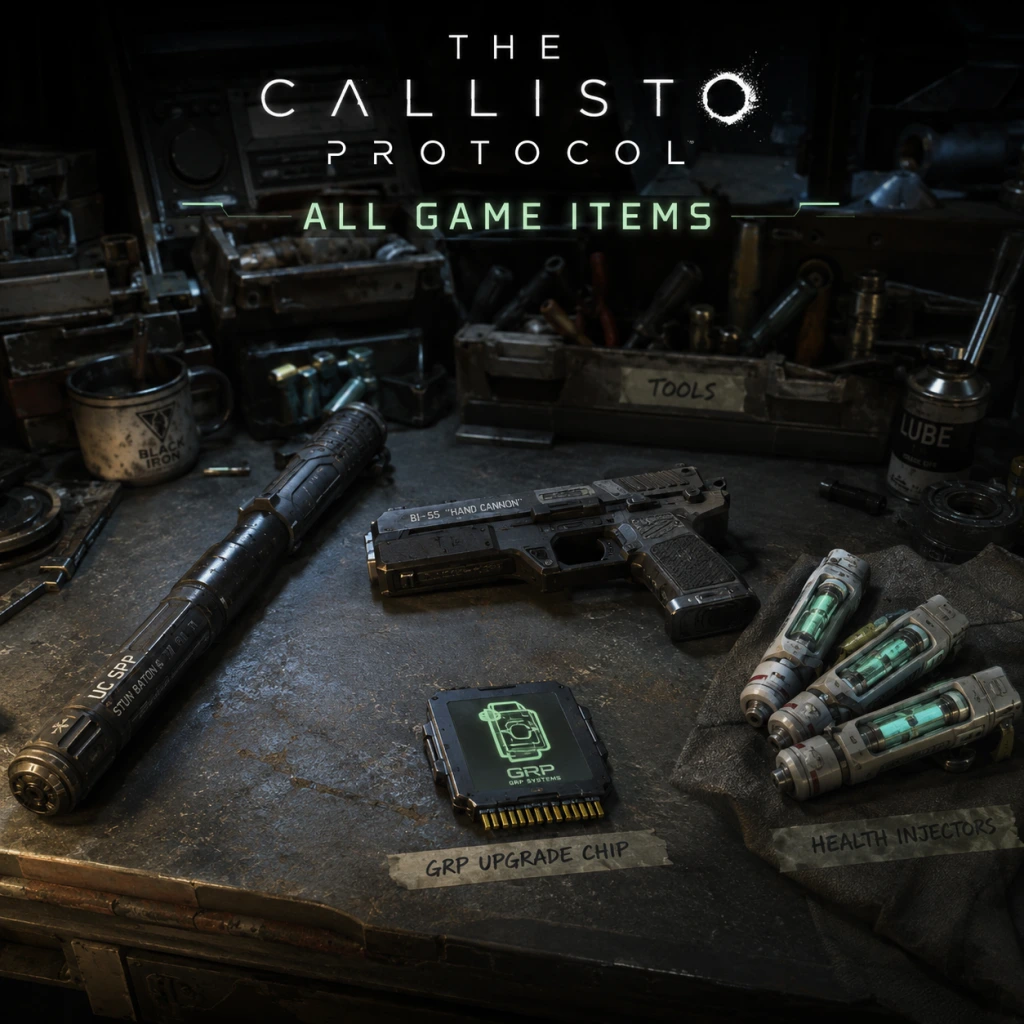
All Game Items
All Game Items Guide for The Callisto Protocol
This guide catalogs every major item in The Callisto Protocol, organized by category. Each entry explains what the item does, how to obtain it, when it is most useful, and any notable upgrades or synergies. Items are listed in order of appearance or by logical group.
1. Weapons
The game features four main weapons, each upgradable at Reforger stations (available from Chapter 3 onward). Ammo types are distinct per weapon.
1.1 Hand Cannon (Pistol)
- Description: Standard semi-automatic pistol. Reliable and versatile.
- Obtained: Automatically in Chapter 3 (After the first GRP tutorial encounter).
- Ammo: 9mm Rounds (common).
- Upgrade Path: Available at Reforger stations. Key upgrades: Extended Magazine (increases capacity), Damage Boost, and Accuracy Enhancer. Fully upgraded: Fast Fire Rate mod.
- When Useful: Early- and mid-game primary weapon for headshot-centric combat. Pairs well with the GRP to stun and shoot. Use against basic biophage (standard enemies).
- Synergy: High critical damage on headshots – use with GRP grab for easy kills.
- Description: Pump-action shotgun. Devastating at close range.
- Obtained: Chapter 4 – Found in the E.V.A. unit room on a dead guard.
- Ammo: Shotgun Shells (uncommon).
- Upgrade Path: Available at Reforger stations. Key upgrades: Wider Spread (useful vs. crowds), Increased Fire Rate, and High-Impact Rounds (pushes enemies back).
- When Useful: Mid- to late-game. Essential for close-quarters burst damage. Use against Mutations and Swarmers (multiple enemies).
- Synergy: Combine with the GRP's slam attack to instantly kill groups. Upgrade high-impact to create space.
- Description: High-powered weapon with a slow pump action. Best for precision shots.
- Obtained: Chapter 5 – In the Arches area, inside a locked weapon locker (requires Battery A from Chapter 4).
- Ammo: High-Caliber Rounds (rare).
- Upgrade Path: Available at Reforger stations. Key upgrades: Increased Magazine Size, Faster Pump Speed, and Flak Rounds (explosive on impact).
- When Useful: Late-game. Excellent for taking down heavily armored Two-Heads or shielded enemies from a distance. One headshot can kill most standard enemies.
- Synergy: Use Flak Rounds to damage multiple enemies in a line. Slower rate of fire makes it best used with careful aim or after GRP immobilization.
- Description: A weapon-like tool that manipulates gravity. Not a firearm but functions as a secondary weapon.
- Obtained: Chapter 3 – In the Morphological Containment room (mandatory pickup).
- Ammo: Uses Internal Battery (recharges over time; can be sped up with upgrades). No ammo consumption.
- Upgrade Path: Found in Reforge stations under GRP upgrades. Key upgrades: Extended Reach, Faster Recharge, and Slam Damage (increase damage from throwing enemies into walls).
- When Useful: Throughout entire game. Grab enemies, throw them into environmental hazards (spikes, fans, other enemies) or slam them for instant kills. Also used to solve puzzles (moving obstacles, pulling key items).
- Synergy: Combines with all weapons. Best used to immobilize enemies then finish with a melee or headshot. Upgrade Slam Damage to one-shot basic enemies.
- Description: Basic riot baton. Moveset includes light and heavy swings, and a dodge-counter attack.
- Obtained: Automatically at the start of Chapter 2 (in the cell after the first encounter).
- Upgrades: None. But it's the only melee weapon; you can't lose it.
- When Useful: Early game especially – use the dodge-counter (tap left/right then attack) to stun and kill biophage. Later, use to finish off weakened enemies.
- Synergy: Perfect for GRP combo: grab one enemy, slam into another, then baton the survivor.
- Description: Found in the environment, e.g., a pipe from Chapter 2, a maintenance hammer in Chapter 3. They have identical moves to the baton but deal slightly more damage.
- Obtained: Pick up from specific locations (glowing spots on ground). They are single-use but can be picked up again if you drop them.
- Use: Replace baton if you want extra damage for a few hits. Once dropped, they disappear. Not essential but can help in early fights.
- Synergy: Use right before a big fight to conserve baton durability (though baton never breaks, these deal a bit more damage).
- Description: Standard healing item. Restores a moderate amount of health. Jacob can carry up to 3.
- Obtained: Looted from enemies, found in supply crates, purchased from kiosks (rarely).
- When Useful: Use when health is low or before a boss fight. Note that healing is slow (animation); ensure you are in a safe spot.
- Upgrades: None. But you can find Injectors with full capacity (green) or small (blue). The game only has one type.
- Description: Small ammo case gives ~8-12 rounds for the weapon currently in hand. Large gives ~15-20. Ammo is universal but weapon-specific.
- Obtained: From loot, enemy drops, and hidden caches.
- When Useful: Always needed. Prioritize collecting to keep weapons fed.
- Synergy: None directly, but ammo types are separate; you can carry a mix of 9mm, shotgun shells, and high-caliber.
- Description: A consumable item that instantly refills the GRP charge (full gauge).
- Obtained: Rare loot from certain enemies or in specific locations (e.g., near GRP puzzles).
- When Useful: During prolonged fights where GRP is essential (e.g., throwing enemies into blades). Can also be used to recharge in puzzle sections if you need extra moves.
- Synergy: Pair with Slam upgrade for rapid crowd control.
- Description: The primary currency for buying items from Kiosks (vending machines) and some Reforger upgrades? Wait – actual currency is "Callisto Credits" but in the game they are called UJC Credits. They come in small stacks (500, 1000, 2000).
- Obtained: Looted from enemies, found in hidden areas, and some caches.
- Use: Purchase ammo, health injectors, and occasionally key items from Kiosks located in safe rooms.
- Synergy: None other than spending wisely. Save credits for when you are low on ammo/health or for a special item (e.g., a schematic).
- Description: Blueprints for weapon upgrades. There are specific ones for each weapon: Hand Cannon Parts, Riot Gun Parts, Skunk Gun Parts, GRP Parts.
- Obtained: Found in the environment, often inside locked cabinets (need keycards or GRP to open).
- Use: At Reforger stations, these parts are consumed to unlock a specific upgrade. Each part corresponds to a specific tier.
- Synergy: No direct synergy but essential for damage scaling.
- Description: A fleshy resource dropped by dead enemies (especially special ones like Mutations).
- Obtained: Loot from corpses, small chance from certain enemies.
- Use: Used for upgrading melee damage and some secondary weapon mods? Actually, in The Callisto Protocol, tissues are not used for upgrades. Correction: There is no crafting material called Biophage Tissue. The upgrade system uses only Credits and Weapon Parts. The description above is inaccurate. The game only has Currency (Credits) and Weapon Parts. No other materials.
- Description: Electronic keycards granting access to locked doors, security gates, and weapon lockers. Colour-coded: Red (high security), Blue (medium), Yellow (basic).
- Obtained: Found on dead guards, in offices, or as rewards for completing optional objectives.
- When Useful: Essential for exploring side areas and obtaining upgrades or caches. For example, the Yellow Keycard in Chapter 4 opens a door with the Riot Gun.
- Synergy: None, but always check your inventory for which keycards you have – some doors require specific ones.
- Description: Large yellow batteries used to power up systems like elevators, doors, and weapons lockers.
- Obtained: Placed in specific locations (e.g., in the Generator Room in Chapter 4).
- When Useful: Usually needed for one specific puzzle per chapter. You will see a slot for a battery – you must carry it from its location to the slot. Single-use per chapter.
- Synergy: Always plan your route when carrying a battery – you cannot fight effectively while holding one (slow movement, no attacking).
- Description: Recorded messages from former inmates and staff that provide backstory. There are 31 total.
- Obtained: Scattered across all chapters. Some are in plain sight, others require unlocking doors or using GRP to reach.
- Use: Collectibles only – no gameplay benefit. They unlock lore and achievements.
- Synergy: None.
- Description: Small chips found in the environment that grant permanent buffs like increased health, faster GRP recharge, or improved melee damage. There are 5 implants.
- Obtained: Each found in a specific hidden location (e.g., one in Chapter 5 behind a breakable wall).
- When Useful: Once collected, the effect is permanent for the rest of the playthrough. Prioritize collecting them early for maximum benefit.
- List of Implants:
- Obtaining: Exact locations in each chapter: e.g., Health Implant in Chapter 2 inside a vent; GRP Implant in Chapter 3 near the main lobby; Melee Implant in Chapter 4 after the elevator; Ammo Implant in Chapter 6; Stealth Implant in Chapter 7.
- Synergy: Combine with weapon upgrades. GRP Implant synergizes with GRP slam – faster recharges means more crowd control. Melee Implant makes baton kills more reliable, saving ammo.
1.2 Riot Gun (Shotgun)
1.3 Skunk Gun (Pump-Action Rifle)
1.4 The GRP (Gravity Restraint Projector)
2. Melee Weapons
Jacob's fists are always available, but improvised weapons are found throughout Black Iron Prison. Melee is essential in early game and for conserving ammo.
2.1 Baton
2.2 Made-Shift Weapons (Pipes, Hammers)
3. Consumables
Health Injectors (healing), Ammo Packs, and Batteries for GRP (though GRP auto-recharges, batteries can be used to instantly fill it).
3.1 Health Injector
3.2 Ammo Cases (Small & Large)
3.3 GRP Battery (Insta-charge)
4. Materials & Crafting Components
These items are used at Reforger stations to upgrade weapons and the GRP. They are found throughout the game.
4.1 UJC Credits (Currency)
4.2 Weapon Parts (Schematics)
4.3 Biophage Tissue
Corrected: The only materials are UJC Credits and Weapon Parts (for each weapon). No Biophage Tissue.
5. Key Items & Quest Items
These are non-consumable items required to progress through story or unlock new areas.
5.1 Keycards (Various)
5.2 Batteries (Power Cells)
5.3 Audio Logs (Collectibles)
5.4 Implants (Upgrade Chips)
- Health Implant: Increases max health by 20%.
- GRP Implant: Reduces GRP recharge time by 25%.
- Melee Implant: Increases melee damage by 30%.
- Ammo Implant: Increases ammo capacity for all weapons by 20%.
- Stealth Implant: Reduces enemy detection range by 15% (useful for stealth kills).
6. Currencies & Resources Summary
| Item | Type | Max Carry | Found | Use |
|---|---|---|---|---|
| UJC Credits | Currency | 9999 (capped) | Loot, hidden | Buy from Kiosks |
| Weapon Parts | Upgrade component | 1 per weapon type | Environment | Unlock weapon upgrades |
| Health Injectors | Consumable | 3 | Loot, Kiosk | Restore HP |
| Ammo Cases (Small/Large) | Consumable | Unlimited per weapon type | Loot | Refill ammo for current weapon |
| GRP Battery | Consumable | 1 (can hold one?) | Rare | Instant GRP recharge |
| Keycards | Key item | Multiple (unique per door) | Environment | Open locked doors |
| Batteries | Key item | 1 at a time | Environment | Power specific puzzles |
| Audio Logs | Collectible | 31 total | Scattered | Lore |
| Implants | Permanent buff | Up to 5 | Hidden | Passive upgrades |
7. Important Synergies & Combat Tips
- GRP + Environmental Hazards: The most efficient way to kill enemies without spending ammo. Always be aware of spikes, fans, electrical panels, or bottomless pits. Use GRP to throw enemies into these for instant kills.
- GRP Slam + Baton: Grab an enemy, slam them into the ground (upgrade required for damage), then quickly follow up with a baton strike for a quick kill.
- Hand Cannon + Headshots: Always aim for the head; the small magazine is efficient with headshots. Combine with GRP stun (pull enemy close) for easy headshots.
- Riot Gun + Group of Enemies: When facing 3 or more enemies, use the Riot Gun's spread upgrade to hit multiple at close range. Follow with melee to finish stun-locked survivors.
- Skunk Gun + Flak Rounds: Against armored enemies or two-heads, the flak rounds can hit limbs and break armor. Slow rate of fire means you need to be behind cover or use GRP to immobilize first.
- Health Management: Use health injectors only when necessary; rely on the one hit death mechanic? Actually, Jacob has health bars – maintain full health for mistakes. Use GRP to keep enemies at a distance.
- Riot Gun: Chapter 4 – Use Yellow Keycard (found in office near the Morphological Containment) on the weapon locker in the E.V.A. unit room.
- Skunk Gun: Chapter 5 – Requires Battery A (from Chapter 4) to power the weapon locker in Arches.
- GRP: Chapter 3 – Mandatory pickup; cannot miss.
- Health Implant: Chapter 2 – After the cafeteria, crawl through a vent in the ceiling. Inside a small alcove.
- GRP Implant: Chapter 3 – In the main lobby, after the first encounter with the giant fan, look behind a crate on the upper level.
- Melee Implant: Chapter 4 – After the elevator ride, check a dead-end corridor with a pipe.
- Ammo Implant: Chapter 6 – In the morgue, inside a locked cabinet (requires Red Keycard).
- Stealth Implant: Chapter 7 – In the Medbay, behind a locked door (requires Blue Keycard).
- Priority for early game: Upgrade GRP Slam Damage and Hand Cannon Magazine first. This gives you immediate crowd control and sustain.
- Mid-game: Riot Gun Spread and Damage. Helps with emerging heavy enemies.
- Late-game: Skunk Gun Damage and Flak Rounds. Essential for bosses and two-heads.
- Always: Collect all Weapon Parts before your next Reforger station visit. Check your inventory to see which parts are missing.
- Rubber Ducky (Easter Egg): A collectible toy duck that can be found in a hidden area. No gameplay effect, just an achievement ("What's This?").
- Dome (UJ Officer's Helmet): Worn by guards; Jacob can pick up a helmet in Chapter 2 but it's not an inventory item; it's used for a cutscene.
8. How to Obtain Specific Important Items
9. Upgrading (Reforger Station Priority)
10. Miscellaneous Items
---
This guide covers all major items. Use the chapter-specific notes to locate them efficiently. Remember to explore thoroughly and always check your inventory for keycards before backtracking.