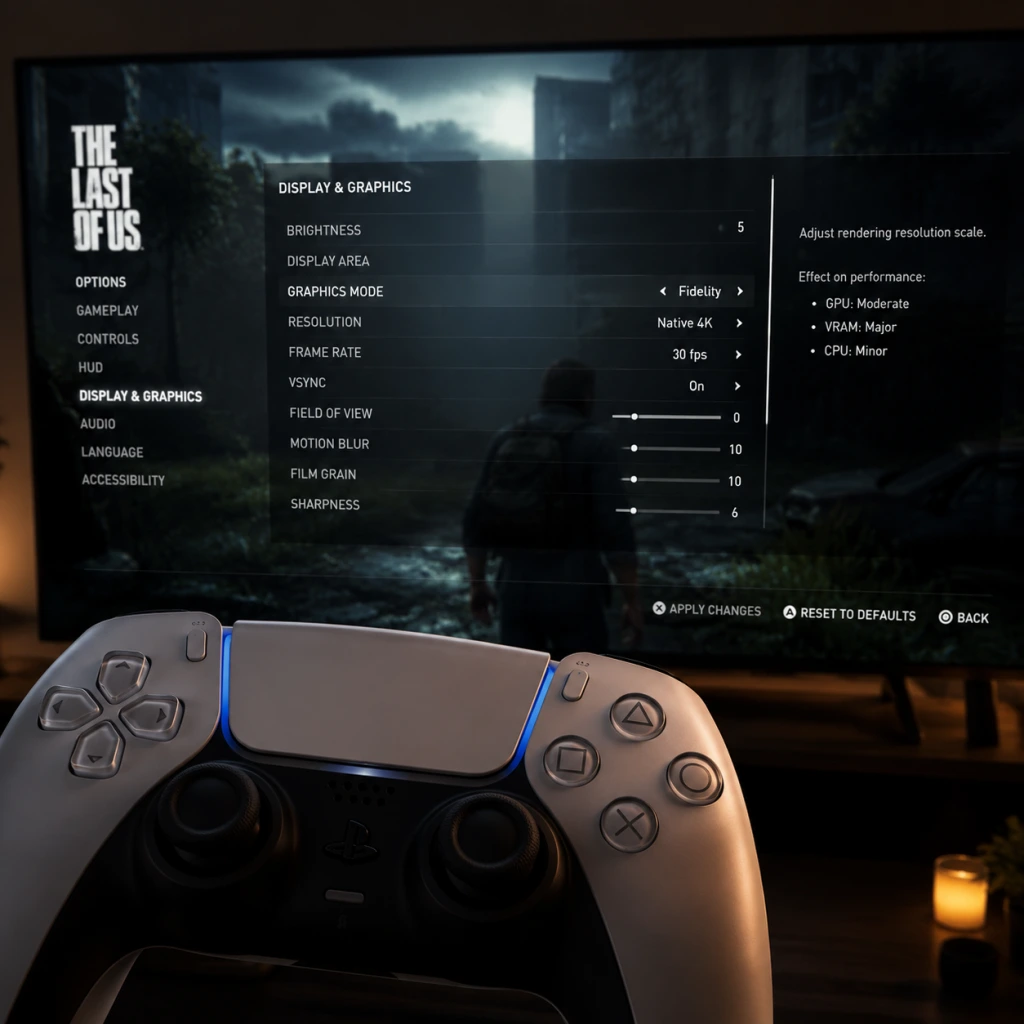
Game Settings
Game Settings for The Last of Us
This guide covers in-game settings for The Last of Us Part I (PS5 and PC) and The Last of Us Part II Remastered (PS5). Settings are divided into key categories. Optimal recommendations balance visual quality, performance, and personal preference. Settings that are easy to misconfigure are marked with ⚠️.
---
1. Graphics Settings
The Last of Us Part I (PC)
The PC version offers extensive graphics options. Use the recommended table below as a baseline. Adjust based on your specific hardware.
| Setting | Low (4GB VRAM) | Medium (6GB VRAM) | High (8GB VRAM) | Ultra (10GB+) | Notes |
|---|---|---|---|---|---|
| Texture Quality | Low | Medium | High | Ultra | ⚠️ VRAM hog. Reduce if stuttering occurs. |
| Texture Filtering | 2x | 4x | 8x | 16x | Little performance impact, set to Ultra if possible. |
| Shadow Quality | Low | Medium | High | Ultra | Medium hides detail but saves performance. |
| Ambient Occlusion | Off | SSAO | HBAO+ | HBAO+ | High impact on immersion, low performance cost on HBAO+. |
| Reflections | Off | Static | SSR (low) | SSR (high) | SSR high is costly. Use Static for solid framerate. |
| Volumetric Quality | Low | Medium | High | Ultra | Heavy in forests; set to Medium on mid-range. |
| Depth of Field | Off | On | On | On | Off improves clarity and reduces load. |
| Motion Blur | Off | Off | Off | Off | ⚠️ Turn off for sharper image and less nausea. |
| Chromatic Aberration | Off | Off | Off | Off | ⚠️ Turn off – adds visual noise with no performance gain. |
| Film Grain | Off | Off | Off | Off | Off for cleaner image. |
| Dynamic Resolution Scaling | Off | On (target 60fps) | Off | Off | Useful for stable framerate on weaker GPUs. |
| Upscaling | DLSS (Quality) or FSR (Quality) | DLSS/FSR Balanced | DLSS Quality | Off / DLAA | ⚠️ DLSS can add ghosting; FSR may cause shimmer. Test each. |
| VSync | Off (use G-Sync/Freesync) | Off | Off | Off | ⚠️ Off reduces input lag if you have adaptive sync. |
| Frame Rate Cap | 60 | 60 | 120 (if monitor) | 120/144 | Cap at monitor refresh for consistency. |
| Field of View (FOV) | Default (70) | Default | Default | Slight increase (75-80) | ⚠️ Too high may distort edges; keep modest. |
- Upscaling: DLSS (NVIDIA) and FSR (AMD/Intel) are great for performance. For best image quality, use DLSS Quality or DLAA if you have headroom. FSR may introduce aliasing; try FSR Native AA in part I.
- Motion Blur & Chromatic Aberration: These are aesthetic effects many players find distracting. Disabling them often improves perceived clarity without performance penalty.
- VRAM Management: Texture Quality heavily affects VRAM usage. If you experience stuttering, drop textures one tier. The game can crash if VRAM is exceeded.
- CPU Bottlenecks: The PC port is CPU-intensive in crowded areas. Lowering Ambient Occlusion and Volumetric Quality can help.
The Last of Us Part I (PS5)
The PS5 version offers two visual modes:
| Mode | Resolution | Target Framerate | Notes |
|---|---|---|---|
| Fidelity | 4K (2160p) | 30 fps | Highest visual quality; shadows, reflections, and draw distance are maxed. |
| Performance | 1440p (upscaled to 4K) | 60 fps | Smoother gameplay; slight drop in shadow/reflection quality. |
- Recommendation: For a first playthrough, Performance mode is strongly recommended for responsive combat. Use Fidelity if you prefer eye candy and don’t mind 30 fps.
- VRR Support: If your TV supports Variable Refresh Rate (e.g., HDMI 2.1), both modes run with a slightly unlocked framerate (Fidelity ~40-60 fps, Performance ~60-90 fps). Enable VRR in PS5 system settings for smoother motion.
The Last of Us Part II Remastered (PS5)
| Mode | Resolution | Target Framerate | Notes |
|---|---|---|---|
| Fidelity | 4K (1440p upscaled) | 30 fps | Best graphics; uses higher quality asset streaming. |
| Performance | 1440p | 60 fps | Smoother; minor texture pop-in. |
| 120 Hz Output + Fidelity | 1440p (upscaled to 4K) | 40 fps | Requires 120Hz display; a nice middle ground – 40 fps feels smoother than 30. |
| 120 Hz Output + Performance | 1440p | 60-120 fps | Unlocked framerate between 60-120. Best for responsive play. |
- Recommendation: If you have a 120Hz TV, enable 120 Hz Output in PS5 settings and select the Performance mode for the smoothest experience. Otherwise, use Performance for 60 fps.
- Note: The 120 Hz modes require HDCP 2.3 and a high-speed HDMI 2.1 cable; ensure both are met.
---
2. Audio Settings
General Audio
| Setting | Recommendation | Explanation |
|---|---|---|
| Master Volume | 70-80% | Avoid distortion. Lower if you use headphones. |
| SFX Volume | 100% | Essential for hearing enemy footsteps and clickers. |
| Music Volume | 80% | Atmos background but reduce if it masks critical sounds. |
| Dialogue Volume | 100% | Critical for story immersion. |
| Voice Language | Original English or language of choice | The performances are iconic; original cast is recommended. |
| Subtitles | On | Helps follow story in loud environments. Can be toggled in Accessibility. |
3D Audio (PS5 only)
- 3D Audio (Tempest 3D AudioTech): Available for headphones. Enables spatial audio (height, distance). For Part II Remastered, it’s particularly effective for directional threats like clicker sounds.
- Speaker vs Headphones: If using a surround sound system, set 3D Audio to Off to avoid processing conflicts. For headphones, set to On.
- ⚠️ Misconfiguration: Using 3D Audio with stereo TV speakers can cause muffled or hollow sound. Always match 3D Audio to your output device.
Audio Presets (Part II Remastered)
Part II Remastered includes a Dynamic Audio option that adjusts background music based on tension. Keep Dynamic enabled for a cinematic experience.
---
3. Controls Settings
Button Mapping
Both games allow full button remapping (PS5: System-level remapping or in-game; PC: in-game).
| Setting | Default | Alternative | Recommendation |
|---|---|---|---|
| Sprint | R1 (PS5) / Shift (PC) | L3 (click left stick) | ⚠️ Hold R1 for sprint is easier on thumbs; avoid L3 to prevent joystick drift. Keep R1. |
| Crouch | Circle (Hold) | R3 (click right stick) | Holding circle can be awkward during combat. If you prefer toggle, change to Circle (Toggle). |
| Listen Mode | R1 (Hold) | L2 or R2 | Prevent accidental activation; L2 as an alternative is comfortable. |
| Melee | Square | R2 (right trigger) | Some find square awkward; remap to R2 for faster reaction. |
Controller Settings (DualSense)
| Setting | Default | Recommended | Notes |
|---|---|---|---|
| Vibration Intensity | 100% | 70% | High vibration can drain battery and be distracting. |
| Trigger Effect (Adaptive Triggers) | On | On (for immersion) or Off (for faster shooting) | Adaptive triggers simulate gun resistance; turn off if you need faster trigger pulls. |
| Gyro Aiming | Off | Off (unless you prefer) | Available in Part II Remastered (No Return mode). Can improve aim, but takes practice. |
PC-Specific Controls
- Mouse Sensitivity: Start at 4 (on a scale of 1-10) and adjust. Lower for sniping, higher for quick turns.
- Aim Down Sights Sensitivity: 0.6-0.8 times hipfire sensitivity for precision.
- Key Bindings: The default bindings are fine, but consider mapping Listen Mode to a side mouse button for easier access.
---
4. Accessibility Settings
Both games are praised for extensive accessibility options. These are located under Options > Accessibility.
Visual Aids
| Setting | Recommendation | Purpose |
|---|---|---|
| High Contrast Display | Off (or On for visibility) | Enables high-contrast outlines for enemies/objects. Useful in dark areas. |
| Large Subtitles | On if needed | Increases subtitle size for readability. |
| Text Size | Adjust to preference | Separate from subtitles; affects menu text. |
| Screen Reader | On for visually impaired | Reads menus aloud. Works with system TTS. |
| Motion Blur Reduction | On | Reduces dizziness; same as turning off Motion Blur in Graphics. |
| Color Blind Modes | Off (choose variant if needed) | Deuteranopia, Protanopia, Tritanopia filters. |
Hearing & Audio Aids
| Setting | Recommendation |
|---|---|
| Subtitles | On. Enable Subtitles for Combat Dialogue to see enemy callouts. |
| Visual Cues for Collectibles | On – shows a subtle ping for items. |
| Sound Indicator | On – visual arrow points to direction of enemy sounds. |
| Chat to Text | Not applicable (no multiplayer). |
Gameplay Accessibility
| Setting | Recommendation | Explanation |
|---|---|---|
| Auto Pickup | Off (default) vs On | Manual pickup gives control; auto pickup can grab unwanted items. |
| Auto Lock-on (Aim Assist) | Off (for skill) or Medium (for help) | Aim assist strength slider: Off (hardcore), Medium (balanced), Strong (casual). |
| Invert X/Y Axis | Off unless you prefer. | Common for flight games, less so for third-person. |
| Toggle vs Hold | Choose for sprint, crouch, listen mode. | Hold is more intuitive but tiring. Toggle is easier on fingers. |
| Rapid Tap | Part II: On/Off | Allows rapid melee attacks by tapping; keep On for combat. |
| Enemy Awareness Indicator | On | A small icon shows when an enemy detects you (stealth games). Useful for beginners. |
| No Return (Part II) - God Mode | Off | For infinite health; only for challenge runs. |
---
5. Language Settings
| Setting | Options | Recommendation |
|---|---|---|
| Voice Language | English, French, German, Italian, Spanish, Japanese, etc. | Choose your preferred language. The English performances are outstanding. |
| Subtitle Language | Same as voice or separate | Set to match voice or your native language. |
| Menu Language | System language | Usually auto-detected; can be changed in game’s options (Part II). |
- Note: Part II Remastered supports Language Packs that can be installed separately (e.g., Japanese audio) via the PS5 settings. Ensure the pack is downloaded before selecting.
- Online Features: Enables automatic syncing of trophies, leaderboards for No Return (Part II), and photo mode sharing. Always keep On for latest updates.
- Automatic Updates: System-level. Ensure ‘Auto-Update’ is enabled in console/PC settings to receive patches.
- Data Transfer (Part I PC): None specific.
- Cross-Platform Saves: Not supported.
- Very Light (easiest) – generous resources, enemy visibility low, listening mode unlimited.
- Light
- Moderate (default)
- Hard
- Survivor – scarce resources, enemies more perceptive.
- Grounded – toughest; no listen mode, minimal HUD, very scarce supplies.
- Custom – allows per-category adjustment.
---
6. Network Settings
These games have no traditional multiplayer. Network options are limited to:
⚠️ Misconfiguration: Turning off Network Features in the PS5 system settings may block trophy sync and prevent cloud save usage. Keep them enabled unless you play offline exclusively.
---
7. Gameplay Settings
Difficulty Settings
Both games offer multiple difficulty sliders that can be customized independently:
Preset Difficulties:
Custom Settings Categories (Part I & II):
| Category | Settings | Effect |
|---|---|---|
| Player Damage | Very Light – Grounded | How much damage you take. Lower = more forgiving. |
| Enemy Damage | Very Light – Grounded | How resilient enemies are. Lower = they die faster. |
| Resources | Very Light – Grounded | Amount of ammo and supplies in the world. |
| Stealth | Very Light – Grounded | Enemy awareness and ability to lose them. |
| Listen Mode | Off / On (with speed/range options) | Enemies highlighted through walls. Can be fully disabled for challenge. |
| Aim Assist | Off – Strong | Crosshair magnetism. |
| Navigation Assistance | Off / Minimal / Full | Shows path to objective markers. |
- Part I: Moderate gives a balanced survival experience without being frustrating.
- Part II: Light or Moderate – the combat is more intense; light provides more resources but still challenging.
- ⚠️ Listen Mode: For a true survival horror experience, consider setting Listen Mode to ‘Off’ after the prologue. It dramatically increases tension.
HUD & UI Settings
| Setting | Recommendation |
|---|---|
| Health HUD | Always Visible (default) or Contextual (fades out of combat). Contextual is more immersive. |
| Ammo Counter | Always on (recommended) to track remaining bullets. |
| Objective Marker | On for first playthrough; off for immersion later. |
| Wheel Menu Input | Radial menu (hold) or Direct (button combos). Radial is slower but safer. |
| Pip-Boy Style Notes | Not applicable. |
---
8. Special Attention Points During Setup
PC Setup Pitfalls
1. Shader Compilation: The first launch will compile shaders. This can take 10-30 minutes and cause a brief stutter. Do not alt-tab or close the game during this process.
2. VRAM Oversubscription: Selecting ‘Ultra’ textures on a 6GB GPU will cause severe stuttering. Lower by one tier if you see VRAM warnings.
3. DLSS vs Native Resolution: DLSS Quality looks nearly indistinguishable from native 4K and gives major performance boost. Use it unless you have a top-tier 4090.
4. Disable HDR in Windows if not supported: In-game HDR can look washed out if Windows HDR is off. Either enable Windows HDR or turn off in-game HDR.
PS5 Setup Pitfalls
1. HDMI 2.1 Required for 120Hz: For Part II Remastered’s 120 Hz modes, your TV and HDMI cable must support HDMI 2.1. Check TV input settings and set ‘HDMI Enhanced’.
2. VRR Confusion: Even without 120Hz, VRR (48-60Hz) helps smooth out frame drops in Performance mode. Enable VRR in PS5 > Screen and Video > VRR.
3. Adaptive Triggers Wear: Constant use of adaptive triggers can cause trigger fatigue on the DualSense. Turn off in controller settings if you experience resistance fatigue.
Common Setup Mistakes
- Aiming with Motion Controls: Gyro aiming is not enabled by default; don’t accidentally flick your controller thinking it’s normal.
- Invert Y Axis: Always double-check before starting combat – accidentally inverted camera can cause disaster in stealth sections.
- Audio Sync: Ensure your TV/audio receiver is set to ‘Game Mode’ to minimize lip-sync delay.
---
By carefully configuring these settings, you can tailor The Last of Us Part I and Part II Remastered to your hardware and personal preference, ensuring the best possible experience whether you seek photorealism, high framerate, or accessibility. Refer back to this guide whenever you start a new game or upgrade your hardware.