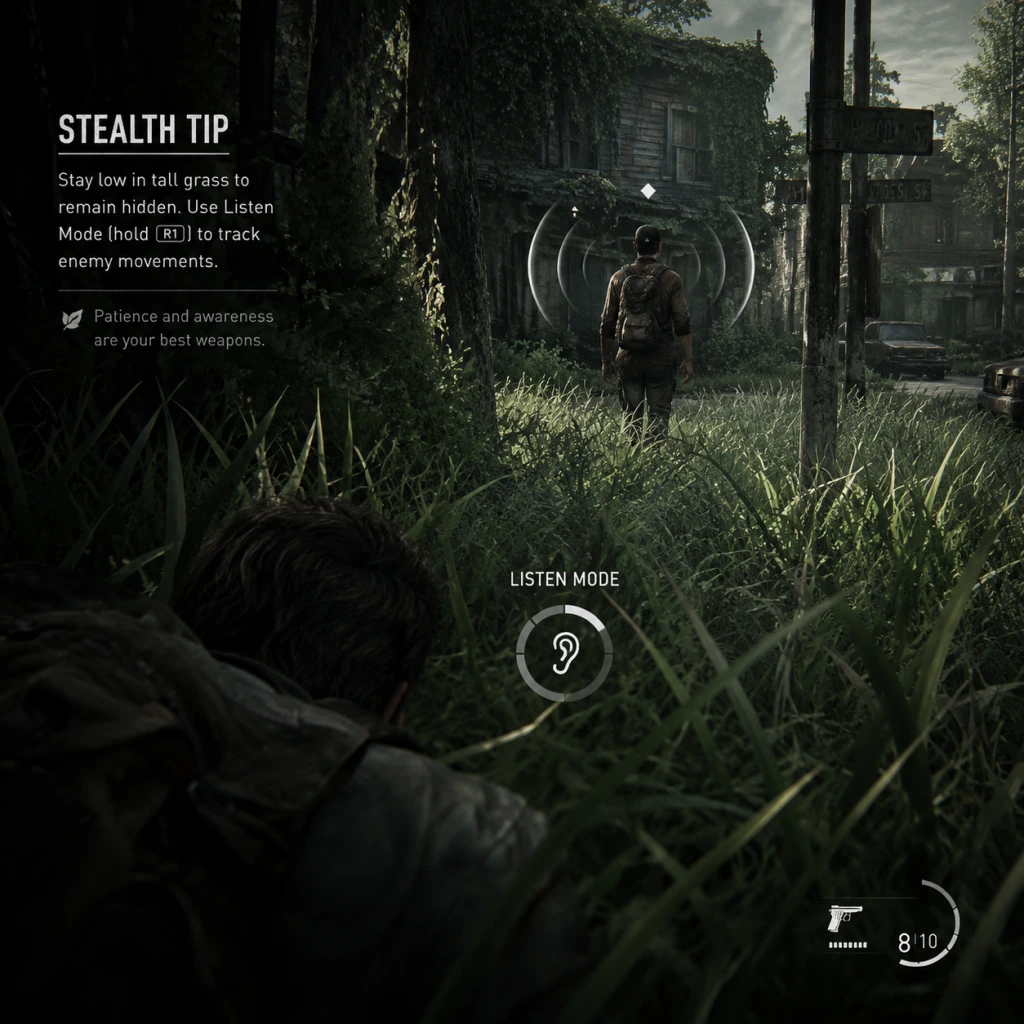
Game Tips
Game Tips for The Last of Us (Part I & Part II)
This guide provides comprehensive tips for both The Last of Us Part I and The Last of Us Part II Remastered. While core mechanics differ slightly, many principles apply to both. Tips are categorized for easy reference, with explanations of why they work and when to use them.
---
1. Stealth & Infiltration
Beginner: Crouch-walk everywhere
- Why it works: Enemies detect you mostly by sound and sight. Crouch-walking eliminates footstep noise and lowers your silhouette. Even when you think no one is near, staying crouched ensures you avoid triggering patrol routes.
- When to use: In any area with enemies, even if you plan to go loud. It costs no stamina and keeps your options open.
- Why it works: Throwing a bottle or brick against a wall or metal object produces a loud sound that attracts enemies toward that spot. This allows you to slip behind them or into the next area without direct confrontation.
- When to use: When you have limited ammo, are low on health, or need to bypass a tough encounter. Always scavenge for bricks and bottles first—they are reusable (you can pick up a brick after throwing it).
- Why it works: In Part II, enemies that enter tall grass can be grabbed and killed silently even if they are alerted (but not combat-active). By throwing a bottle just inside a patch of tall grass, you can lure one enemy there, eliminate them, and reduce the patrol count without raising the alarm.
- When to use: When facing groups of 3+ enemies; pick off the loner first, then use the distraction to isolate the next.
- Why it works: Headshots are instant kills against most human enemies (and some infected). Leg shots stagger enemies, causing them to limp and move slower, making subsequent shots easier.
- When to use: Headshots when you have a clear view and steady aim; leg shots when the enemy is running toward you or you need to buy time.
- Why it works: A heavy melee attack (square) after a stun (e.g., pistol whip, smoke bomb, or Molotov) guarantees a one-hit kill. This saves ammo and is faster than finishing a downed enemy with another shot.
- When to use: When an enemy is stunned by a smoke grenade or running through a cloud of spore-sacks; also works after a dodge+punish in Part II.
- Why it works: In both games, you can shoot explosive barrels, drop chandeliers, or knock over gas cans to cause chain reactions. In Part II, you can also push enemies off ledges or into water (drowning animation).
- When to use: When you are outnumbered and need area damage. Look for red barrels or hanging objects in every arena.
- Why it works: Once combat starts, enemies patrol and may step on items, making them impossible to pick up. Looting first ensures you don't miss crafting materials.
- When to use: Before entering any new area, sweep every drawer, cabinet, and body. Use listen mode (R1) to highlight lootable objects.
- Why it works: Cloth and binding are used for health kits, silencers, smoke bombs, and melee upgrades—all essential. Scissors and alcohol are more common, but cloth is the bottleneck for medkits.
- When to use: Always craft a health kit if you have at least 3 cloth and 1 alcohol. Keep one cloth in reserve for a silencer when facing many human enemies.
- Why it works: Selling items to traders (e.g., at the WLF FOB or Hillcrest) yields supplements and coins, which can be used to buy more valuable upgrades. Scrapping weapons is usually less efficient than selling them, unless you need parts for a specific upgrade.
- When to use: Check trader inventory before scrapping any weapon. Sell duplicates or low-rarity weapons; scrap only the ones with low sell value but high parts value.
- Why it works: The pistol holster upgrade (Parts) allows you to switch weapons faster. In many early encounters, quickly drawing your pistol versus your rifle can save your life.
- When to use: As soon as you have enough parts (e.g., 75 in Part I), upgrade the holster before weapon sway or capacity.
- Why it works: The shotgun is excellent against clickers and bloaters, which are the main threats in mid-game. Increasing its rate of fire and reload speed makes it viable in tight spots. The revolver is strong but has heavy recoil; it can wait.
- When to use: After crafting the holster, invest in shotgun upgrades (shell capacity, fire rate).
- Why it works: In Part II, you can use supplements to unlock skills like "Stealth 3" (faster crouch movement) and "Listen mode range". These allow you to stay hidden longer and spot enemies earlier. Combine with a silenced precision rifle (e.g., the hunting pistol) to eliminate targets silently from a distance.
- When to use: If you prefer stealth, invest points into stealth and listen mode upgrades first, then weapon accuracy upgrades.
- Why it works: Listen mode (R1) highlights enemy positions, lootable items, and safe containers. It also reveals hidden passages or breakable walls (marked with white X's).
- When to use: In every new area, activate listen mode for 2-3 seconds to scan for dangers and loot. It costs no resources and has no cooldown (though it drains stamina if held too long in Part II).
- Why it works: Safes contain rare parts, supplements, and schematics. Their codes are often found on notes or scribbled on walls nearby. Workbenches allow you to upgrade weapons—always find them before major encounters.
- When to use: Whenever you enter a building, search for notes with numbers (e.g., "11-7-59"). The safe is usually in the same room or nearby. Workbenches are often marked with a wrench icon on the map (if you have the map item).
- Why it works: In Part II, many areas become inaccessible after certain story events. However, you can often return to earlier zones via optional side paths or by waiting until later chapters. Collectibles like trading cards, artifacts, and coins can be missed if you rush.
- When to use: Before progressing the main story in a chapter, check the in-game collectible tracker (pause menu). If you are missing an artifact, search online for its location before moving to a point of no return.
- Why it works: Inventory is limited (pistol ammo, long gun ammo, crafting materials). Leave common items like scrap metal if your inventory is full, but always grab supplements and rare components.
- When to use: When looting, check the item type. If you already have 15 pistol bullets, skip a box of 5; take supplements and binding instead.
- In Part II, coins are the main currency for buying weapons and upgrades from traders. Prioritize buying the silencer and upgraded backpack. Also, invest in stamina upgrades (supplements) to carry more items.
- When to use: At traders, always buy the backpack upgrade first (costs 1 coin). Then buy weapon upgrades (silencer, scope, etc.). Don't waste coins on ammo—ammo drops are common.
- Some artifacts (e.g., gold coins, rare trading cards) have high sell value. Check a trader's buyback price; you can often sell artifacts that are duplicates (if you already have them in your collection) for supplements or parts.
- When to use: When you need a few more parts to upgrade a weapon, sell a rare artifact. But keep at least one copy for the collectible log (completionists).
- Recommended skills: Stealth 1-3 (crouch speed, silenced movement), Listen Mode range, Bow proficiency. Weapons: Silenced hunting pistol, bow, trap mines. Tactics: Avoid combat, use environmental kills, headshots from distance.
- Recommended skills: Melee damage, health upgrades, weapon sway reduction. Weapons: Shotgun, hammer, explosive launcher. Tactics: Smash through doors, use heavy melee to stun enemies, then finish with shotgun.
- Why it works: In certain choke points (e.g., the hotel basement), you can craft a shiv, use it on a door, then immediately die and respawn. The door remains open but the shiv is returned to your inventory. Only works in Part I; patched in Part II.
- When to use: Only if you are stuck with no shiv and need to open a door that requires one.
- Why it works: If you crouch-walk behind an enemy and they are in the middle of an animation (e.g., turning around or calling out), they won't detect you. Use this to travel through open spaces during combat.
- When to use: When you are spotted and need to reposition without being shot.
- Save often: In both games, manual saves are a lifesaver. Save before a tough combat encounter so you can retry without losing resources.
- Use photo mode for reconnaissance: In Part II, photo mode pauses the game and allows you to move the camera freely. Use it to scout enemy positions before engaging.
- Weapon durability matters: In Part II, melee weapons degrade. Use bricks to break walls instead of your machete. Keep a backup melee weapon.
- Dodge is your friend: In Part II, you can dodge (circle) melee attacks. Practice timing—dodging right before an attack stuns the enemy briefly, allowing a counter.
- Listen mode is not infinite: In Part II, holding R1 drains stamina. Use short bursts (2 seconds) to conserve stamina for sprinting.
Intermediate: Use bottles / bricks as distractions, not just weapons
Advanced: "Luring" enemies into tall grass for instant kills
---
2. Combat
Beginner: Aim for the head or leg
Intermediate: Melee+Stun combos
Advanced: Use the environment as a weapon
---
3. Resource Management
Beginner: Always loot everything before engaging enemies
Intermediate: Prioritize cloth and binding
Advanced: Salvage management in Part II — sell, not scrap
---
4. Crafting & Upgrades
Beginner: Craft a holster first
Intermediate: Upgrade shotgun before revolver in Part I
Advanced: Precision rifle upgrades for Part II stealth builds
---
5. Exploration & Environment
Beginner: Use listen mode frequently
Intermediate: Look for safes and workbenches
Advanced: Use the "backtrack" mechanic for missed items
---
6. Enemies: Types & Tactics
Infected
Runners – Fast but weak. Can be killed with one arrow or headshot. Use melee if you have a shiv or knife.
Clickers – Need a weapon upgrade or shiv for stealth kill. Never engage in melee without a shiv—they auto-kill you. Use shotgun, Molotov, or bait them into a trap.
Stalkers (Part II) – They hide and ambush. Use listen mode to track their movement. Smoke bombs stun them, allowing a quick kill.
Bloaters – Slow but extremely tough. Use fire (Molotov, flamethrower, explosive arrows). Shoot the spore sacks on their back to stagger them.
Humans
WLF – Use coordinated tactics. Focus on killing the leader (often marked with an exclamation).
Scars – They use bows and call out targets. Use smoke bombs to break their line of sight.
Clickers infected – If a human is infected, they turn after death. Burn or behead bodies quickly to prevent reanimation.
---
7. Economy (Supplies & Trading)
Beginner: Only pick up items you need
Intermediate: Use coins for trading
Advanced: Sell Artifacts for high value
---
8. Character Builds (Part II)
Ellie Build (Stealth & Precision)
Abby Build (Brute Force)
---
9. Advanced Tips & Glitches
Infinite shiv trick (Part I, specific locations)
Exploit enemy AI with "ghost" movement (Part II)
---
10. General Tips
---
This guide covers the essentials to survive and thrive in The Last of Us. Adapt your playstyle based on difficulty and resources. Good luck!