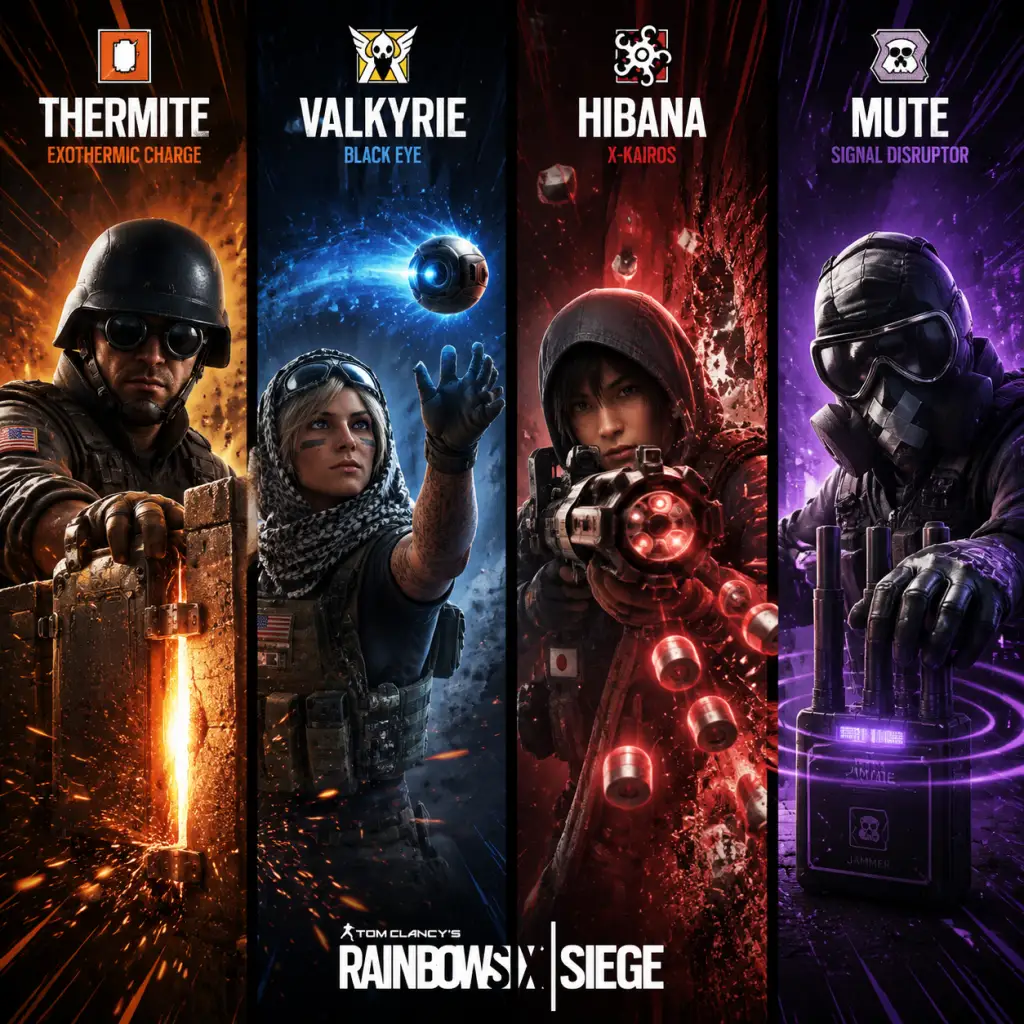
Character Skills
"content": "# Character Skills Guide for Tom Clancy's Rainbow Six Siege
This guide covers every playable Operator in Rainbow Six Siege, detailing their unique gadgets (skills), secondary gadgets, and tactical usage. Operators are divided into Attackers and Defenders. Each skill is described with its effect, cooldown/recharge, recommended synergies, and optimal loadout tips. Note that Siege does not have traditional \"spells\" or \"talents\"; instead, each Operator has one primary gadget and one secondary gadget (chosen from a pool). Upgrades are limited to weapon attachments—no ability upgrades exist. Cooldowns refer to gadget recharge time if applicable, or one-time use.
This guide covers every playable Operator in Rainbow Six Siege, detailing their unique gadgets (skills), secondary gadgets, and tactical usage. Operators are divided into Attackers and Defenders. Each skill is described with its effect, cooldown/recharge, recommended synergies, and optimal loadout tips. Note that Siege does not have traditional \"spells\" or \"talents\"; instead, each Operator has one primary gadget and one secondary gadget (chosen from a pool). Upgrades are limited to weapon attachments—no ability upgrades exist. Cooldowns refer to gadget recharge time if applicable, or one-time use.
Attacker Skills
Sledge
- Ability: Breaching Hammer
- Type: Active, melee
- Effect: A large sledgehammer that can break reinforced hatches, wooden barricades, and soft walls (3 hits to break a soft wall through one side). Also destroys deployable shields and certain gadgets in one hit.
- Cooldown/Use: Infinite uses; no cooldown. However, swinging animation is slow and leaves Sledge vulnerable.
- Synergies: Works well with Thermite or Hibana for creating multiple entry points. Pairs with a hard breacher to open both soft and hard surfaces.
- Recommended Loadout: Primary: M590A1 (shotgun) for close-quarters destruction or L85A2 (rifle) for versatility. Secondary: P226 Mk 25. Secondary Gadget: Stun Grenades or Frag Grenades (if available in season). Use hammer to open lines of sight or surprise enemies from above.
- Ability: EMP Grenades
- Type: Throwable
- Effect: Throws an EMP grenade that disables all electronic gadgets in a 4.5m radius for 15 seconds. Disables: ADS (Jäger), Magpie (Wamai), Shock Wire (Bandit/Kaïd), Signal Disruptor (Mute), Evil Eye (Maestro), but does not destroy them. However, it does destroy Gu mines (Lesion), Grzmot mines (Ela), and Yokai drones (Echo) if directly hit. Also temporarily disables player optics (2.5 sec) if within blast.
- Cooldown/Use: 3 EMP grenades per round; no recharge. Once thrown, effects are immediate.
- Synergies: Essential for hard breachers (Thermite, Hibana, Ace) as it disables Bandit/Kaïd batteries and Mute jammers. Also good against trap operators (Lesion, Ela, Kapkan).
- Recommended Loadout: Primary: AR33 (rifle) or L85A2. Secondary: P226 Mk 25. Secondary Gadget: Claymore or Smoke Grenade. Always coordinate with your hard breacher to time EMP throws.
- Ability: R4-C / G36C? No, her ability is the M120 CREM (breaching round)
- Type: Active, launcher
- Effect: Fires a projectile that explodes on contact, destroying wooden barricades, unreinforced walls, and certain gadgets (e.g., deployable shields, barbed wire). Does not destroy reinforced walls. The explosion is small but enough to open a kill hole.
- Cooldown/Use: 2 breaching rounds per round; one-time use.
- Synergies: Great with Sledge for soft destruction; can pair with Zofia for quick entry. Use to destroy Mira windows from a distance.
- Recommended Loadout: Primary: R4-C (high recoil) or G36C (easier control). Secondary: 5.7 USG or M45 MEUSOC. Secondary Gadget: Smoke Grenade or Breach Charge. Ash is a fast entry fragger; prioritize using rounds for rotation or killing enemies behind soft cover.
- Ability: Exothermic Charge
- Type: Deployable, explosive
- Effect: A large thermite charge that can breach a reinforced wall, reinforced hatch, or reinforced floor. Creates a large hole (approx 2m x 1m) that can be walked through. Also destroys any gadgets attached to the surface (e.g., Bandit batteries, Mute jammers, Kaid electroclaws).
- Cooldown/Use: 1 charge per round; takes 5 seconds to deploy and detonates automatically after placement. Thermite is vulnerable during placement.
- Synergies: Must be paired with Thatcher (to disable enemy electronics) or Maverick (for alternative entry). Works with Twitch to destroy shock wires. Also good with Capitao (smoke cover) for protection while planting.
- Recommended Loadout: Primary: 556xi (rifle) or M1014 (shotgun). Secondary: 5.7 USG. Secondary Gadget: Smoke Grenade (to cover the breach) or Claymore. Always communicate with your team to ensure the wall is clear before planting.
- Ability: Shock Drone (RSD-1)
- Type: Remote-controlled drone
- Effect: Deploy a small wheeled drone that can shoot electric darts that deal 1 damage (very small) but destroy most enemy gadgets (e.g., Mute jammers, Bandit batteries, Valkyrie cams, Lesion mines). Also can damage and destroy evil eyes (Maestro) and Yokai drones (Echo). The drone has 2 health points and can be shot. Can jump and climb up hatches.
- Cooldown/Use: 2 shock drones per round. Each drone has 10 darts. Darts recharge? No, each drone has a set number of darts (10). Once darts are used, drone can still be used for scouting.
- Synergies: Pairs excellently with hard breachers (Thermite, Hibana) to destroy Bandit/Kaid batteries. Also useful against trap operators. Use early game to clear electronic defenses, then save a drone for late-game intel.
- Recommended Loadout: Primary: F2 (rifle, high fire rate) or 417 DMR (for range). Secondary: P9. Secondary Gadget: Claymore or Smoke Grenade. Learn drone paths; avoid common drone spots.
- Ability: Extendable Shield (Le Roc)
- Type: Deployable shield (tactical)
- Effect: A full-body ballistic shield that can be extended to cover Montagne's entire front, making him nearly invincible from the front (but vulnerable from sides/back). When extended, he cannot melee or use primary weapon, but can use secondary (pistol) if not fully extended (partial extension). Extending contracts the shield width; can cover teammates behind him.
- Cooldown/Use: No cooldown; toggle extend.
- Synergies: Works with team to plant the defuser; Montagne can shield the planter. Also used for scouting and pinning enemies. Pair with Glaz or Capitao for smoke and shoot while shielded.
- Recommended Loadout: Primary: Extendable Shield is his gadget; no primary weapon. Secondary: Revolver (LFP586) or P9. Secondary Gadget: Smoke Grenade (to obscure vision while advancing). Always move slowly and use voice chat to coordinate pushes.
- Ability: HDS (Hand-held Display Sight) thermal scope on OTs-03 (DMR)
- Type: Passive/Weapon attachment
- Effect: The OTs-03 sniper rifle has a thermal scope that highlights enemies through smoke screens and dimly lit areas. Enemies appear as bright white figures (heat signature). Also highlights red when looking at enemies. The scope has variable zoom (2.5x to 5x).
- Cooldown/Use: Always active when using the OTs-03.
- Synergies: Excellent with smoke operators (Capitao, Ying, Smoke) to shoot through smoke. Also works with Zofia (concussion mines) to disorient enemies then pick them off. However, Glaz is slow and vulnerable at close range.
- Recommended Loadout: Primary: OTs-03 only. Secondary: GSH-18 or PL-15. Secondary Gadget: Smoke Grenade (maximize thermal usage) or Claymore. Hold long angles and reposition after every shot.
- Ability: APM-6 Cluster Charge
- Type: Deployable, explosive
- Effect: A cylindrical cluster charge that deploys on a breakable or reinforced wall, floor, or ceiling. After deployment, it launches 5 fragmentation grenades in a circular pattern into the room on the other side. Each grenade deals lethal damage in a radius. The charge can be destroyed before detonation (takes 5 seconds to arm).
- Cooldown/Use: 3 charges per round (each cluster charge deploys 5 grenades). No recharge.
- Synergies: Best used on objectives with multiple defenders. Pair with Twitch or Thatcher to destroy Mute jammers. Also good with Yinq to cause chaos. Always use on floors above the objective for maximum area coverage. Watch for teammates in the room.
- Recommended Loadout: Primary: Ballistic Shield (6P41 LMG is not his primary? Actually his primaries are 6P41 LMG or AK-12). Secondary: PYa (pistol). Secondary Gadget: Smoke Grenade or Breach Charge. Fuze is slow; call out before using.
- Ability: Electronics Detector (RED Mk III)
- Type: Passive, gadget scanner
- Effect: IQ’s wrist-mounted device reveals all electronic gadgets (e.g., Valkyrie cams, Pulse’s heartbeat sensor, Mute jammers, Bandit batteries, Lesion mines, Echo drones) within a 360-degree radius up to 20 meters. The device can be toggled on/off and highlights gadgets through walls. She can also see Pulse's heartbeat sensor and Vigil's ERC-7 (but not Vigil himself).
- Cooldown/Use: Always active when equipped; no cooldown. Swapping to her gadget takes time and renders her primary weapon unusable (only pistol can be used while scanning).
- Synergies: Essential for clearing Valk cams and Pulse threats. Works with hard breachers to locate Bandit/Kaïd batteries. Pair with Dokkaebi (to disable phones) to force defenders to stay still.
- Recommended Loadout: Primary: AUG A2 (rifle) or Commando 552. Secondary: 5.7 USG or PL-15. Secondary Gadget: Claymore or Breach Charge. Use IQ to clear major intel gadgets before pushing.
- Ability: SK-4 Breaching Shotgun (underbarrel)
- Type: Active, underbarrel attachment on his primary rifle (C8-SFW) or shotgun (CAMRS DMR). Actually on C8-SFW only.
- Effect: A shotgun mounted under the C8-SFW that can fire 3 shells in quick succession. Each shell breaks soft walls, floors, hatches, and barricades. It has limited range. Also destroys gadgets and deals some damage to enemies.
- Cooldown/Use: 15 shells total across 5 reloads (each reload gives 3 shells). No recharge beyond ammo pickup from crates or through secondary gadget (not recommended).
- Synergies: Works with soft destruction teams (Sledge, Zofia). Use to open floors from above or create sight lines. Excellent for vertical play—open the floor above objective and rain fire.
- Recommended Loadout: Primary: C8-SFW (rifle) with SK-4. Secondary: MK1 9mm (pistol). Secondary Gadget: Stun Grenades or Frag Grenades. Buck is versatile but require recoil control; use SK-4 sparingly.
- Ability: Rifle Shield
- Type: Deployable shield attached to primary weapon
- Effect: A transparent ballistic shield that mounts on Blackbeard's primary weapon (Mk17 CQB or SR-25 DMR). It can absorb up to 60 damage (initially 80, but nerfed). When aimed down sights, the shield covers the head and upper torso. It breaks after taking enough damage. Can be swapped between weapons (if you carry both). The shield slows movement significantly when aiming.
- Cooldown/Use: 2 shields per round; each shield is single use (once broken, cannot repair). You can swap between shields from inventory.
- Synergies: Excellent for holding tight angles and peeking windows. Pairs with Glaz (to survive while scoped). Use to contest long corridors. However, shield is weak against explosives and melee.
- Recommended Loadout: Primary: Mk17 CQB (high recoil) or SR-25 DMR (for range). Secondary: D-50 (pistol). Secondary Gadget: Smoke Grenade or Claymore. Always use shield when peeking; replace after it breaks.
- Ability: Tactical Crossbow
- Type: Launcher, two arrows
- Effect: A crossbow that fires two types of arrows: Smoke bolts (create a smoke screen) and Fire bolts (incendiary area denial). Smoke bolts last 5 seconds and are thicker than regular smoke grenades. Fire bolts create a pool of fire that lasts 7 seconds and deals damage to enemies passing through. Each type has 1 bolt initially (total 2 bolts). Can carry both types at the same time?
- Cooldown/Use: 3 crossbow bolts per round (usually 2 smoke, 1 fire or configuration changes by season). No recharge.
- Synergies: Great for planting the defuser (smoke cover) and for area denial (fire). Pair with Glaz for thermal smoke shooting. Combine with Ying's candela for confusion. Also works with Fuze to obscure cluster charge placement.
- Recommended Loadout: Primary: PARA-308 (rifle) or M249 (LMG). Secondary: PRB92 (pistol). Secondary Gadget: Claymore or Breach Charge. Use fire bolts to flush out anchors or deny defuser disable.
- Ability: X-KAIROS Launcher
- Type: Projectile, explosive
- Effect: Fires 6 small pellets that attach to a reinforced wall, hatch, or floor. After a short delay, the pellets explode, creating a circular hole (about 1m diameter) that can be crouched through if multiple pellets are placed. The pellets can be detonated simultaneously or in groups. Also destroys gadgets attached to the surface.
- Cooldown/Use: 3 launchers per round? Actually Hibana has 2 X-KAIROS clusters (each contains 6 pellets). Each cluster can be detached and deployed on separate surfaces. Pellets detonate after 3 seconds or manually? They detonate automatically after 5 seconds, but you can trigger early by shooting the cluster.
- Synergies: Essential for opening reinforced hatches and small holes. Works with Thatcher (EMP) or Twitch (shock drone) to clear Bandit/Kaïd. Also good for creating sight lines at head height. Pair with Maestro (on attack? No) or Ying to cover angles.
- Recommended Loadout: Primary: Type-89 (high recoil, high damage) or SuperNova (shotgun). Secondary: P229 (pistol). Secondary Gadget: Stun Grenades or Breach Charge. Use on hatches for a quick entry; aim for the top edge to create a vaultable hole.
- Ability: Eyenox Model III
- Type: Passive, tracking
- Effect: Jackal wears a helmet that can scan footprints left by defenders. When he activates the scanner, footprints are highlighted in red (recently made) or other colors for older. Scanning a footprint reveals the defender’s identity and pings their location every few seconds while they are still moving. The scan lasts about 10 seconds. Defenders receive a warning that they are being tracked (pings show on their screen).
- Cooldown/Use: 3 scans per round. Each scan takes about 3 seconds to process. Footprints remain visible for a limited time.
- Synergies: Excellent for hunting roamers. Pair with Cav (if he scans her, she still can silent step? but if her foot prints are hidden?). Actually Cav's silent step prevents footprints from being left. Jackal counters Cav because her ability nullifies footprints? No, Cav's Silent Step does not leave footprints, so Jackal cannot track her when that ability is active. Good with Dokkaebi (phone call) to force defenders to move and leave footprints.
- Recommended Loadout: Primary: C7E (rifle) or PDW9 (SMG). Secondary: USP40 (pistol). Secondary Gadget: Smoke Grenade or Claymore. Scan before entering objectives; prioritize tracks leading away from objective.
- Ability: Candela (Cluster Flash)
- Type: Throwable, timed
- Effect: A cluster flashbang that can be cooked and thrown or rolled. After detonation, it releases 7 small flashbangs that blind and deafen any defenders looking at them. The flashes also affect Ying's teammates if they look at them. Ying can also set the candela on a surface (like a door frame) and it will flash when bumped (proximity) or after a timer.
- Cooldown/Use: 3 candelas per round. No recharge.
- Synergies: Ideal for entering rooms and clearing corners. Pair with Glaz (smoke + flash) to disorient then shoot. Also with Blitz or Montagne (shield push). Works with Capitao fire bolts for area denial after flash.
- Recommended Loadout: Primary: T-95 LSW (LMG) or Six12 (shotgun). Secondary: Q-929 (pistol). Secondary Gadget: Smoke Grenade (to cover your entrance) or Claymore. Cook the candela for 3-4 seconds before throwing to minimize escape time.
- Ability: M762 Rifle (primary) has underbarrel launcher for two types of grenades: Concussion (impact) and Impact (explosive)
- Type: Underbarrel launcher
- Effect: Fires either a concussion grenade (blinds and deafens enemies in radius, similar to Ela’s Grzmot but area) or an explosive impact grenade (deals damage and destroys soft walls, hatches, and gadgets). The concussion grenade also disorients with a loud buzzing sound. She carries 2 concussion and 2 impact grenades per round.
- Cooldown/Use: Total 4 grenades; each is individual shot from the launcher. No recharge.
- Synergies: Versatile operator. Use impact to destroy barbed wire, shields, or open rotation holes. Concussion to clear corners. Pair with Buck for soft destruction, or with Maestro? For team, combine with Breach charges for extra rotation. Good for self-clearing if no Thatcher.
- Recommended Loadout: Primary: M762 (rifle) or LMG-E (if available). Secondary: RG15 (pistol). Secondary Gadget: Claymore or Breach Charge. Prioritize using impacts for opening lines of sight and saving concussions for room entry.
- Ability: Logic Bomb (phone call)
- Type: Global, electronic
- Effect: Activates a phone call to all defenders, causing their phones to ring audibly and vibrate on their screen. Defenders can stop the ringing by interacting (pressing a button) for about 2 seconds. While ringing, they cannot sprint, and the sound gives away their position. Also, after Dokkaebi kills a defender who has a phone (all defenders have phones), she can hack the defender's phone to access the defender's camera feeds (like Valkyrie cams, Maestro turret, Echo drone) for the rest of the round. The hack is a one-time operation per kill.
- Cooldown/Use: 2 Logic Bombs per round. Each bomb rings for about 10 seconds, but defenders can stop it early. The camera hack is passive after killing a defender.
- Synergies: Excellent with Lion (EE-ONE-D) to force defenders to stay still or get detected. Pair with Jackal (track while ringing) or Finka (boost). Also good with Capitão (fire to flush out ringing defenders).
- Recommended Loadout: Primary: Mk 14 EBR (DMR) or BOSG.12.2 (slug shotgun). Secondary: SMG-12 (machine pistol) or C75 Auto. Secondary Gadget: Smoke Grenade or Breach Charge. Use logic bomb before pushing; hack cameras after a kill to gain intel.
- Ability: EE-ONE-D Drone
- Type: Global, timed
- Effect: A hovering drone that scans the entire map. During the scan, any defender that moves more than 2 meters will be detected (highlighted and pinned on screen). Movement includes walking, running, and rappelling. Standing still or slowly crouch-walking (at very slow speed) avoids detection. The scan lasts 3 seconds. Defenders hear a warning sound before and during scan.
- Cooldown/Use: 2 scans per round. Each scan has a 15-second cooldown between uses.
- Synergies: Pair with Dokkaebi (phone call) to force defenders to move or stay still. Also with Capitao fire to force movement. Works with Glaz to shoot detected enemies through smoke. Good for final pushes in post-plant.
- Recommended Loadout: Primary: V308 (rifle) or LMG? Lion uses V308 and 417 DMR. Secondary: P9 or PMM? Actually Lion has P9. Secondary Gadget: Claymore or Stun Grenade. Use scan when you know enemies are near but not pinned.
- Ability: Adrenaline Surge
- Type: Global, self-buff
- Effect: Activates a nanobot injection that buffs all attackers for about 20 seconds. Effects: Health regeneration (heals 20 HP instantly and over time), higher weapon handling (reduce recoil, increase reload speed), quicker revive speed, and slight movement speed increase (but reduces ADS time). Also counters the effects of smoke/neurotoxin from Smoke's gadget and Lesion's Gu mines (reduces damage). Each surge also slightly increases health past max (up to 140? No, just heals up to full). Finka can use three surges per round. The surge has a global cooldown of 30 seconds between uses.
- Cooldown/Use: 3 surges per round.
- Synergies: Great for rushing or late-round pushes. Works with Lion (scan while surged) and Dokkaebi (phone call). Also helps teammates that need health after trade. Can revive downed teammates faster (but requires teammate to be near).
- Recommended Loadout: Primary: Spear .308 (rifle) or 6P41 (LMG). Secondary: GSh-18 (pistol). Secondary Gadget: Stun Grenade or Breach Charge. Use surge before entering a room or to counter Lesion/Smoke.
- Ability: Blowtorch (Suri)
- Type: Active, torch
- Effect: A small blowtorch that can burn through reinforced walls, hatches, and floors creating a small hole (about 30cm diameter) that can be shot through. The torch makes a distinct hissing sound that defenders can hear. Maverick can also use it to open a crouch-able hole if given enough time (about 20 seconds over a line). The torch can also destroy Bandit batteries, Kaid claws, and Mute jammers if applied directly.
- Cooldown/Use: Infinite fuel per round; but the torch overheats after about 10 seconds of continuous use (need to cool down for 5 seconds). Fuel does not deplete; unlimited.
- Synergies: Independent hard breacher that doesn't need Thatcher. Pairs with Thermite or Hibana to open a hole after Maverick creates the initial line. Good with IQ (to check for gadgets) and Twitch (to destroy electronics). Use torch to create head-height sight lines.
- Recommended Loadout: Primary: AR-15.50 (DMR) or M4 (rifle). Secondary: 1911 TACOPS (pistol). Secondary Gadget: Smoke Grenade or Claymore. Practice making small holes for peeking, then larger ones for entry.
- Ability: Airjabs
- Type: Deployable, proxmity trigger
- Effect: Small canisters that stick to surfaces. When an enemy walks within 2m, the airjab detonates, firing a compressed air blast that knocks the defender away and disorients them (0.5 second stun). The blast does no damage but pushes the defender in the direction the airjab was placed. Airjabs can be destroyed by shooting or explosives.
- Cooldown/Use: 3 airjabs per round. No recharge.
- Synergies: Excellent for covering flanks and denying run-outs. Place on stairwells or behind doors. Works with Gridlock (Trax) to create a layered denial. Also with Zofia (concussion) to disorient longer.
- Recommended Loadout: Primary: AK-74M (rifle) or ARX200 (rifle). Secondary: PRB92 (pistol). Secondary Gadget: Claymore or Breach Charge. Place airjabs on common flank routes; you can hear the sound of a defender being launched.
- Ability: Trax Stingers
- Type: Deployable, area denial
- Effect: Large hexagonal mats that deploy on the ground. When thrown, they expand into a sheet of sharp spikes that cover an area about 3m x 3m. Defenders walking on the spikes take damage (10 damage per tick) and move slowly. The spikes also make noise when stepped on. Trax can be destroyed by melee (3 hits), explosives, or gunfire (30 bullets? It takes many shots).
- Cooldown/Use: 3 Trax canisters per round. Each canister creates 3 mats (total 9 mats?). Actually each canister deploys one large mat that covers the area. So total 3 large mats.
- Synergies: Pairs with Nomad (airjab) to protect flanks. Also with Capitao (fire) and Smoke (poison) for multi-layer denial. Good for post-plant to prevent defuser disable.
- Recommended Loadout: Primary: M249 SAW (LMG) or F90 (rifle). Secondary: Super Shorty (shotgun) or SDP 9mm (pistol). Secondary Gadget: Smoke Grenade or Claymore. Place Trax near defuser to make it costly for defenders.
- Ability: HEL Presence Reduction
- Type: Active, stealth
- Effect: A device that makes Nøkk invisible to drone cameras and enemy gadgets that rely on sound and movement detection? Specifically, when active, she makes no footstep sound, and she is not detected by Lion's drone, Alibi's prismas, or by cameras (including Yokai, Evil Eye, Valkyrie, Maestro, etc.). However, she is still visible to the naked eye and to Pulse's heartbeat sensor, and she can still be heard if she sprints or fires. The ability has a limited duration (about 12 seconds) and a cooldown of 8 seconds after deactivation (energy recharge).
- Cooldown/Use: Energy bar that depletes while active; recharges when not active. Total active time per round about 20-30 seconds if used efficiently.
- Synergies: Great for flanking and sneaking. Pairs well with Caveira (interrogation) but Caveira is defender. On attack, use with Dokkaebi (phone call) to find isolated defenders. Also effective against trap-heavy defenses (Lesion, Kapkan) because traps still trigger but you can avoid cams.
- Recommended Loadout: Primary: FMG-9 (SMG) or Six12 SD (shotgun). Secondary: D-50 (pistol). Secondary Gadget: Frag Grenades or Stun Grenade (if available). Use before entering a room to avoid drone spotting.
- Ability: Garra Hook
- Type: Active, grappling hook
- Effect: A hook that can be used to quickly ascend through hatches (to the floor above) or pull Amaru up to windows and balconies. The hook also allows her to vertically reppel? It's a one-shot movement tool. She can only hook upward to breakable hatches or open windows. The hook has a wind-up time of 1.5 seconds and makes a sound.
- Cooldown/Use: 1 hook per round; once used, can't be recovered. Also she can carry 2 secondary gadgets? No.
- Synergies: Good for rapid vertical entry, especially on top-floor objectives. Pair with Nomad or Gridlock to secure the landing. Use with Ying (flashbang) to disorient before you arrive. Fast rotation between floors.
- Recommended Loadout: Primary: G8A1 (LMG) or ITA12L (shotgun). Secondary: SMG-11 (machine pistol) or ITA12S (shotgun). Secondary Gadget: Claymore or Smoke Grenade. Plan your grapple path carefully; you are vulnerable during the climb.
- Ability: CSRX 300 (special sniper rifle) with high explosive rounds
- Type: Active, weapon
- Effect: A bolt-action sniper rifle that fires a single high-caliber round. It has a unique scope with variable zoom. The bullet is extremely powerful, capable of penetrating reinforced walls and hatches? Actually, the CSRX 300's primary function is to destroy enemy gadgets (like Bandit batteries, Mute jammers, Kaid claws) with a single shot. However, it also deals massive damage to defenders (one-shot down at any range, but not always kill if hit lower body). The rifle has a slow cycle rate (approx 1 round per 1.5 sec).
- Cooldown/Use: 12 rounds total (4 extra magazines? Actually she has 12 rounds overall; can reload). No ability cooldown; it's her primary weapon.
- Synergies: Works like Thatcher for gadget destruction but requires line of sight. Pair with hard breachers (Thermite, Hibana) to remove electronics from a distance. Also good with Twitch (drone) for intel. Use the explosive tip to destroy shields and walls?
- Recommended Loadout: Primary: CSRX 300 (only). Secondary: SPSMG9 (machine pistol). Secondary Gadget: Claymore or Breach Charge. Use as a hard support; mark gadgets for your team.
- Ability: Gemini Replicator
- Type: Active, hologram
- Effect: Deploys a holographic copy of Iana that can walk, sprint, and vault. The hologram moves with the player's input (like a drone but on foot). It can be shot, but does not reveal the real Iana's location. The hologram lasts until destroyed or until Iana cancels it. It also pings enemies if they shoot it (