Getting Started
First Hour Walkthrough for Tom Clancy's Rainbow Six Siege
Your first 60 minutes should be spent learning the core mechanics, not jumping into multiplayer. Here’s the optimal path:
1. Launch the Game → After splash screens and initial account linking (Ubisoft Connect required), you’ll be dropped into the main menu.
2. Complete the Situations → This is a single‑player tutorial series (6 missions). Play all of them, especially the first two ("Hereford Base" and "House"). You’ll earn Renown (in‑game currency) and unlock basic gadgets/operators.
3. Play Through the “Discovery” Playlist → A separate matchmaking mode for beginners that uses only a limited map pool and disables friendly fire. Play at least 2‑3 matches here to understand round flow (Preparation Phase → Action Phase → Eliminate Hostages/Bomb/Diffuser).
4. Try Terrorist Hunt (now called “Training Grounds”) → Solo or co‑op against AI. Use this to practice your aim, learn map layouts, and test operator abilities without pressure.
5. Watch the in‑game “How To” videos → Found under the “Options” menu → “General” → “How To”. They cover destruction, gadgets, droning, and callouts.
After the first hour, you’ll have a basic understanding and should move to Quick Match (unranked) for real PvP experience.
---
Character / Operator Creation
There is no character creation in Rainbow Six Siege. You play as one of the many Operators, each with unique gadgets, weapons, and roles. Operators are divided into two teams:
- Attackers (blue team) – Use drones, breach charges, and hard breachers.
- Defenders (orange team) – Reinforce walls, deploy traps, use intel gadgets.
- Start with the Recruit (free, no gadget) – Use only for early practice.
- Complete Situations to unlock Sledge (Attacker) and Rook (Defender) for free.
- Spend your initial Renown on Thatcher (Attacker – EMP grenades) and Mute (Defender – signal jammer). These are foundational for team play.
You cannot customise a physical character – only choose an Operator and equip them with a primary weapon, secondary weapon, and two gadgets (plus a unique ability). Unlocking new Operators costs Renown or R6 Credits (premium currency).
Getting your first Operators:
---
Controls on All Platforms
Default Controls (On Foot)
| Action | PC (Keyboard & Mouse) | PlayStation (DualShock 4 / DualSense) | Xbox (Controller) |
|---|---|---|---|
| Move | W, A, S, D | Left Stick | Left Stick |
| Look / Aim | Mouse | Right Stick | Right Stick |
| Sprint | Shift (hold) | L3 (press stick) | L3 |
| Crouch | Ctrl (toggle) or C | Circle (hold for toggle in options) | B |
| Prone | Z (toggle) | Circle (hold while moving) | B (hold) |
| Reload | R | Square | X |
| Fire | Left Mouse Button | R2 | RT |
| ADS | Right Mouse Button | L2 | LT |
| Use Gadget | Middle Mouse Button | L1 (or press R2/RT? check in-game) | LB |
| Switch Gadget | Q | Triangle | Y |
| Ping | Z (default) | D-Pad Up | D-Pad Up |
| Drone (Attacker) | 5 (switch to drone) | D-Pad Left (hold) | D-Pad Left (hold) |
| Camera (Defender) | 5 (if available) | D-Pad Right (hold) | D-Pad Right (hold) |
| Reinforce Wall | F (hold) | X (hold) | A (hold) |
| Barricade | F (tap) | X (tap) | A (tap) |
| Melee | V | R3 (stick) | RS (stick) |
---
UI Overview (Heads‑Up Display)
When playing, your screen shows:
- Top Center – Operator rank icon, HP bar, armour indicator, and special ability cooldown.
- Bottom Left – Ammo counter (current / total) and fire mode (semi/auto/burst).
- Bottom Right – Gadget icon (e.g., smoke grenade, barbed wire) with inventory count.
- Bottom Center – Objective icon (bomb/hostage/secure area) and distance to it.
- Compass (top edge) – Shows cardinal directions and objective markers; use for callouts (e.g., “Enemy north of stairs”).
- Kill Feed (top right) – Shows eliminations, assists, and team kills.
- Round Timer (top center) – Counts down from 3 minutes (or less depending on mode).
- Team Info (left side) – List of alive teammates with health, operator icon, and ping status.
- Microphone indicator – Green dot when talking; red when muted.
- Attackers place drones on the map; Defenders reinforce walls, set traps, and rotate gadgets.
- Defenders see a 3D map overlay temporarily.
- Attackers see drone feed on main screen (press `5` to switch to drone view).
- The above HUD is active, plus objective markers update.
- Attackers can redeploy a single drone per round.
- Defenders can use static cameras (e.g., security cams) via `5` (hold).
- Play the Situations – Free Renown and operator unlocks.
- Complete the Discovery Playlist – Safe environment with friendly fire off.
- Watch “How To” Videos (in Options) – Explains destruction, pinging, etc.
- Join a Community/Discord – Many Siege communities offer coaching for new players.
- Practice with Recruit first – No stress of ability management.
- Focus on two Operators – Master one Attacker (e.g., Sledge) and one Defender (e.g., Rook) before expanding.
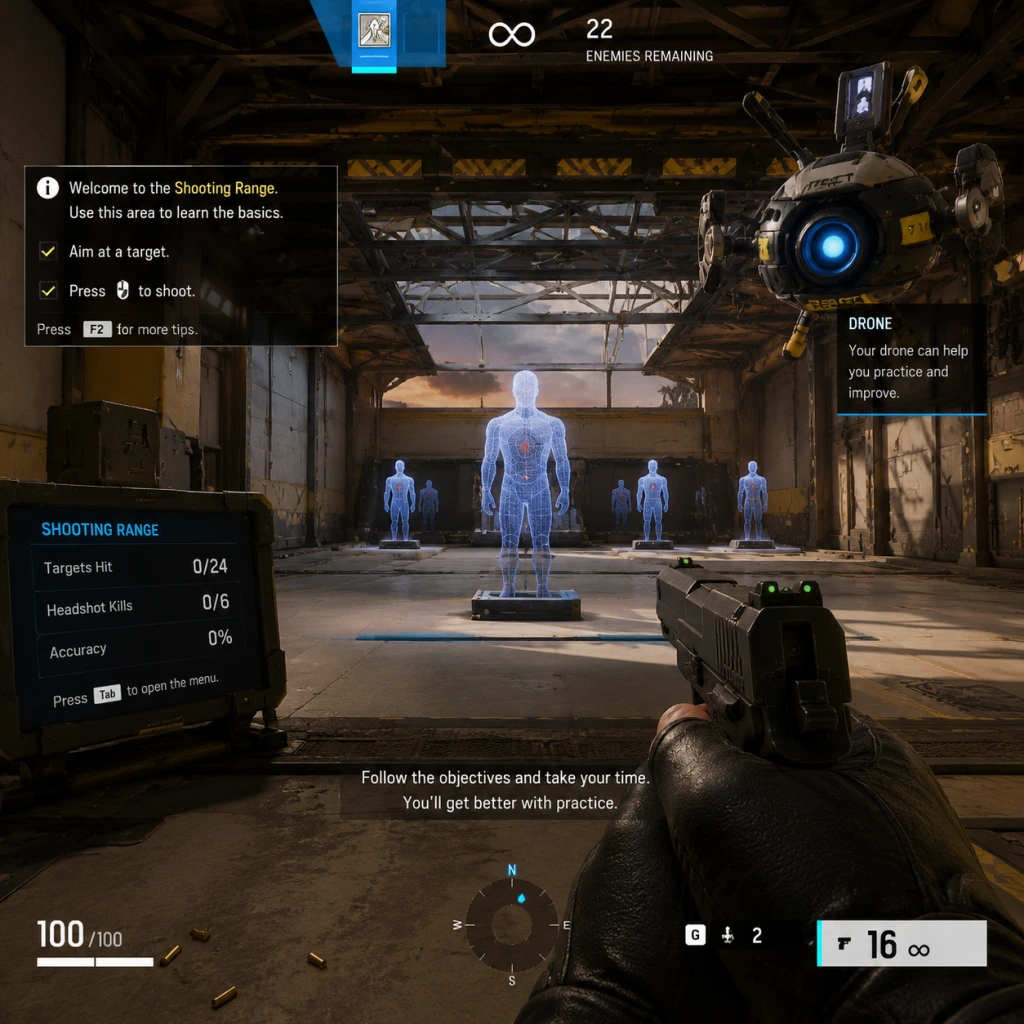
- Use the Shooting Range (in Settings → Accessibility) – Test weapons and recoil patterns.
- Jumping into Ranked – You need level 50+ and full map knowledge; stick to Quick Match or Unranked.
- Team Killing – Even accidental – it damages team morale and can get you banned.
- Reinforcing all walls – Especially between two bomb sites (leave a soft wall for rotation).
- Peeking the same angle twice – Experienced players will pre‑fire you.
- Ignoring the drone phase – Attackers must drone to avoid ambushes.
- Spending Renown on cosmetics first – Unlock all “base” operators (cheap 1000 Renown) before buying skins.
- Using all gadgets immediately – Save barbed wire for windows, not doorways; place shock wire near gadgets, not randomly.
- Reinforcing between bomb sites – In Bomb mode, you need rotations between the two bombs. Leave the connecting walls soft (unreinforced) unless you plan to anchor from one site.
- Destroying friendly gadgets – Don’t shoot Teammate’s traps (like Lesion mines) or drones.
- Chasing kills – Your priority is the objective, not eliminations. Over‑extending leaves your team vulnerable.
- Not using the compass – Callouts like “Blue stairs” or “Red room” help teammates. Practice using map room names.
- Forgetting to lean – On PC, press `Q` and `E` to lean; on console, click the thumbstick. Leaning reduces your hitbox exposure.
- Ignoring sound – Siege is audio‑driven. Wear headphones: footsteps, gadget sounds, and environmental noises (e.g., breaking barricades) give away enemy positions.
- No drone usage – Attackers often forget to drone before entering a building. Use your drone every round.
- Standing still – Always be moving (even slightly) to avoid headshots. Use crouch and prone sparingly.
- [ ] Install Rainbow Six Siege and link your Ubisoft account.
- [ ] Complete all 6 “Situations” missions. (Tip: Set difficulty to Normal, then try Hard for extra Renown.)
- [ ] Play 2–3 matches in the “Discovery” playlist.
- [ ] Visit the Shooting Range (Options → Accessibility → Shooting Range) to test weapons and recoil.
- [ ] Unlock at least two Operators: Sledge (Attacker) and Rook (Defender) are free. Then buy Thatcher and Mute (1000 Renown each).
- [ ] Read the in‑game “How To” videos (General Settings).
- [ ] Change your controls (optional but helpful):
- [ ] Complete two “Daily Challenges” from the Battle Pass menu (earn extra Renown).
- [ ] Join an official Rainbow Six Discord (or a friend’s squad) and play a few rounds with voice chat.
- [ ] Review this guide again after your first 10 matches – you’ll have context for the advanced tips.
During Preparation Phase (first 45 seconds):
During Action Phase:
---
Essential Early Objectives
As a brand‑new player, focus on these goals before worrying about advanced strats:
1. Learn Basic Maps – Start with “House”, “Hereford Base”, and “Clubhouse”. Run through them in Terrorist Hunt to memorise room names and stair locations.
2. Master the Primary Gadget – For Attack: use Drones to scout (don’t rush). For Defense: place traps/jammers in choke points (doorways, windows).
3. Understand Destruction – Walls and floors can be destroyed with breaching charges, shotguns, or Sledge’s hammer. Bullets also break wood/barricades; reinforced walls require hard breachers (Thermite, Hibana, Ace) to break.
4. Communicate – Use the ping system (D-Pad Up or Middle Mouse) to mark enemies. If you have a mic, give short callouts: “One on stairs, red stairs.”
5. Stay with Your Team – Don’t roam (wander alone) until you know callouts and map flows. Stick near the objective on Defense, and push together on Attack.
---
What to Do First and What to Avoid
✅ DO:
❌ AVOID:
---
Early Resource Priorities
Renown is earned by playing matches, completing challenges, and winning. Spend wisely:
1. Unlock Operators (1000–2000 Renown each):
- Priority Attackers: Sledge (free), Thatcher (EMP), Ash (fast breacher), Twitch (drone with taser).
- Priority Defenders: Rook (free), Mute (jammer), Bandit (shock wire), Jäger (anti‑projectile).
2. Purchase Attachments – Use Renown on sights (especially 1x scopes), grips, and muzzle attachments. Always buy the Flash Hider (reduces muzzle flash) or Compensator (reduces horizontal recoil).
3. Operator Gadget Upgrades – Only after you have the core operators. Don’t waste Renown on cosmetic charms or uniforms early.
> R6 Credits (premium currency) – Save these for the “Battle Pass” or a Year Pass discount; never spend on renown boosts or cheap skins.
---
Common Beginner Mistakes
---
Day‑One Checklist
Here’s your actionable first‑day checklist:
- Set prone to toggle (not hold).
- Increase vertical sensitivity to 15, horizontal to 25.
- Bind “Ping” to a convenient key (e.g., Middle Mouse or D‑Pad Up).
Remember: Siege has a steep learning curve. Don’t get discouraged if you die often – every death is a lesson. Focus on learning, not winning. Good luck, Operator!