Game Tips
Game Tips for Tom Clancy's Rainbow Six Siege
Below is a comprehensive set of tips organized by category. They range from beginner fundamentals to advanced optimizations, all designed to improve your effectiveness in close-quarters tactical combat.
---
Beginner Tips (Foundation)
1. Play the Tutorials & Situations First
Before jumping into multiplayer, complete the in-game Situations mode. It teaches you basic movement, aiming, gadget usage, and destruction. Each situation focuses on a specific skill (e.g., breaching, defending bomb sites). This will save you from frustration against experienced players.
2. Learn the Operator Roles
Operators are divided into Attackers and Defenders, each with unique gadgets. Start with simple operators:
- Attackers: Sledge (breaches walls with hammer), Thatcher (disables defender gadgets).
- Defenders: Rook (provides armor plates to teammates), Mute (jams drones and gadgets).
These operators have straightforward abilities that let you focus on gunplay and map knowledge.
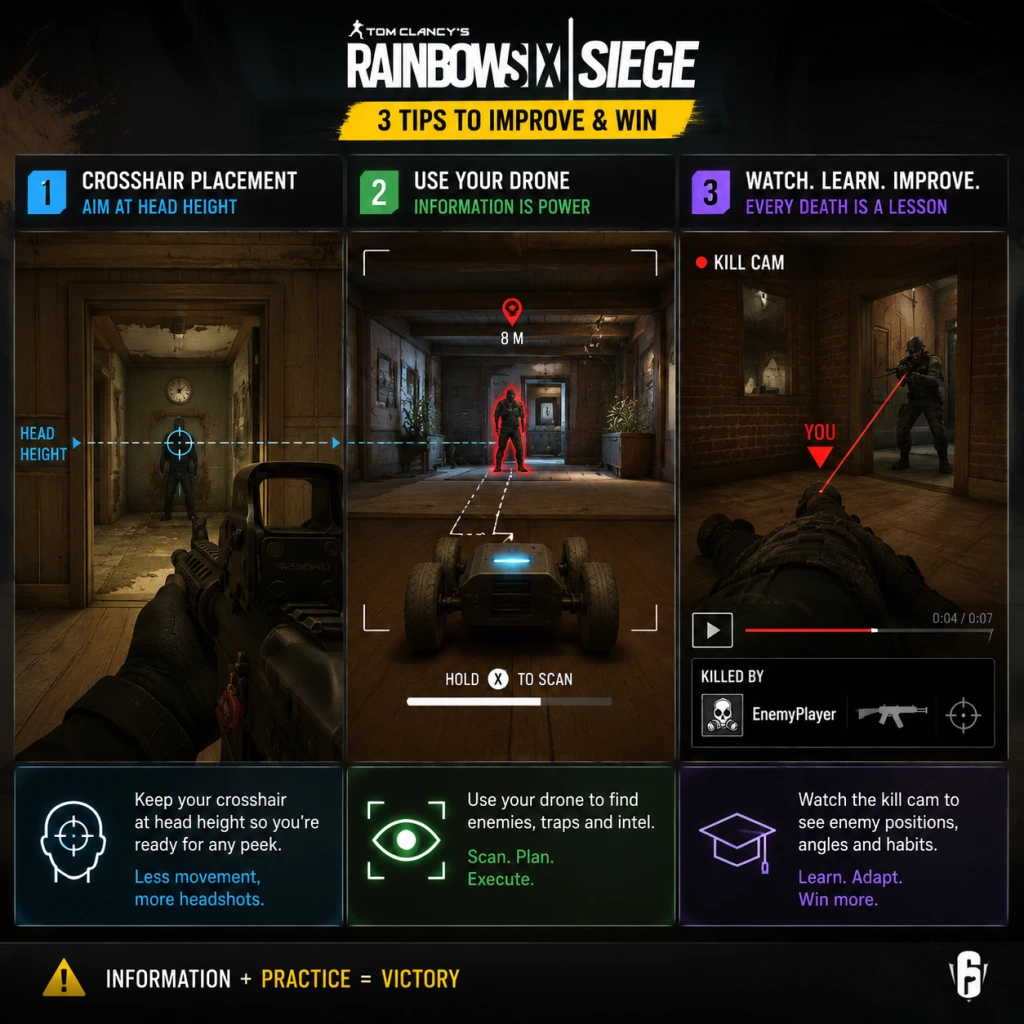
3. Use Your Drone Wisely (Attack)
During the prep phase, drive your drone into the objective room to locate the defuser bomb site, but then hide it in a safe location (e.g., under furniture) so you can use it later to scout. On attack, use your second drone sparingly—save it for clearing rooms or checking traps.
4. Reinforce the Right Walls (Defense)
Not every wall needs reinforcement. Prioritize walls that connect the objective room to the outside or adjacent rooms where attackers can breach. Leave some unreinforced to create rotation holes between rooms. A common mistake is reinforcing every wall, which traps your team inside.
5. Communicate, Even Without a Mic
Use the ping system (default middle mouse button or up on d-pad) to mark enemy locations, traps, or useful areas. Ping on the floor or object to avoid giving away your position. Use text chat for callouts if you don’t have a microphone.
6. Practice Crosshair Placement
Always keep your crosshair at head height (about 1.8 meters from the ground) and aim around corners where enemies might peek. In Siege, headshots are instant kills. Good crosshair placement drastically reduces reaction time needed.
---
Combat Tips
7. Pre-fire Common Angles
When you expect an enemy behind a wall or at a window, start firing a short burst as you round the corner. This increases your chance of landing a headshot even before you fully see the enemy. Use it when you have intel (e.g., from a drone or audio cue).
8. Peeker’s Advantage
Due to network latency, the player who peeks (moves around a corner to shoot) has a slight delay advantage over the stationary player holding the angle. To counter this, hold tight angles or quick-peek to bait shots. Never sit still behind a soft wall—enemies can wallbang you.
9. Use Sound to Your Advantage
Siege has directional audio. Pay attention to footsteps, gadget sounds, barricade breaking, and reloading. Wear a good headset. Crouch walk to reduce noise, but understand that running is loud. You can use sound to fake movement: run one way then crouch-walk back.
10. Learn to Quick Peak
To check a corner without exposing your whole body, lean left/right (Q/E on PC) and quickly move out and back. This is called a “jiggle peak.” It gives you a snapshot of the area while making you a harder target. Practice in Terrorist Hunt mode.
11. Crouch & Prone at the Right Time
Crouching reduces your profile but slows movement. Use it when holding tight angles. Prone is rarely useful except for hiding behind low cover or when planting the defuser in a tricky spot (e.g., behind a shield). Avoid proning in the open—you become an easy headshot.
12. Wallbanging (Shooting Through Walls)
Many walls and floors are destructible. If you know an enemy is behind a soft wall (e.g., via a drone or sound), fire a burst through it. The same applies to floors above or below. Use a weapon with high penetration such as DMRs or LMGs. Be mindful that some walls are reinforced (bulletproof) or metal (not penetrable).
---
Attacker Tips
13. Drone Efficiently
In the prep phase, drive your drone into the objective to spot the bomb site, but then back it into a safe corner. On the main phase, use your secondary drone to clear rooms before entering. If you lose your drone, you lose that intel source. Advanced trick: jump your drone over door gaps to avoid detection.
14. Breaching Order & Collaborating with Hard Breachers
If you have a hard breacher like Thermite, Hibana, or Ace, they need support from Thatcher or Kali to disable defender electronic gadgets (like Mute jammers or Bandit batteries). Coordinate with your team: “Thatcher EMP on the garage wall, then Thermite breach.”
15. Plant the Defuser Smartly
When planting, choose a spot that is partially covered (e.g., behind a shield or soft wall) and where you have cover. Announce your plant to the team so they can cover you. Do not plant out in the open unless you have smoke grenades and a clear escape route.
16. Use Vertical Gameplay
Attackers can destroy hatches and floors to shoot into the objective from above. Operators like Buck and Sledge excel here. Open the floor above the bomb site and shoot at defenders below. This gives you a powerful angle without exposing yourself to multiple defender sightlines.
17. Deal with Gadgets (Gadget Clearers)
Operators like IQ, Thatcher, and Kali are essential for disabling defender gadgets (e.g., Valkyrie cameras, Maestro turrets, bulletproof cameras). If your team lacks a gadget clearer, use grenades or Ash charges to destroy them from range. Always prioritize utility over kills.
---
Defender Tips
18. Set Up a Strong Roam
Roamers (defenders who leave the objective) should hold important map areas (like stairs or connecting corridors) to waste attacker time. Operators like Vigil, Caveira, and Rook can roam effectively. Don’t roam too far—you need to be able to rotate back to the objective if needed.
19. Anchor the Objective
Anchors (defenders who stay on site) should hold the bomb site with utility like Maestro’s evil eye, Echo’s yokai, or Mira’s black mirrors. Place traps (Lesion mines, Kapkan traps, Frost mats) at common entry points. Communicate when attackers are pushing.
20. Use Barricades Wisely
Barricading doors slows attackers and gives you audio cues when they break them. However, barricading too many doors can block your own rotations. Leave some barricades unreinforced or only partially reinforced (by hitting them once) so you can quickly vault through.
21. Cams and Intel
Use default cameras to spot attackers. If they are destroyed, rely on operator gadgets (Valkyrie cams, Maestro turret, bulletproof cameras). Always scan enemies (red ping) only briefly; instead, use yellow pings to mark their location without revealing your camera’s position. As Valkyrie, hide cams in unexpected places like foliage or behind signs.
22. Rotations and Hatches
Create rotation holes between adjacent rooms using Shotguns or impact grenades. This allows you to move without exposing yourself to windows. Always close hatches above the site to prevent attackers from dropping down. Use reinforced hatches to protect objectives below.
23. Trap Placement Tips
Place Kapkan traps on windowsills or doorframes at knee height—attackers rarely check that low. Lesion’s Gu mines should be placed near common pathways and drones drone paths. Frost mats are most effective around shield corners or directly behind vaultable windows.
---
Map Knowledge & Exploration
24. Learn the Callouts
Learn the common room names (e.g., “Red Stairs,” “Library,” “Garage,” “Basement”) for each map. This speeds up communication. You can find map guides online or create custom lobbies to explore. Start with the most played maps: Consulate, Oregon, Clubhouse, Coastline, Border.
25. Know the Default Camera Locations
Each map has default cameras (usually in hallways or large rooms). Memorize their positions so you can either destroy them as an attacker or avoid them as a defender. Use Valkyrie cams to replace destroyed ones.
26. Understand Common Rush Routes
Attackers often rush from spawn points toward the objective via shortest paths. Defenders should pre-place barbed wire or traps on those routes. As an attacker, consider alternative long rotates to avoid defender setup.
27. Soft vs. Hard Walls
Soft walls are made of wood, plaster, or drywall – penetrable by bullets and explosives. Hard walls are reinforced with steel – require hard breachers or specific gadgets (like Maverick’s blowtorch) to breach. Always identify which walls you can shoot through.
28. Exploitation of Hatches
Hatches connect floors. Attackers can open them from below with a breaching charge. Defenders should close them with reinforcement or use gadgets to block. If you’re defending below a hatch, be aware attackers might drop down; consider placing a trap below.
---
Resource Management & Economy
29. Loadout Choices Affect Your Playstyle
Your weapon and attachments should match your role. For example:
- Attacker with an ACOG scope: Suited for long-range engagements and holding angles.
- Defender with SMG and close range: Use holographic sight and a laser (if desired) for hip-fire accuracy.
Always choose a secondary gadget (smoke, flash, claymore, etc.) that complements your operator. For instance, if you are Thermite, bring smokes to cover the breach.
30. Weapon Attachments Matter
Muzzle attachments:
- Flash Hider: Reduces vertical recoil; best for most full-auto weapons.
- Compensator: Reduces horizontal recoil; good for tapping or burst.
- Silencer: Hides tracers and reduces sound – use only for sneaky flanks, but reduces damage range.
Grip: Vertical grip for recoil reduction (most common), angled grip for faster ADS speed (but more recoil). Learn your weapon’s recoil pattern in the shooting range.
31. Reinforcement Management (Defense)
Each defender has two reinforced walls. Use them wisely; for example, if you’re Mira, you want to reinforce walls around your black mirror. If you’re a roamer, you may not need to reinforce at all – leave that to anchors. Communicate who reinforces which walls.
32. Use Barbed Wire and Deployable Shields
Barbed wire slows attackers and gives audio cues when they step into it. Place it at doorways or stairs. Deployable shields can block sightlines or protect a bomb planter. Don’t block your own team’s movement.
---
Operator Builds & Loadouts (Best Pairings)
33. Hard Breach Duos
- Thermite + Thatcher: Classic. Thatcher EMP disables jammers, Thermite blows the wall.
- Hibana + Maverick: Hibana opens smaller holes (3 pellets), Maverick can silently cut holes for line of sight.
- Ace + Kali: Ace’s gadget can be shot out, so Kali’s sniper can destroy defender gadgets from range.
34. Roamer Combos
- Vigil + Mute: Vigil can hide from drones, Mute stops them from entering certain areas.
- Caveira + Pulse: Caveira interrogates for intel, Pulse can scan through walls to locate attackers.
35. Support Attacker Loadout
Bring a claymore to cover your flank while you drone. As Thatcher, you can swap your secondary gadget for smokes to conceal the hard breacher’s animation. As Finka, equip the Spear .308 with an ACOG for longer-range support.
36. Anchor Defender Loadout
Depends on site:
- For small rooms, use shotguns (Echo’s Supernova, Maestro’s ALDA LMG).
- For open sites, use high RoF SMGs (Rook’s MP5, Doc’s MP5). Always bring a deployable shield or bulletproof camera if available.
---
Advanced Strategies & Optimizations
37. Droning as a Team
Organize: one attacker drones ahead while the other covers. The droner should park the drone around a corner, then relay info to the teammate. Do not both drone at the same time—risk of both being destroyed.
38. Shield Operators (Montagne, Blitz, Fuze with shield)
Shield operators should not stand still. Crouch-walk or sprint and then deploy shield. Blitz can blind enemies then melee. Montagne can extend his shield to cover the entire body while teammates plant. Use the shield to block doorways.
39. C4 (Remote Explosive) Usage
Defenders can place C4s on walls or ceilings to blow up attackers below. Throw a C4 and detonate mid-air over a shield or behind cover. Practice the cook timing: 3 seconds after throwing, it explodes. You can also use it to destroy breach charges.
40. Countering Common Tactics
- Ying’s Candela: Look away or use Warden’s glasses.
- Blitz Flash: Melee his shield to push it aside and shoot his exposed legs.
- Capitao’s Smoke: Move quickly through it or use a smoke to hide your movement.
- Jackal’s Tracking: Stop walking for a few seconds to stop the ping; crouch walking leaves footprints but at slower pace.
41. Breach Denial
As Bandit or Kaid, you can electrify reinforced walls to destroy breaching gadgets. Place a Bandit battery on the wall at the last second (bandit trick) to destroy Thermite’s charge as it deploys. Kaid can electrify hatches from a distance with his claw.
42. Osa’s Transparent Shield (Attacker)
Osa can place a shield that she can look through. Use it to hold tight angles on windows or hallways. It can be shot out over time, so reposition after a few shots. Place it on a doorway to deny defenders from peeking.
43. Amaru’s Grapple (Attacker)
Use Amaru to quickly enter windows or hatches. But beware: the grapple makes a loud noise and exposes you. Best used as a surprise after drones clear an area. Coordinate with a teammate to draw attention.
44. Melusi’s Banshees (Defender)
Place Banshees near doorways or windows to slow attackers and create audio cues. Attackers can shoot them, so place them behind soft walls or in blind spots. They are especially effective during the plant phase.
45. Aruni’s Laser Gates (Defender)
Aruni’s gates destroy gadgets and drones, and deal damage to attackers. Place them at choke points. They require a cooldown after being activated. Use them to protect reinforcements or rotate paths.
---
Economy in Siege (Renown & Shop)
46. Spend Renown on Operators First
Save your renown (earned currency) to unlock operators. Start with year 1 or year 2 operators because they are cheap and strong. Avoid buying cosmetic packs until you have a solid operator pool. Each operator costs 1,000–25,000 renown depending on release year.
47. Use Battle Pass for Currency
The Battle Pass (if you purchase it) provides renown boosts and exclusive cosmetic items. Free track also gives some renown and Alpha Packs. Focus on completing weekly challenges to maximize renown gain.
48. Buy Alpha Packs Only When You Have Surplus
Alpha Packs give random cosmetics. They cost 5000 renown each. Only buy them after you own all useful operators. Alternatively, earn them through gameplay (winning matches, completing challenges).
---
Conclusion
Rainbow Six Siege rewards map knowledge, teamwork, and constant learning. Start with basic operators and communication, then gradually incorporate advanced tactics like vertical play, gadget countering, and site setups. Practice in Terrorist Hunt to hone aim and movement. Remember: every death is a lesson—watch the kill cam to see what you did wrong. Good luck, and see you on the battlefield!.