Game Tips
Combat Tips
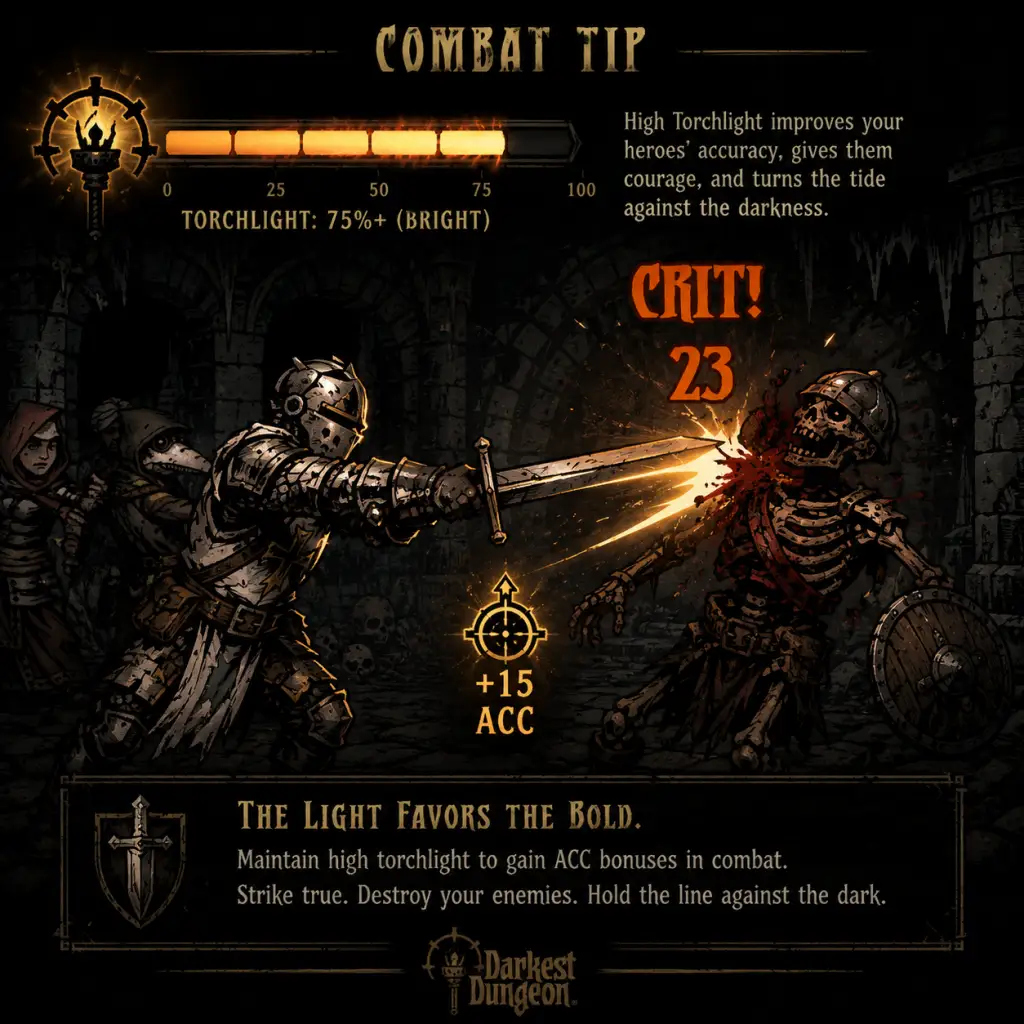
1. Always manage torchlight above 75% for first few rooms – Higher torchlight increases accuracy and reduces chance of surprise attacks, especially critical for early-game heroes with low base accuracy. Keep torches in inventory and use them when light drops below 75%.
2. Focus fire on high-priority targets – In every battle, identify the most dangerous enemy (e.g., stress dealers like the Madman or bone courtiers, or high-damage threats like Swine Drummer). Eliminate them first to reduce incoming damage and stress. Use stuns (e.g., Plague Doctor’s Blinding Gas) to delay other enemies while you focus.
3. Stun is the best status effect – Stunning an enemy removes their turn entirely, preventing both damage and stress. Abilities like the Houndmaster’s Hound’s Harry or the Bounty Hunter’s Flashbang are invaluable. Use stuns on the second or third turn to buy time for healing or finishing a target.
4. Healing is a luxury, not a priority – In many fights, preventing damage (via stuns, dodges, or high PROT) is more efficient than healing after the fact. Only bring a dedicated healer (Vestal or Occultist) if you expect prolonged fights. Otherwise, rely on camp skills and food for recovery.
5. Position matters: use movement skills wisely – Enemies and heroes have preferred ranks. Abilities like the Man-at-Arms’ Rampart or the Grave Robber’s Lunge can disrupt enemy formations, forcing dangerous backline enemies to the front where they are less effective. Conversely, always keep your squishy heroes in ranks 3-4.
6. Stress management in combat – End every fight with low stress if possible. Use abilities that reduce stress (Jester’s Inspiring Tune, Houndmaster’s Cry Havoc) or equip trinkets that boost stress resistance. A hero at 100 stress can become afflicted, causing debuffs and unpredictable behavior. Prevent this by healing stress early.
7. Guard abilities are lifesavers – Skills like the Man-at-Arms’ Guard or the Houndmaster’s Guard Dog can protect a low-health hero from a lethal blow. Use these when an enemy is about to attack a vulnerable target, especially against bosses with single-target nukes.
8. Do not underestimate accuracy – Missing attacks wastes turns and can lead to party wipes. Always equip at least one +ACC trinket on damage dealers (e.g., Focus Ring, Sun Ring). Keep torchlight high for the +ACC bonus.
Exploration Tips
1. Always scout before moving – The scouting mechanic reveals traps, battle tiles, curios, and secret rooms. Bring heroes with high scouting chance (Houndmaster, Bounty Hunter) or equip trinkets like the Scout’s Map. A successful scout lets you avoid unnecessary fights and plan your route.
2. Bring at least 4-6 shovels – Shovels are needed to clear debris blocking paths, which often contain valuable loot or lead to shortcuts. Running out of shovels can force you to backtrack or miss treasure. Also, shovels are used at certain curios (e.g., Sarcophagus) for bonus loot.
3. Keys open locked curios – Always carry 2-3 keys to open locked chests and cabinets, which often contain rare trinkets or large amounts of gold. Use keys on curios like the Iron Maiden to avoid damage from trapped containers.
4. Use holy water on Eldritch altars and portraits – Holy water is invaluable for reducing stress and gaining buffs from negative curios. Apply it before interacting with shrines, bookshelves, or other suspicious objects to get positive outcomes (e.g., stress heal, increased damage).
5. Antivenom and bandages counter bleed/blight – Bring at least 2 of each on any expedition. Bleed and blight are common in most dungeons (Warrens, Weald, Cove). Cure them immediately to prevent damage-over-time from stacking. Use Medicinal Herbs for removing debuffs and on certain curios.
6. Plan your route to maximize loot – Dungeon maps are generated with a fixed number of rooms and corridors. Try to explore all side paths but prioritize short routes that allow you to finish with low stress. Use the map to mark where curios and traps are located after scouting.
7. The secret room (Chamber of the Artifact) is always worth finding – These rooms contain the best loot (gold, rare trinkets, heirlooms). They are hidden behind a wall that must be broken with a shovel or a hero’s attack. Always bring an extra shovel to break the secret room wall when scouting reveals a small dead-end room.
8. Camping is a double-edged sword – Only camp when stress or health is critically low, or before a boss fight. Over-camping wastes resources and time, potentially causing the torch to fall too low. Use camp skills to remove negative quirks (e.g., The Warrens’ “Rough Living”) or boost stats for the next fight.
Resource Management Tips
1. Gold is easy to earn, but harder to keep – Spend gold mostly on upgrading the Blacksmith and Guild, and on provisions. Avoid buying expensive trinkets from the Nomad Wagon early; instead, loot them from dungeons. Manage your inventory wisely: sell low-value loot (e.g., Junk items) and keep heirlooms and gems.
2. Heirloom priority: Portraits > Deeds > Busts > Crests – Portraits are needed for stagecoach upgrades (more heroes per week) and for the Bank (best district). Deeds are used for the Blacksmith and Guild. Busts for the Sanitarium and Survivalist. Crests are generally the least needed late-game.
3. Upgrade the stagecoach first – At the beginning, upgrade the stagecoach to increase the number of heroes arriving each week (level 2 gives 4 heroes) and the number of heroes you can recruit (level 3 gives 6). This ensures a steady supply of fresh troops for difficult missions.
4. Do not dismiss heroes with good quirks – Even if a hero has a negative quirk, if they have positive ones like “Quick Reflexes” or “Hard Skinned,” consider treating them at the Sanitarium. Buying new heroes is expensive, and low-level heroes are cheap to train.
5. Sanitarium treatment: cure negative quirks carefully – Treat quirks that cause stress (e.g., “Kleptomaniac,” “Curious”), damage-to-self, or reduce combat effectiveness. Ignore minor penalties unless the hero is high-level. Lock in positive quirks for your main team (e.g., “Eldritch Hater” for Darkest Dungeon runs).
6. Sell trinkets you won’t use – Many trinkets are situational or have heavy drawbacks. If you have duplicates or ones that don’t fit your strategy, sell them. The gold can be used for upgrades instead.
Party Builds & Composition
1. The “Mark Team” – A classic composition: Arbalest, Houndmaster, Bounty Hunter, and Occultist. The synergy is that the Occultist marks targets (e.g., “Vulnerability Hex”), and the other three deal bonus damage against marked enemies. Extremely effective in the Weald and Cove. Use the Houndmaster’s hound for bleed, Bounty Hunter for collect bounty damage, and Arbalest for sniper shots.
2. The “Stress Heal” team – Jester, Houndmaster, or Crusader to manage stress. Combine with a Vestal for healing. The Jester’s “Inspiring Tune” and “Battle Ballad” increase speed and reduce stress. This team can tackle long dungeons with high stress generation.
3. The “Stun Lock” team – Use Plague Doctor (Blinding Gas, Noxious Blast), Houndmaster (Hound’s Harry), and Man-at-Arms (Rampart). This team stuns enemies repeatedly, preventing them from acting. Great for short, high-difficulty fights but requires careful positioning.
4. Boss-specific teams – Research boss mechanics before fighting. For the Necromancer, bring high accuracy and area-of-effect damage. For the Swine King, bring a Guard skill and high PROT. For the Siren, avoid heroes with strong self-buffs (she charms them).
5. Avoid over-specialization – Having a flexible team that can handle multiple enemy types is safer than a hyper-specialized one. For example, a party with both a stunner and a stress healer is more adaptable than one with only damage dealers.
Economy & Hamlet Management
1. Build the Bank district as soon as possible – The Bank (from The Color of Madness DLC) generates 2% interest per week on your gold reserves. This trivializes the economy when you have around 100k gold. Alternatively, focus on the Cartographer’s Camp for extra scouting chances.
2. Upgrade the Blacksmith and Guild to level 3 for each hero tier – You cannot upgrade low-level equipment beyond a certain point without these upgrades. Prioritize getting at least level 2 for both before tackling veteran dungeons.
3. Use the difficulty slider: Radiant mode for first playthrough – Radiant mode reduces grind by allowing higher-level heroes to go on lower-level quests. It also reduces the number of champion-level missions needed. This is a legitimate way to learn the game without excessive frustration.
4. Sell extra heirlooms only when desperate – Heirlooms are used for all hamlet upgrades. Convert them into gold only if you’re short on cash for a critical upgrade. Otherwise, save them.
5. Provisions are cheaper than their dungeon cost – Always buy enough food, torches, and shovels to last the entire dungeon. A single torch costs 100 gold in town but can save you from a deadly ambush or missing loot. Better to over-provision than to run out mid-dungeon.
Advanced Optimizations & Endgame Strategies
1. The “Deathless” strategy for Darkest Dungeon final quest – Use a party with high HP and stress resistance: Crusader, Man-at-Arms, Vestal, and a damage dealer (e.g., Houndmaster or Bounty Hunter). Equip them with +HP trinkets and stress reduction items. The final bosses have high damage and will target your party repeatedly. Use Guard skills and heal whenever possible.
2. Use the “Anti-ambush” trinket – The “Guardian’s Seal” (from the Vvulf quest) prevents night-time ambushes. While not mandatory, it can save you from a critical failure during camping. Alternatively, use the “Candle” from the Farmstead DLC for extra scouting.
3. Stash looting and hero management – Maintain a roster of at least 12 heroes (two full teams) to rotate. Let stressed heroes rest in the Hamlet while others do quests. Use the “Distillery” district to reduce stress recovery time. For long endgame runs, have a spare team ready if the main team gets wiped.
4. Master the order of operations for camping – Camping skills can be used in a specific order: first, use skills that heal stress (e.g., Jester’s “Turn the Tables”), then buff abilities (e.g., “Battle Ballad”), then food. If you have multiple skills, plan the sequence to maximize benefits before resting. Always camp in a safe room, not near a boss.
5. Use the “Siren” strategy for leveling low-level heroes – The Siren boss fight can be cheesed by bringing a party with only the Siren’s preferred targets (e.g., Arbalest). However, a safer method is to send your highest-level heroes alone on a short mission to quickly train low-level heroes by having them hide in the back and let the veteran do the heavy lifting.
6. The Shambler is a risk worth taking – If you have a strong party and plenty of light, deliberately triggering the Shambler by using a torch on a Shambler’s Altar can yield excellent trinkets (e.g., “Cursed Banner,” “Shambler’s Eye”). But only attempt this with a prepared team, as the Shambler can easily wipe a party.
7. Quirk locking priority – Use the Sanitarium to lock in: “Eldritch Slayer” (+15% damage vs Eldritch) for the Darkest Dungeon final boss, “Quick Reflexes” (+2 speed), “Hard Skinned” (+15% PROT), “Steady” (stress resist), and “Bodies Bound” (bleed resist). These quirks have permanent benefits.
8. Never underestimate the power of dodge – High dodge (around 30-40) makes many enemies miss frequently. The “Tough Ring” and “Camouflage Cloak” are great trinkets. Pair with a Man-at-Arms who can buff dodge with “Bolster.” Avoid relying solely on dodge for boss fights, as bosses often have high accuracy.
This guide covers general tips and should be adjusted based on your team composition, dungeon type, and difficulty. Remember: overconfidence is a slow and insidious killer.