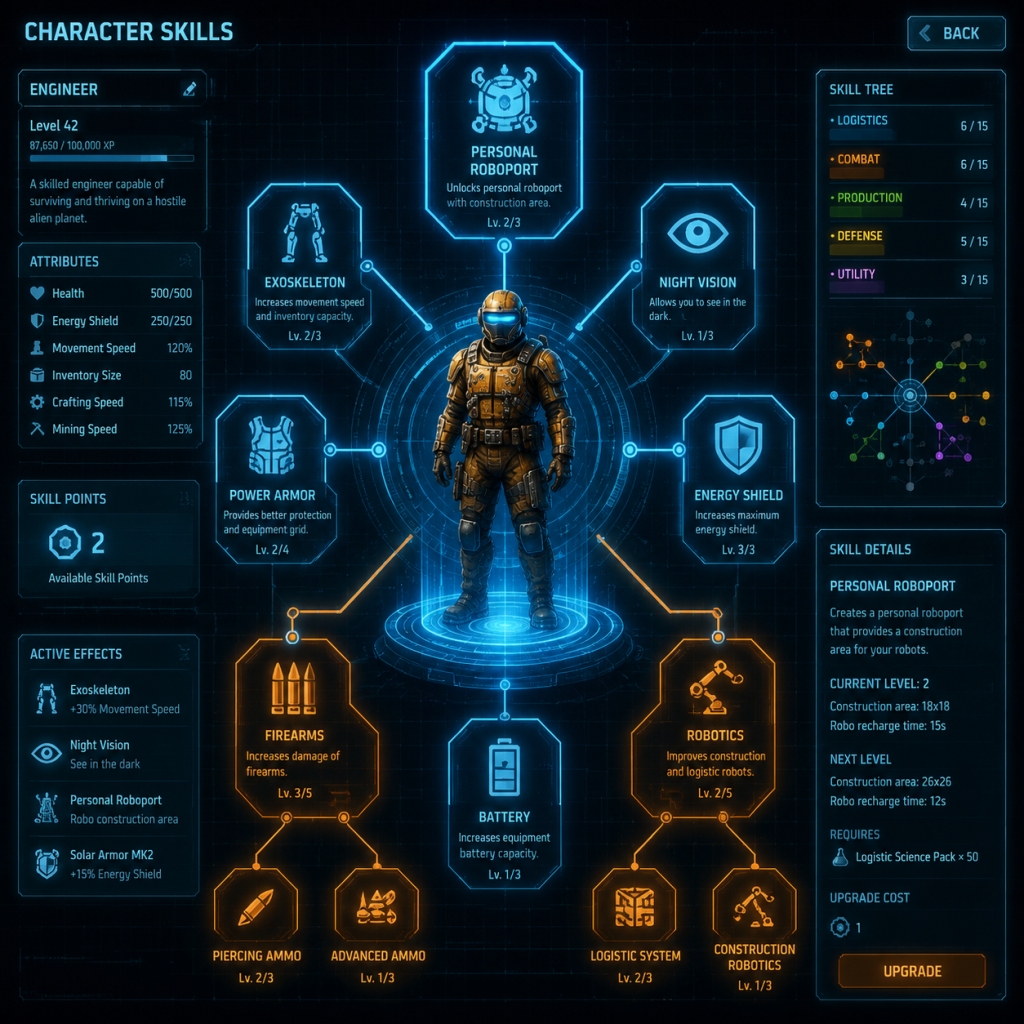
Character Skills
Character Skills
Overview
In Factorio, the engineer is the sole playable character. Instead of a traditional skill tree, abilities are unlocked through technology research and equipment crafting. This guide categorizes every active and passive skill, including combat, movement, construction, and utility abilities. Each entry describes the skill's effects, cooldowns (where applicable), upgrades, combos, synergies, recommended builds, and optimal usage scenarios.
---
Combat Skills
Combat skills range from basic weapons to advanced capsules and remote tools. All weapons benefit from damage upgrades researched in the "Combat" tech tree (e.g., Bullet Damage, Shotgun Shell Damage, Rocket Damage). Ammunition and energy required for weapon usage are not considered cooldowns but resource constraints.
#### 1. Hand Mining
- Unlock: Default.
- Effect: Pick up resources, ores, or items from entities. Slow and inefficient.
- Cooldown: None (continuous action).
- Upgrades: None.
- Combos/Synergies: Used only in the first few minutes; automate quickly.
- Recommended Build: None – avoid relying on it.
- When to Use: Only when no burner miner or electric miner exists.
- Unlock: Starting equipment.
- Effect: Fires pistol magazines. Low damage, slow fire rate.
- Cooldown: Fire rate ~3.33 per second.
- Upgrades: Magazine damage upgrades.
- Combos/Synergies: Early game defense against small biters.
- Recommended Build: Replace with submachine gun as soon as possible.
- When to Use: First few wanderer attacks, emergency defense.
- Unlock: Military tech (requires red/green science).
- Effect: Fires piercing or standard magazines rapidly. High fire rate, moderate damage.
- Cooldown: Fire rate ~10 per second.
- Upgrades: Magazine damage, piercing ammo (better damage, armor penetration).
- Combos/Synergies: Use with energy shield and heavy armor for mid-game combat.
- Recommended Build: Piercing rounds + heavy armor + personal laser defense.
- When to Use: Primary weapon until combat shotgun or rocket launcher.
- Unlock: Military tech.
- Effect: Fires a spread of pellets. High close-range damage, poor accuracy at distance.
- Cooldown: Fire rate ~1.8 per second.
- Upgrades: Shotgun shell damage, piercing shells.
- Combos/Synergies: Effective against worms and groups. Use with slowdown capsules.
- Recommended Build: Piercing shotgun shells + energy shield + exoskeleton (to close distance).
- When to Use: Clearing nests before rocket launcher is available.
- Unlock: Military tech (requires blue science).
- Effect: Faster fire rate and larger spread than basic shotgun. Best for run-and-gun.
- Cooldown: Fire rate ~2.5 per second.
- Upgrades: Same as shotgun.
- Combos/Synergies: Pair with personal defense laser and exoskeleton for mobile assault.
- Recommended Build: Full heavy armor + 2 exoskeletons + energy shield + fusion reactor.
- When to Use: Mid-game nest clearing and biter waves.
- Unlock: Military tech (requires blue science).
- Effect: Fires rockets (explosive, atomic). High area damage, slow fire rate.
- Cooldown: Fire rate ~1 per second.
- Upgrades: Rocket damage, rocket speed (for accuracy). Atomic bomb is a late-game upgrade.
- Combos/Synergies: Atomic bomb can one-shot large biter nests. Use with poison capsules for crowd control.
- Recommended Build: Atomic bombs + personal roboport for repairs + spidertron artillery.
- When to Use: Late-game biter base removal, atomic artillery support.
- Unlock: Military tech (requires blue science).
- Effect: Sprays fire over a cone. Damage over time and area denial. Uses crude oil or heavy oil.
- Cooldown: Continuous stream; no cooldown but consumes fuel.
- Upgrades: Fire damage, range.
- Combos/Synergies: Ineffective against biters that can avoid flames; combine with slowdown capsules or walls.
- Recommended Build: Heavy armor + legs (exoskeleton) for mobility; use from behind walls or turrets.
- When to Use: Clearing trees, denying biter approaches, controlling nest regrowth.
- Unlock: Military tech (requires red/green science).
- Effect: Thrown explosive, 2-second fuse. Area damage, destroys cliffs and trees.
- Cooldown: Throwing animation ~1 second, then 0.5 seconds before next throw. Max stack 20.
- Upgrades: Grenade damage, cluster grenade (splits into multiple explosions).
- Combos/Synergies: Clear large biter clusters quickly. Pairs with slowdown capsules to keep enemies grouped.
- Recommended Build: Use as primary early anti-nest weapon. Carry 2-3 stacks.
- When to Use: Early nest clearing, clearing trees for new builds.
- Unlock: Military tech (requires blue science).
- Effect: Creates a cloud of poison gas dealing damage over time. Does not damage structures or worms immediately (worms take damage). Lasts ~30 seconds.
- Cooldown: No cooldown, but limited by capsule count (100 per stack). Requires poison capsule item.
- Upgrades: Capsule damage (affects poison), capsule range.
- Combos/Synergies: Throw multiple to stack damage. Immune to poison yourself? (No, you take damage if in cloud). Use with slowdown or defender capsules.
- Recommended Build: Bomb nests from distance; use with vehicle to throw while driving.
- When to Use: Clearing nests safely from range, especially effective against worms.
- Unlock: Military tech (requires blue science).
- Effect: Slows enemies in area by 50% (or more with upgrade). Lasts ~20 seconds.
- Cooldown: No cooldown.
- Upgrades: Capsule range, slowdown effect duration.
- Combos/Synergies: Essential for defensive turret lines; combine with flamethrower or destroyer capsules.
- Recommended Build: Always carry 1-2 stacks in mid-game combat loadout.
- When to Use: When facing fast biters (spitters, behemoth), before throwing explosive capsules.
- Unlock: Military tech (requires blue science).
- Effect: Spawns a flying combat bot that attacks nearby enemies. Lasts ~30 seconds, then self-destructs. Max active defenders limited by follower count (from upgrades).
- Cooldown: No cooldown (but each capsule spawns one follower).
- Upgrades: Follower count (up to 100), follower damage, follower speed.
- Combos/Synergies: Use with distractor capsules to draw aggro, or with destroyer capsules for damage. Good for personal defense.
- Recommended Build: Max follower count + exoskeleton + personal laser for a mobile army.
- When to Use: Early to mid-game offensive pushes; patrol defense.
- Unlock: Military tech (requires blue science).
- Effect: Spawns a stationary bot that emits a loud noise to attract enemies. Bots fight but mainly serve as decoys.
- Cooldown: No cooldown.
- Upgrades: Follower count, bot health.
- Combos/Synergies: Combine with defender/destroyer capsules to protect your bots. Use while approaching nests.
- Recommended Build: Pair with destroyer capsules for crowd control.
- When to Use: Drawing biters away from turrets or while clearing with artillery.
- Unlock: Military tech (requires purple/yellow science).
- Effect: Spawns a powerful combat bot that deals high damage. Max followers are separate from defender/distractor pool.
- Cooldown: No cooldown.
- Upgrades: Follower count (up to 100 combined with others? Actually separate pool – check).
- Combos/Synergies: Best offensive capsule. Combine with personal lasers and exoskeleton.
- Recommended Build: Max destroyer followers, use with shield and armor.
- When to Use: End-game biter clearing, especially behemoths.
- Unlock: Requires personal discharge defense equipment.
- Effect: Fires an electric shock to nearby enemies when activated. Stuns and damages. Cooldown based on energy supply.
- Cooldown: Energy recovery dependent on battery/fusion reactor.
- Upgrades: None.
- Combos/Synergies: Emergency escape tool; use with energy shield.
- When to Use: When surrounded by biters; get out of tight spots.
- Unlock: Military tech (requires red/green science).
- Effect: Placeable explosive mine. Triggered by enemy stepping on it. Does area damage.
- Cooldown: Placing one at a time; no cooldown but consumes item.
- Upgrades: Mine explosion damage, range.
- Combos/Synergies: Lay corridors for biters; combine with walls and slow effect.
- Recommended Build: Use for defensive perimeter rather than active skill.
- When to Use: As a defensive layer around base.
- Unlock: Requires artillery turret and remote research.
- Effect: Targets a location; then artillery fires shells automatically if ammo is present.
- Cooldown: Fire rate of turret; remote just designates target.
- Upgrades: Artillery range, shell damage.
- Combos/Synergies: Use to clear biter bases from far away; pair with radar for remote viewing.
- Recommended Build: Essential for megabase expansion.
- When to Use: Late-game biter base suppression.
- Unlock: Spidertron vehicle research.
- Effect: Control a remotely piloted Spidertron. Click on map to move; right-click for attack commands.
- Cooldown: None.
- Upgrades: Spidertron equipment grid (personal roboport, lasers, exoskeleton, etc.).
- Combos/Synergies: Use multiple spidertrons as a mobile army. Equip with rockets and shields.
- Recommended Build: One Spidertron with personal roboport and construction bots for automated building; another with lasers for combat.
- When to Use: End-game base building and exploration; biter clearing without personal risk.
- Default speed: ~3.2 tiles/second.
- Upgrades: Exoskeleton (each adds +50% speed); up to 2 in armor Mk2, 4 in Mk3 (with modular armor? Actually armor grid size increases).
- Synergies: Speed is crucial for evading biters and quick construction.
- Recommended Build: Always equip at least one exoskeleton after unlocking.
- Unlock: Research Car (red/green), Tank (blue), Spidertron (purple/yellow).
- Effect: Ride inside vehicle. Car fast but fragile; Tank durable with ranged weapon; Spidertron can walk over cliffs and water.
- Cooldowns: None (fuel consumption).
- Upgrades: Vehicle armor, weapon upgrades (machine gun, cannon, rockets).
- Combos: Tank used for early biter clearing; Spidertron for end-game.
- Recommended Build: Tank with personal defense lasers; Spidertron with exoskeleton and roboport.
- When to Use: Traveling long distances, biter base clearing.
- Unlock: Research Construction Robotics and Personal Roboport (blue science).
- Effect: Enables construction and repair bots to deploy from your inventory to build/repair items in range (upgradable range).
- Cooldown: Only limited by bot availability and recharge rate.
- Upgrades: Roboport range, bot speed, number of bots.
- Combos/Synergies: Use with ghost building – place ghosts and bots will build automatically.
- Recommended Build: Essential for mid-game and beyond; equip in armor grid.
- When to Use: All construction tasks; repair during combat.
- Unlock: Research Automation (starting).
- Effect: Mark entities for deconstruction (bots will remove them).
- Cooldown: None.
- Upgrades: Filter mode (only specific items).
- Combos/Synergies: Use with blueprints to rebuild layouts.
- Recommended Build: Always in inventory.
- When to Use: Reorganizing base, removing old builds.
- Unlock: Research (free).
- Effect: Save a copy of a structure layout; place ghosts for instant building.
- Cooldown: None.
- Upgrades: Advanced blueprint (include circuit conditions, logistics).
- Combos/Synergies: Pair with personal roboport for instant construction.
- Recommended Build: Use for mega-base design.
- When to Use: Repeating identical build patterns.
- Unlock: Research (terraform – red/green).
- Effect: Place landfill tile over shallow water, creating land.
- Cooldown: None (consumes stone).
- Upgrades: None.
- Combos/Synergies: Use with cliff explosives to flatten terrain.
- Recommended Build: Essential for base expansion near water.
- When to Use: When base space is limited by water.
- Unlock: Research (requires blue science).
- Effect: Blow up a cliff tile, removing it permanently.
- Cooldown: None (consumes explosives).
- Upgrades: None.
- Combos/Synergies: Clear paths for belts and trains.
- Recommended Build: Carry stack for base layout.
- When to Use: When cliffs obstruct factory expansion.
- Unlock: Research Railway (red/green).
- Effect: Enter locomotive; accelerate and brake. Can switch to automatic driving via schedule.
- Cooldown: None.
- Upgrades: Fuel types (coal, solid fuel, rocket fuel, nuclear fuel) affect speed and acceleration.
- Combos/Synergies: Use remote train control with signals.
- Recommended Build: Use nuclear fuel for max speed.
- When to Use: Transporting resources long distances; personal train travel.
- Unlock: Research Logistics network (yellow/purple).
- Effect: Set personal logistic requests: bots will bring items to your inventory when you are in range of a roboport.
- Cooldown: None.
- Upgrades: Larger request slots.
- Combos/Synergies: Setup requester chests to supply construction bots.
- Recommended Build: Essential for mid-game to maintain inventory without manual picking.
- When to Use: Always active – ensures you have needed items for building.
- Effect: Automatically attacks enemies within range. Requires energy.
- Upgrades: Mk2 (more damage).
- Synergies: Pairs with exoskeleton and energy shields; conserves ammo.
- Recommended Build: Use in heavy armor for constant DPS.
- When to Use: Any combat situation; reduces need for manual shooting.
- Effect: Absorbs damage before health; recharges over time.
- Upgrades: Mk2 (more capacity).
- Cooldown: Recharge delay after hit (1 second), then regen ~3 seconds.
- Synergies: Essential for survival in heavy combat.
- Recommended Build: Always use as many shields as possible; balance with batteries.
- When to Use: All biter attacks; essential for deathworld.
- Effect: Stores energy for shield and lasers. Needs to be charged by solar or fission reactor.
- Upgrades: Mk2 (larger capacity).
- Synergies: Pair with solar panels or fusion reactor.
- Recommended Build: At least one battery in early game until fusion reactor.
- When to Use: When energy demand exceeds supply.
- Effect: Increases movement speed by 50% each. Stack up to 4 (with Mk3 armor).
- Upgrades: None (single version).
- Synergies: Essential for kiting enemies and quick base building.
- Recommended Build: At least two exoskeletons for combat mobility.
- When to Use: Always equip for general movement; remove only for extreme combat tank builds.
- Effect: Removes darkness effect; enables clear vision at night.
- Upgrades: None.
- Synergies: Useful for base building during night cycle.
- Recommended Build: Optional; can replace with solar-powered lamps.
- When to Use: If you dislike darkness or need to see without lighting.
- Effect: Extends range for construction bots (Mk1: 30x30 area, Mk2: 50x50 area; also 10 bots max vs 25).
- Upgrades: Mk2 from Space science.
- Synergies: Use with blueprint ghosts.
- Recommended Build: Upgrade to Mk2 as soon as possible.
- When to Use: Any building project.
- (Note: There is no official active defense module; the Discharge Defense is considered active defense.)
- Effect: Generates 750kW (Mk1) or 1.5MW (Mk2) of power for equipment.
- Upgrades: Mk2 from space science.
- Synergies: Powers shields, lasers, exoskeleton; essential for heavy combat build.
- Recommended Build: Use Mk2 in end-game armor.
- When to Use: When multiple exoskeletons and shields are equipped.
- Effect: Toggle satellite view. Can place blueprints and issue commands (artillery, spidertron) from map.
- Cooldown: None.
- Upgrades: Radar coverage reveals map.
- Combos: Use with remote control for long-distance building.
- When to Use: Planning expansions, scouting without traveling.
- Effect: Quick access to items; placement of buildings or equipment.
- Cooldown: None.
- Upgrades: More quickbar rows (via inventory upgrade).
- When to Use: Efficient building.
- Effect: Place ghost of an item without building it; bots will construct later.
- Cooldown: None.
- When to Use: When personal roboport is active or planning ahead.
- Effect: Connect circuit network wires automatically when placing combinators/poles.
- Cooldown: None.
- When to Use: Complex automation.
- Effect: Adjust camera zoom level.
- Cooldown: None.
- When to Use: Always.
- Effect: Manual crafting. Limited to personal inventory crafting speed (base 0.5 per second; upgraded with crafting speed research? No, only assemblers).
- Cooldown: Continuous.
- When to Use: Early game only; automate ASAP.
- Skills: Hand mining, pistol, grenades.
- Equipment: Iron armor, stone furnaces.
- Build: Focus on gun turrets and wall construction; use grenades for nests.
- Skills: Combat shotgun, defender capsules, slowdown capsules.
- Equipment: Heavy armor (or modular armor with 1 shield, 1 laser, 1 battery).
- Build: Use walls and gun turrets; personally lead assault with shotgun and defenders.
- Skills: Spidertron remote, atomic bombs, artillery remote.
- Equipment: Power armor Mk3 with 2 fusion reactors, 2 exoskeletons, 4 energy shields, 2 personal defense lasers, personal roboport Mk2.
- Build: Let spidertron and artillery clear while you construct remotely.
#### 2. Pistol
#### 3. Submachine Gun (SMG)
#### 4. Shotgun
#### 5. Combat Shotgun
#### 6. Rocket Launcher
#### 7. Flamethrower
#### 8. Grenades
#### 9. Poison Capsules
#### 10. Slowdown Capsules
#### 11. Defender Capsules
#### 12. Distractor Capsules
#### 13. Destroyer Capsules
#### 14. Discharge Defense Remote
#### 15. Land Mines
#### 16. Artillery Remote
#### 17. Spidertron Remote
---
Movement & Utility Skills
#### 1. Running
#### 2. Vehicle Operation (Car, Tank, Spidertron)
#### 3. Personal Roboport
#### 4. Deconstruction Planner
#### 5. Blueprints
#### 6. Landfill
#### 7. Cliff Explosives
#### 8. Train Driving
#### 9. Logistics System (Personal Logistics)
---
Equipment-Based Abilities
Equipment modules are placed in the armor’s equipment grid. They provide passive or active abilities.
#### 1. Personal Defense Laser
#### 2. Energy Shield
#### 3. Battery
#### 4. Exoskeleton
#### 5. Nightvision
#### 6. Personal Roboport Mk1 & Mk2
#### 7. Active Defense Modules
#### 8. Fusion Reactor
---
Special Moves & Interface Skills
#### 1. Map Mode (M key)
#### 2. Quickbar Usage (1-9, Q, etc.)
#### 3. Ghost Building (Shift + Click)
#### 4. Auto-Connect Wires (Red/Green)
#### 5. Zooming (Scroll wheel)
#### 6. Crafting Menu (E)
---
Recommended Builds
#### Early Game (First 2 hours)
#### Mid-Game Deathworld
#### End-Game Megabase
---
Conclusion
Every skill in Factorio has its place, but the true power lies in automating them. Focus on early upgrades for weapons and capsules, and invest in exoskeletons and personal roboports for mobility and construction efficiency. Adapt your skill usage to the current threat level and factory size. The engineer is a versatile tool; use your abilities wisely to conquer the planet.