Game Tips
Game Tips
Beginner Tips
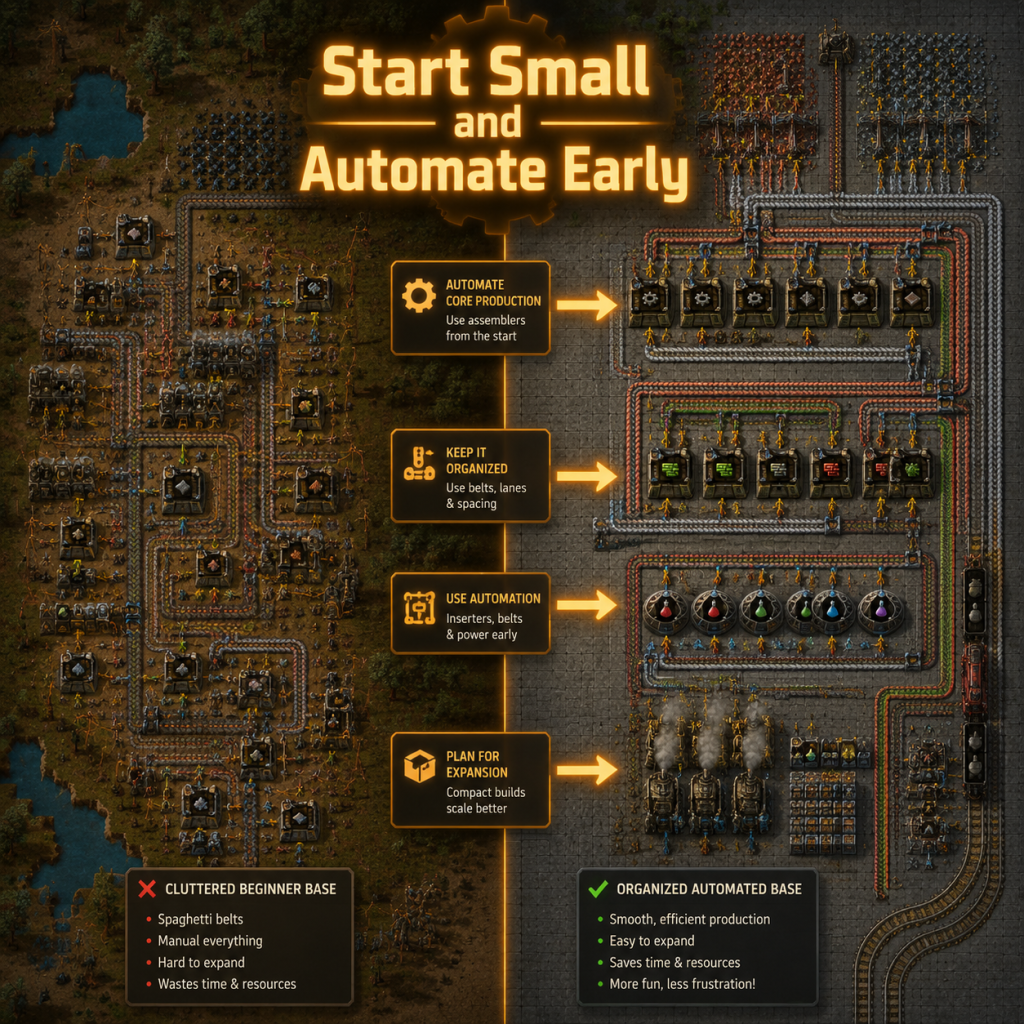
#### Start Small and Automate Early
- Tip: As soon as you have a few iron and copper plates, build an automated setup for red science packs (automation science). Use a single assembler for gears, then feed those into assemblers for science.
- Why: Hand-crafting everything becomes a bottleneck. Automating science from the start lets you research faster, unlocking belts, inserters, and other essentials that dramatically speed up expansion.
- When: Immediately after your first 10-20 iron plates are smelted.
- Tip: Create a centralised "bus" of belts carrying key resources (iron plates, copper plates, steel, circuits, plastic) in one direction, then pull off what you need for each production block.
- Why: A main bus simplifies scaling and troubleshooting. You can easily see what’s running low and add more smelting or production lines without rebuilding everything.
- When: Once you unlock splitters and underground belts (red/green science). For beginners, 4-8 lanes initially; later expand to 16+ lanes.
- Tip: Learn basic production ratios. For example, 1 stone furnace smelts 1 iron/copper ore per second. To fully saturate a yellow belt (15 items/s), you need 15 furnaces per side.
- Why: Overbuilding or underbuilding wastes resources and space. Correct ratios ensure smooth flow without backups or shortages.
- When: Start applying from mid-game (green science) onward. Use the Factorio Calculator website or in-game crafting speed tooltips.
- Tip: Keep an eye on your pollution cloud. It triggers biter attacks. Build walls and turrets (gun turrets with yellow ammo first) around your base perimeter, especially near pollution sources (smelters, boilers, steam engines).
- Why: Biters attack only when pollution reaches their nests. Containing pollution buys you time; active defense prevents destruction of key structures.
- When: As soon as you start burning coal for power (steam engines).
- Tip: Transition to a modular base layout. Use a grid of rail-supported blocks (e.g., 3x3 chunks) each dedicated to a single product (green circuits, red circuits, etc.). Use trains to move materials between blocks.
- Why: This design is highly expandable and future-proof. You can add new blocks without tearing down existing ones. Perfect for mid-game when iron/copper patches deplete.
- When: After you have construction robots and rails unlocked (blue science). Start with a small 100x100 block pattern.
- Tip: Use chain signals before junctions and rail signals after. Build stackers (parking bays) at each unloading station so trains queue without blocking the main line.
- Why: Proper signals prevent deadlocks and increase throughput. Stackers ensure continuous ore delivery even when multiple trains arrive simultaneously.
- When: When you have more than two trains on a shared rail network. Use 1-4 trains (1 locomotive, 4 wagons) for bulk ore.
- Tip: Replace steam power with solar panels and accumulators once you have advanced circuits. Build solar fields in large arrays (e.g., 24 solar panels + 20 accumulators per roboport coverage area).
- Why: Solar is pollution-free and requires no fuel logistics. Accumulators sustain night operation. The initial cost is high but pays off in infinite free energy.
- When: After you have construction bots (blue science) and a steady supply of green circuits. Use a blueprint book with optimal ratios (0.84 accumulators per panel).
- Tip: Use requester and provider chests with logistic bots to automate repair packs, turret ammo, and construction supplies at your defenses. Also use blueprints to quickly expand smelting arrays.
- Why: Logistic networks dramatically reduce manual travel. Bots automatically deliver items to repair packs, refill turrets, and rebuild destroyed walls. Blueprints allow you to copy/paste entire sections.
- When: After unlocking logistics network (yellow science). Start with a small personal roboport and a few hundred construction bots.
- Tip: For assemblers consuming multiple ingredients, position them so that one assembler outputs directly into another (e.g., copper wire→green circuit assembler). Use long-handed inserters or stack inserters with bonus capacity.
- Why: Direct insertion reduces belt traffic and improves UPS (updates per second) performance. It’s critical for end-game megabases where belt congestion becomes a bottleneck.
- When: On megabases (>1k science per minute) where UPS is precious. For example, directly feed copper wire to green circuit assemblers with a 3:2 ratio.
- Tip: Surround productivity-3 module assemblers with speed-3 beacons to get massive output per machine. Use 8 or 12 beacons per assembler (two rows of 4 or 6).
- Why: Productivity modules reduce resource consumption, but they slow the machine. Beacons with speed modules counteract that, resulting in net resource savings and higher throughput per machine. For example, 12 beacons + prod modules gives ~2.5x output for half the resources.
- When: After you have purple and yellow science and advanced module production. Best applied to expensive recipes like blue circuits, rocket fuel, and rocket control units.
- Tip: Use a mod like LTN (Logistic Train Network) or CyberSyn to dynamically assign trains to stations based on demand. Create depots and use requester/provider stations.
- Why: Vanilla train logic can starve or overflow stations. LTN optimizes train assignments, reduces number of trains needed, and allows easy scaling. Great for bases with many different ores and intermediates.
- When: You’re struggling with vanilla train schedules. Works best with a city block layout and a central depot.
- Tip: For extremely large bases (10k+ SPM), avoid using splitters excessively, minimise belt merging, use direct insertion, and prefer nuclear power (single reactor = 40MW, but use 2x2 layouts for neighbor bonus) over solar for UPS efficiency. Also, limit biters and pollution by disabling expansion or using peaceful mode.
- Why: Factorio’s simulation of belts, inserters, and enemies consumes CPU. Reducing belt length and inserters per item moves UPS. Nuclear power has fewer entities per MW than solar.
- When: When your base runs below 60 UPS, or when planning a megabase from the start.
- Tip: Use the map preview to ensure your starting area has a mix of resources (iron, copper, coal, stone, water) within easy walking distance. Avoid starting too close to large biter nests.
- Why: Starting on poor resources forces you to expand early, which can be dangerous. Water is essential for power and later for oil processing.
- When: In game settings, set resource richness to "very good" for easier early game, or "rail world" for reduced biter expansion.
- Tip: Place radars at regular intervals (every 3-5 chunks) to reveal the map. Build a car or tank equipped with grenades/power armor to scout for new resource patches.
- Why: Radars prevent black spots where biters can expand unnoticed. Active scouting helps you claim rich patches before biters settle on them.
- When: After red/green science, build a few radars. For exploration, use a car with a personal defense laser if possible.
- Tip: If biters are close, attack their nests early (with machine gun/fish/turrets) before they evolve too much. Use turret creep: place a few gun turrets ahead loaded with ammo, then push closer.
- Why: Biter evolution increases with pollution and time. Early clearance gives you safe expansion room and access to larger ore patches. Turret creep is safe and cost-effective.
- When: As soon as you have a dozen turrets and 200 yellow ammo.
- Tip: Build double-layer walls with a gap (dragon’s teeth) in front. Place gun turrets behind the wall, spaced every 2-3 tiles, with piercing ammo.
- Why: Dragon’s teeth slow down biters, making them easy targets. Double walls buy time for turrets to fire. Piercing ammo is essential for medium+ biters.
- When: After red science for walls, but strengthen when you see big biters (green/blue science).
- Tip: Place flamethrower turrets behind walls, fed with light oil or crude oil via pipes. Also put landmines outside the walls.
- Why: Flamethrowers deal area damage and set biters on fire, killing groups efficiently. Landmines are cheap and trivial to replace. Combination is extremely effective against large swarms.
- When: Once you have oil processing (blue science). Flamethrower turrets last forever with minimal maintenance.
- Tip: Build a separate power grid for laser turrets using a switch (connect a power switch to a red wire from a combinator detecting local damage). Only turn on the laser grid when biters attack.
- Why: Lasers drain enormous power even when idle. Switching them off except during attacks saves power and reduces pollution. Use an accumulator charge detector to trigger.
- When: After you unlock lasers (blue science) and have a nuclear or large solar farm.
- Tip: Build an artillery cannon and use it to clear biter nests beyond your pollution cloud. Use an artillery wagon with a dedicated train for remote clearing.
- Why: Artillery can destroy nests from far away, reducing attacks. It also triggers biter rage, so be ready to defend the train with a spidertron or turrets.
- When: After yellow science. Pair with radar to target.
- Tip: Use high-yield ore patches first (e.g., >5M iron/copper) for smelting. Reserve small patches for outposts or immediate needs. Use productivity modules in miners to stretch resources.
- Why: High-yield patches last longer, reducing need to relocate mines frequently. Productivity modules in miners give free ore over time.
- When: Mid-game onward. Use speed modules only if ore is plentiful.
- Tip: When moving fluids long distances, use underground pipes (max 10 per section) to reduce pipe length and pressure drop. Use pumps at regular intervals on very long runs.
- Why: Long pipes reduce flow rate dramatically. Underground pipes count as a single segment for length calculations. Pumps restore pressure.
- When: For oil outposts or water to boilers. Keep pipe segments under 60 tiles without pump.
- Tip: Automate stone brick early for walls and furnaces. Use electric furnaces for smelting steel (2:1 iron:steel ratio). For high volume, use steel furnaces early then electric after solar/ nuclear.
- Why: Stone bricks are needed for concrete and walls. Electric furnaces can be beacon-moduled later. Steel is a key ingredient in many advanced items.
- When: Start making bricks manually or with a small stone smelter right after red science.
- Tip: Save your best designs (smelting arrays, science setups, mall) as blueprints. Use the blueprint library (in-game) to sync across saves via the Factorio.com account.
- Why: Blueprints accelerate building and ensure consistency. You can share designs with others or reuse them in future runs.
- When: Start using blueprints as soon as you have construction bots.
- Tip: Create a central area that supplies all building materials: belts, inserters, assemblers, furnaces, pipes, power poles, rails, etc. Use requester chests to feed assemblers and provider chests to store outputs.
- Why: A mall eliminates the need to hand-craft items for expansion. You can grab stacks of everything you need and go build.
- When: After logistics network (yellow science). Start small with just belts and inserters.
- Tip: For extremely large bases (1k+ SPM), avoid using too many splitters; prefer direct insertion. Use a single belt for many items (mixed sushi belt) only if necessary. Use the entity count limiter mod or limit biters completely.
- Why: Each splitter and belt segment adds computational load. Sushi belts require complex combinators that drain UPS. A cleaner design reduces UPS footprint.
- When: When your base is above 5k SPM or you notice UPS drops below 55.
- Tip: Use decider combinators to turn on/off production based on resource thresholds (e.g., enable iron gear production only when iron plates > 10k). Use programmable speakers to alert when a buffer runs low.
- Why: Prevents buffer bloat and ensures resources are used efficiently. Also allows priority systems (e.g., send coal to plastics before power).
- When: After you understand basic circuit logic. Start with simple enable/disable conditions on inserters.
- Tip: Equip a car or tank with a personal roboport and a few construction bots. Drive to a new mining outpost, place blueprints, and the bots (from your inventory) will build everything.
- Why: Speeds up outpost construction dramatically. No need to bring materials by belt; you carry them in chests.
- When: After you have a personal roboport (yellow science) and a vehicle.
- Tip: Use the spidertron remote to control multiple spidertrons simultaneously. Set a group of spidertrons to follow each other and give them a remote. They can auto-repair and clear nests.
- Why: The spidertron is a mobile fortress that can navigate rough terrain. Multiple spidertrons with rockets can destroy massive biter bases without risk to the player.
- When: After spidertron research (yellow/purple science). Build 4+ and arm with rockets.
- Tip: Consider quality-of-life mods like:
- Why: These mods reduce tedious micromanagement and help you focus on design.
- When: After a vanilla playthrough, or immediately if you prefer. Most are safe for achievements.
- Tip: Don’t place too many steam engines on one boiler. One boiler (1.8MW) supports up to 2 steam engines (0.9MW each). Use power switch to isolate a steam backup battery. Avoid hand-crafting green circuits past early game—automate them immediately.
- Why: Overloading boilers causes brownouts. Hand-crafting circuits wastes time. Power switches prevent blackouts from solar/accumulator dips.
- When: Learn these early to avoid rebuilding.
#### Build a Main Bus
#### Use Ratios Wisely
#### Manage Pollution
Intermediate Strategies
#### City Block or Bootstrap Base
#### Train Signalling and Stackers
#### Modular Power with Solar Accumulators
#### Bot-Based Construction and Repair
Advanced Optimizations
#### Direct Insertion for High-Throughput
#### Beacon Overlays and Speed Modules
#### Balanced Train Network with LTN or CyberSyn
#### UPS-Friendly Building Techniques
Exploration Tips
#### Map Away From Starting Area
#### Radar Coverage and Recon
#### Early Aggression for Space
Combat Tips
#### Walls and Dragon’s Teeth
#### Flamethrower Turrets and Landmines
#### Laser Turrets with Power Switches
#### Artillery for Clearing Nests
Resource Management
#### Ore Patch Prioritization
#### Fluid Handling Tricks
#### Stone and Brick Production
Build & Economy
#### Blueprint Library
#### The "Mall"
#### Managing UPS in Megabases
Additional Advanced Tips
#### Circuit Network for Dynamic Control
#### Car and Tank with Personal Roboport
#### Spidertron Remote Control
#### Mods to Enhance Experience
- Bottleneck (shows machine status)
- Helmod or Factory Planner (plan production ratios)
- Squeak Through (walk between machines)
- Even Distribution (quickly fill multiple buildings)
- Vehicle Snap (better car/tank handling)
#### Avoiding Common Mistakes
By following these tips, you’ll progress from a struggling engineer to a master of automation. Remember: The factory must grow!