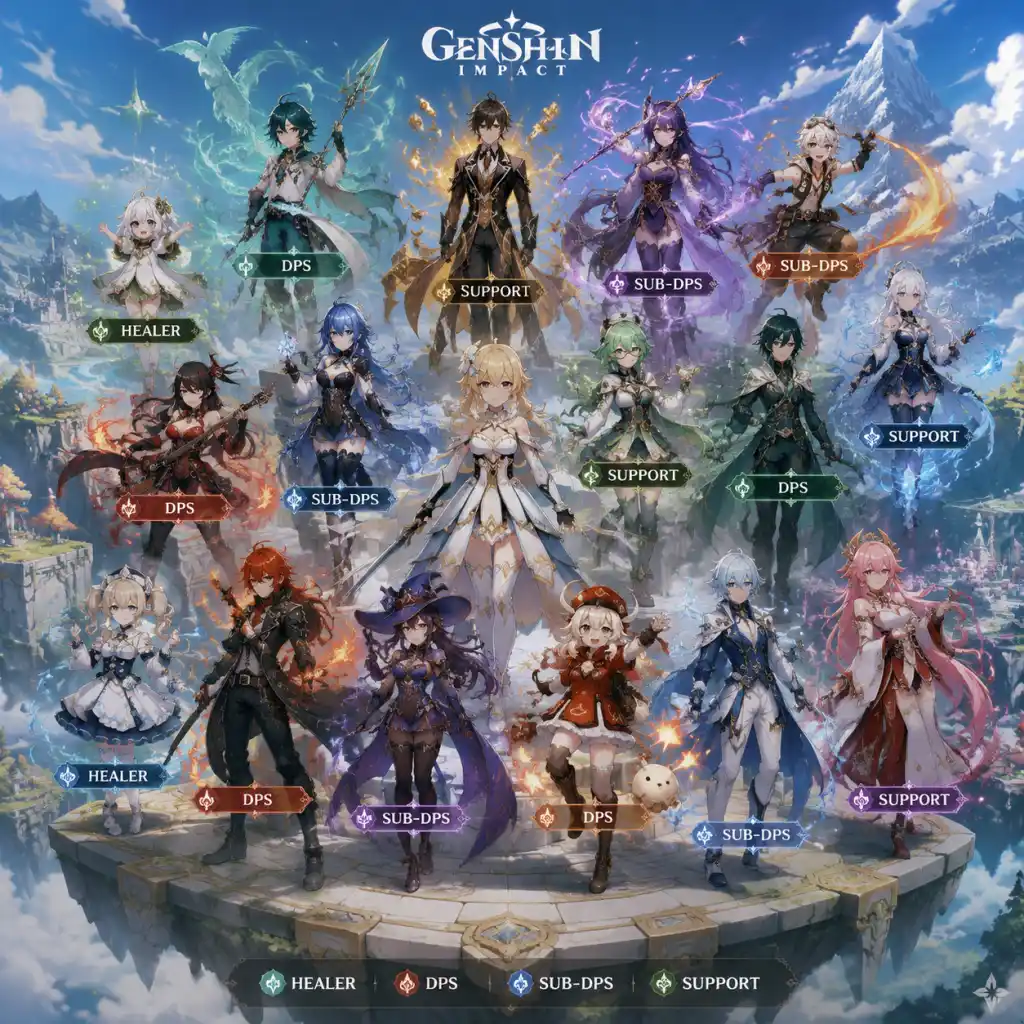
Characters & Roles
Overview
Genshin Impact features a diverse roster of over 80 playable characters, each with a unique combination of Element, Weapon type, and Role. Characters are obtained primarily through the Wish (gacha) system, with a few exceptions like the Traveler (free), Aloy (limited-time collaboration), and occasional free event characters. This guide covers every major character as of Version 5.x, organized by region, detailing their background, strengths, weaknesses, playstyle, unlock conditions, recommended equipment/builds, and team synergy.
Character Basics
Elements
- Pyro (Fire) – High damage, reactions like Vaporize, Melt, Overloaded.
- Hydro (Water) – Enabler for reactions, healing, crowd control.
- Anemo (Wind) – Swirl reactions, crowd control, mobility.
- Electro (Lightning) – Energy regeneration, reactions like Electro-Charged, Superconduct, Aggravate.
- Dendro (Nature) – Bloom, Hyperbloom, Burgeon, Quicken reactions.
- Cryo (Ice) – Freeze, Melt, Superconduct.
- Geo (Earth) – Shields, constructs, Crystallize reactions.
- Sword – Balanced, fast attacks.
- Claymore – Heavy, slow, can break shields.
- Polearm – Medium speed, good reach.
- Bow – Ranged, charged shots for weak points.
- Catalyst – Ranged magic, auto attacks are elemental.
- Main DPS – Primary damage dealer, stays on field.
- Sub-DPS – Off-field damage, skill/burst reliant.
- Support – Healing, shielding, buffing, debuffing.
- Utility – Exploration, energy generation, crowd control.
- Standard Wish – All standard 5-star characters (Diluc, Jean, Mona, Keqing, Qiqi, Tighnari, Dehya) and most 4-star characters are available.
- Limited Character Event Wishes – Most 5-star characters (e.g., Raiden Shogun, Nahida) and some 4-stars are exclusive to their banner.
- Starglitter Exchange – Rotation of 4-star characters (Amber, Kaeya, Lisa, etc.) and some 5-stars (after enough constellations).
- Free Characters – Traveler (all elements), Amber, Kaeya, Lisa (story), Barbara (AR20), Xiangling (Spiral Abyss floor 3), Collei, Lynette (story), and event-exclusive characters like Aloy (expired).
Weapon Types
Roles
Unlock Conditions
Constellations
Constellations (C1-C6) enhance abilities. Some characters drastically improve (e.g., Bennett C1, Xingqiu C6). Not required for viability but offer power spikes.
Regional Character Compendium
Mondstadt (City of Freedom)
| Character | Element | Weapon | Role | Strengths | Weaknesses |
|---|---|---|---|---|---|
| Traveler (Anemo) | Anemo | Sword | Sub-DPS/Support | Free, flexible, crowd control | Low personal damage |
| Amber | Pyro | Bow | Utility/DPS (low) | Free, baron bunny taunt, exploration passive | Weak damage, clunky |
| Kaeya | Cryo | Sword | Sub-DPS/Support | Free, energy refund, good reaction enabler | Low damage scaling |
| Lisa | Electro | Catalyst | Sub-DPS | Free, defense shred, AoE burst | Slow, requires field time |
| Barbara | Hydro | Catalyst | Healer | Free, continuous healing, hydro application | No shield, self-wet |
| Diluc | Pyro | Claymore | Main DPS | High consistent Pyro damage, simple playstyle | Outclassed by newer Pyros |
| Jean | Anemo | Sword | Healer/Support | Healing, crowd control, cleanse | Low damage, split scaling |
| Venti | Anemo | Bow | Support/CC | Largest AoE suction, energy regeneration | Less effective against heavy enemies |
| Klee | Pyro | Catalyst | Main DPS | High burst damage, fun gameplay | Clunky, short range, squishy |
| Razor | Electro | Claymore | Physical DPS | Easy to play, self-sustain | Loses to other DPS, electro not ideal for physical |
| Noelle | Geo | Claymore | Healer/DPS (C6) | Shield, healing, AoE Geo damage at C6 | High energy cost, weak before C6 |
| Fischl | Electro | Bow | Sub-DPS | Oz off-field damage, energy generation | No AoE, reliant on Oz uptime |
| Sucrose | Anemo | Catalyst | Support/EM Share | EM boost, crowd control, cheap | Low personal damage, requires reactions |
| Bennett | Pyro | Sword | Support/Healer | Best attack buff, healing, fast energy | C6 affects some comps, burst circle locked |
| Qiqi | Cryo | Sword | Healer | Strong healing, off-field cryo | No energy recharge, low utility |
| Diona | Cryo | Bow | Healer/Shielder | Shield, healing, cryo application | Low damage, shield can be weak |
| Mona | Hydro | Catalyst | Sub-DPS/Support | Omen debuff, burst damage, hydro application | Energy hungry, slow movement |
| Rosaria | Cryo | Polearm | Sub-DPS | Crit rate share, cryo application, physical support | Low personal damage |
| Albedo | Geo | Sword | Sub-DPS/Support | Off-field Geo damage, EM buff (if C2) | Boring playstyle, geo constructs break |
| Eula | Cryo | Claymore | Physical DPS | Highest physical burst damage | Relies on burst, energy issues |
| Mika | Cryo | Polearm | Support (Physical) | ATK speed, physical damage buff, healing | Niche, only good for physical teams |
Liyue
| Character | Element | Weapon | Role | Strengths | Weaknesses |
|---|---|---|---|---|---|
| Traveler (Geo) | Geo | Sword | Support (constructs) | Free, constructs for puzzles | Low damage, constructs can be annoying |
| Xiangling | Pyro | Polearm | Sub-DPS | Best off-field Pyro, high AoE burst | Energy reliant, requires Bennett |
| Xingqiu | Hydro | Sword | Sub-DPS | Best off-field Hydro, damage reduction | Energy hungry, requires C6 for optimal |
| Beidou | Electro | Claymore | Sub-DPS/DPS | Parry, AoE electro damage, shield | Energy issues, parry timing |
| Ningguang | Geo | Catalyst | Main DPS | High single-target Geo damage, screen | No reactions, stamina hungry |
| Chongyun | Cryo | Claymore | Sub-DPS | Cryo infusion, AoE burst | Infusion can ruin reactions |
| Xiao | Anemo | Polearm | Main DPS | High AoE plunge damage, mobility | HP drain, needs battery |
| Keqing | Electro | Sword | Main DPS | Teleport, fast attacks | Low damage multipliers |
| Qiqi (already in Mond) | Cryo | Sword | Healer | (same as above) | (same as above) |
| Mona (already in Mond) | Hydro | Catalyst | Sub-DPS | (same as above) | (same as above) |
| Hu Tao | Pyro | Polearm | Main DPS | Highest single-target Pyro damage | HP management, stamina issues |
| Ganyu | Cryo | Bow | Main DPS/Sub-DPS | Best charged shot AoE, off-field burst | Aim reliance, interrupt prone |
| Zhongli | Geo | Polearm | Shield/Support | Strongest shield, geo resonance, petrify | Low damage as support |
| Xinyan | Pyro | Claymore | Physical DPS (niche) | Shield, physical damage buff | Split scaling, clunky |
| Yanfei | Pyro | Catalyst | Main DPS | Easy pyro application, stamina management | Squishy, needs shield |
| Shenhe | Cryo | Polearm | Cryo Support | Cryo damage buff, debuff | Niche to cryo teams |
| Yelan | Hydro | Bow | Sub-DPS/DPS | High off-field damage, mobility | Energy hungry with poor hydro application |
| Kuki Shinobu | Electro | Sword | Healer/Sub-DPS | Healing, off-field electro, EM scaling | Low base HP, slow skill |
| Yun Jin | Geo | Polearm | Support (Normal ATK) | Normal attack damage buff, geo resonance | Niche to normal attack teams |
| Yaoyao | Dendro | Polearm | Healer/Support | Healing, dendro application, cheap | Burst leaves field |
| Baizhu | Dendro | Catalyst | Healer/Shielder | Healing, shielding, dendro reactions | No damage, passive shields |
Inazuma
| Character | Element | Weapon | Role | Strengths | Weaknesses |
|---|---|---|---|---|---|
| Traveler (Electro) | Electro | Sword | Battery/Sub-DPS | Energy regeneration, electro application | Low damage |
| Kaedehara Kazuha | Anemo | Sword | Support/Sub-DPS | Elemental damage buff, CC, double jump | Energy issues without C1 |
| Kamisato Ayaka | Cryo | Sword | Main DPS | High burst damage, cryo infusion | Stamina issues, relies on freeze |
| Yoimiya | Pyro | Bow | Main DPS | Fast pyro attacks, single-target | No AoE, misses often |
| Raiden Shogun | Electro | Polearm | Battery/Sub-DPS/DPS | Energy regeneration, burst damage, team buff | Needs team to generate energy |
| Sangonomiya Kokomi | Hydro | Catalyst | Healer/Driver | Healing, hydro application, easy to build | No crit, low personal damage |
| Arataki Itto | Geo | Claymore | Main DPS | High Geo damage, simple combos | Needs geo team, energy hungry |
| Shikanoin Heizou | Anemo | Catalyst | Main DPS (Driver) | AoE damage, EM scaling, good exploration | Requires reactions, short range |
| Kujou Sara | Electro | Bow | Support (ATK buff) | ATK buff, electro crit damage | Clunky buff rotation |
| Gorou | Geo | Bow | Support (Geo) | Geo damage buff, defense buff | Only good in mono-geo |
| Thoma | Pyro | Polearm | Shielder/Support | Shield, pyro application, AoE burst | Weak shield, energy issues |
| Yae Miko | Electro | Catalyst | Sub-DPS | High off-field electro damage | Energy hungry, squishy |
| Kuki Shinobu (already in Liyue) | Electro | Sword | Healer/Sub-DPS | (same as above) | (same as above) |
| Kaedehara Kazuha (already) | Anemo | Sword | Support | (same as above) | (same as above) |
| Kamisato Ayato | Hydro | Sword | Main DPS/Sub-DPS | AoE hydro, flexible | Requires field time, no healing |
| Dori | Electro | Claymore | Healer/Battery | Healing, energy regeneration | Clunky, low damage |
| Cyno | Electro | Polearm | Main DPS | High electro damage, Aggravate teams | Long burst field time, no interruption |
| Nilou | Hydro | Sword | Support (Bloom) | Bloom damage boost, easy to build | Restricted to bloom teams |
| Alhaitham | Dendro | Sword | Main DPS | High dendro damage, flexible | Complicated rotation, energy issues |
| Dehya | Pyro | Claymore | Support/Tank | Damage mitigation, off-field pyro | Low damage, clunky |
| Tighnari | Dendro | Bow | Main DPS | Quick charged shots, dendro application | Relies on reactions, energy hungry |
Sumeru
| Character | Element | Weapon | Role | Strengths | Weaknesses |
|---|---|---|---|---|---|
| Traveler (Dendro) | Dendro | Sword | Support/Sub-DPS | Free, dendro application, EM boost | Low personal damage |
| Collei | Dendro | Bow | Sub-DPS | Free, dendro application, AoE burst | Low damage, clunky |
| Cyno (already in Inazuma) | Electro | Polearm | Main DPS | (same as above) | (same as above) |
| Nilou (already) | Hydro | Sword | Support | (same as above) | (same as above) |
| Alhaitham (already) | Dendro | Sword | Main DPS | (same as above) | (same as above) |
| Dehya (already) | Pyro | Claymore | Support | (same as above) | (same as above) |
| Tighnari (already) | Dendro | Bow | Main DPS | (same as above) | (same as above) |
| Nahida | Dendro | Catalyst | Support/Sub-DPS | Best dendro application, EM share, damage | Squishy, limited range |
| Wanderer | Anemo | Catalyst | Main DPS | High mobility, AoE damage | Interrupt prone, needs shield |
| Faruzan | Anemo | Bow | Support (Anemo) | Anemo damage buff, crowd control | Energy issues before C6 |
| Layla | Cryo | Sword | Shielder/Sub-DPS | Shield, off-field cryo, good for freeze | Low damage |
| Kaveh | Dendro | Claymore | Driver (Bloom) | Bloom damage, self-heal | Niche, low personal damage |
| Scaramouche (Wanderer) | Anemo | Catalyst | Main DPS | (same as above) | (same as above) |
| Baizhu (already in Liyue) | Dendro | Catalyst | Healer | (same as above) | (same as above) |
| Yaoyao (already in Liyue) | Dendro | Polearm | Healer | (same as above) | (same as above) |
Fontaine
| Character | Element | Weapon | Role | Strengths | Weaknesses |
|---|---|---|---|---|---|
| Traveler (Hydro) | Hydro | Sword | Healer/Support | Free, healing, hydro application | Low damage, clunky |
| Lynette | Anemo | Sword | Sub-DPS/Support | Free, taunt, energy regeneration | Low damage, short skill |
| Lyney | Pyro | Bow | Main DPS | High charged shot damage, AoE pyrotechnics | Relies on mono-pyro, clunky |
| Freminet | Cryo | Claymore | Physical/DPS (niche) | Unique pressure system, cryo application | Complicated, low damage |
| Neuvillette | Hydro | Catalyst | Main DPS | High AoE hydro damage, self-heal | Slow charge, requires C1 for full team |
| Wriothesley | Cryo | Catalyst | Main DPS | Fast punches, self-heal, freeze teams | Short CA, can't stop early |
| Furina | Hydro | Sword | Sub-DPS/Support | AoE hydro, damage buff, healing (PN) | HP drain, needs healer |
| Charlotte | Cryo | Catalyst | Healer/Support | Healing, cryo application, freeze | Low damage |
| Navia | Geo | Claymore | Main DPS | High Geo damage, crystalize synergy | Requires crystalize shards |
| Chevreuse | Pyro | Polearm | Support (Overload) | Overload team buff, healing | Niche to overload |
| Xianyun | Anemo | Catalyst | Healer/Support | Plunge buff, healing, exploration | Energy hungry, low personal damage |
| Gaming | Pyro | Claymore | Main DPS | High plunge damage, self-heal | Requires Xianyun, energy issues |
| Chiori | Geo | Sword | Sub-DPS | Off-field geo, coordinated attacks | Niche to geo teams |
| Arlecchino | Pyro | Polearm | Main DPS | High single-target damage, bonds of life | Requires skill management |
| Clorinde | Electro | Sword | Main DPS | High electro damage, Bond of Life synergy | Complicated, squishy |
| Sigewinne | Hydro | Bow | Healer/Support | Healing, hydro application, HP buff | Low damage, clunky |
| Emilie | Dendro | Polearm | Sub-DPS | Off-field dendro, burning team synergy | Niche to burning |
| Kinich | Dendro | Claymore | Main DPS | High dendro damage, grapple | Requires burning, energy hungry |
| Mualani | Hydro | Catalyst | Main DPS | High hydro damage, surfing | Short burst window |
| Kachina | Geo | Polearm | Support (Exploration) | Geo application, climbing buff | Low damage |
Natlan (Version 5.x)
| Character | Element | Weapon | Role | Strengths | Weaknesses |
|---|---|---|---|---|---|
| Traveler (Pyro) | Pyro | Sword | Sub-DPS | Free, Nightsoul's Blessing | Low personal damage |
| Mualani (already in Fontaine) | Hydro | Catalyst | Main DPS | (same as above) | (same as above) |
| Kachina (already in Fontaine) | Geo | Polearm | Support | (same as above) | (same as above) |
| Xilonen | Geo | Sword | Support | Resistance shred, healing, exploration | No shields, split scaling |
| Chasca | Anemo | Bow | Main DPS | Anemo/Elemental damage, mobility | Position reliance |
| Ororon | Electro | Bow | Sub-DPS | Nightsoul, off-field electro, energy refund | Low personal damage |
| Citlali | Cryo | Catalyst | Shielder/Support | Shield, cryo application, EM boost | Low damage |
| Mavuika | Pyro | Claymore | Main DPS/Support | High pyro damage, off-field pyro, exploration | Not yet fully released at time of writing |
Cross-Region Characters
| Character | Element | Weapon | Role | Origin | Unlock |
|---|---|---|---|---|---|
| Traveler | Varies | Sword | Flexible | All regions | Free at start, can resonate with Statues of Seven |
| Aloy | Cryo | Bow | Sub-DPS | Collaboration (Horizon) | Limited event, no longer obtainable |
Team Synergy and Building
Team Composition Basics
- Reaction Focus: Choose two elements that trigger strong reactions (e.g., Vaporize, Melt, Hyperbloom).
- Role Balance: Typically one Main DPS, one Sub-DPS, one Support/Healer, one Flex (can be another support or sub-DPS).
- Energy Requirements: Ensure enough particles for burst uptime; pair characters with same element as batteries (e.g., Raiden with Eula, Fischl with Beidou).
- Resonance: Two same-element characters grant team bonuses (e.g., Pyro resonance gives ATK +25%).
- Artifacts: 4-piece set matching element (e.g., Crimson Witch for Pyro, Blizzard Strayer for Cryo, Husk of Opulent Dreams for Geo).
- Weapons: 5-star signature weapons or 4-star options like Serpent Spine, The Catch, Prototype Rancour.
- Stats: ATK%, Elemental DMG Bonus, CRIT Rate/DMG (or EM for transformative reactions).
- Artifacts: 4-piece Emblem of Severed Fate (burst-heavy) or 2-piece combinations.
- Weapons: Energy Recharge weapons (Favonius, Sacrificial) or damage weapons.
- Stats: Energy Recharge until requirement met, then ATK%/CRIT.
- Artifacts: 4-piece Noblesse Oblige (ATK buff), Tenacity of the Millelith (shield), Ocean-Hued Clam (healing damage), Viridescent Venerer (Anemo shred).
- Weapons: Thrilling Tales of Dragon Slayers (ATK buff), Prototype Amber (healing/energy), Favonius series (energy).
- Stats: HP% (for healers/shielders), Energy Recharge, Healing Bonus.
- Constellations: Not mandatory; many 4-stars are viable at C0. Prioritize Bennet C1, Xingqiu C6, Fischl C6.
- Artifact Farming: Wait until AR45 for guaranteed 5-star drops. Use condensed resin for efficiency.
- Bennett: Avoid C6 if using him with physical or cryo teams; otherwise safe.
- Elemental Mastery: For reaction teams (Vaporize, Melt, Hyperbloom), EM is valuable.
Example Meta Teams
1. National Team (Vaporize): Xiangling (Pyro), Xingqiu (Hydro), Bennett (Pyro), flex (Sucrose/Kaeya).
2. Morgana (Freeze): Ganyu (Cryo), Mona (Hydro), Venti (Anemo), Diona (Cryo).
3. Raiden Hypercarry: Raiden Shogun (Electro), Bennett (Pyro), Kujou Sara (Electro), Kazuha (Anemo).
4. Hyperbloom: Nahida (Dendro), Xingqiu/Yelan (Hydro), Raiden/Kuki (Electro trigger), flex.
5. Neuvillette Hypercarry: Neuvillette (Hydro), Furina (Hydro), Kazuha (Anemo), Baizhu (Dendro)/Zhongli (Geo).
Recommended Builds by Role
#### Main DPS
#### Sub-DPS
#### Support/Healer
Universal Tips
Conclusion
Genshin Impact's character roster offers immense variety. Focus on building a core team that fits your playstyle and the reactions you enjoy. Resources like the Paimon.moe or KQM guides can provide deeper analysis. Always consider your current Adventure Rank and available materials when leveling. Happy adventuring!