Characters & Roles
Characters & Roles in Hunt: Showdown
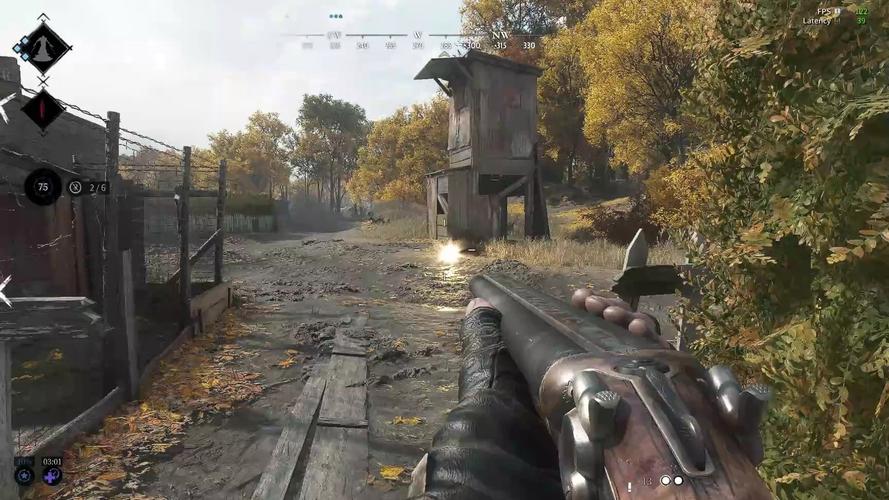
Unlike traditional class-based games, Hunt: Showdown does not have fixed classes, heroes, or playable units with unique abilities. Instead, every Hunter you recruit — whether a randomly generated Tier 1/2/3 Hunter or a Legendary Hunter skin — is a blank slate with the same base stats and health (150 HP). The game’s deep customization comes from traits, weapons, tools, and consumables. Your role in a team is defined entirely by your loadout and playstyle, not by an inherent class. This guide will help you understand the major roles (archetypes) that emerge from loadout choices, and highlight the most notable Legendary Hunters for lore and cosmetic purposes.
---
Understanding Hunters (No Classes)
- Random Hunters: Recruited from the roster using Hunt Dollars. They have random names, appearances, and a small number of starting traits (1–4, scaling with Bloodline level). Tiers (1, 2, 3) indicate increasing quality of starting gear and number of traits, but the Hunter is still a blank slate.
- Legendary Hunters: Cosmetic skins purchased with Blood Bonds (earned in matches or bought with real money) or earned through events. They have unique lore and appearance but no gameplay advantages. They come with zero traits and no gear — you must equip them from your arsenal.
- Free Hunters: Occasionally available as a “free recruit” after matches — these are random Tier 1 Hunters with minimal gear.
- Strengths: Excels at long-range engagements, can land headshots from 100+ meters, controls open sightlines and compounds from a distance.
- Weaknesses: Very vulnerable in close quarters (below 20m). Slow handling and low rate of fire leave little room for error. Requires good aim and map awareness.
- Playstyle: Position yourself on high ground, near windows, or behind cover away from the main compound. Use a scoped or high-damage rifle to pick off enemies before they can close the distance. Always scan for movement and sound cues; reposition after shooting to avoid being flanked.
- Recommended Weapons:
- Tools: Spyglass (for scouting without scope glint), Throwing Knives/Axes (for silent AI kills), Medkit, Concertina Trap.
- Consumables: Frag Bomb (to flush out enemies), Dynamite Bundle (area denial), Ammo Box (to sustain long fights).
- Traits (Must-Have):
- Team Synergy: Best paired with a Shotgunner or close-range fighter who can cover your flanks and defend compounds when you need to push. The Rifleman provides overwatch while teammates secure clues or bounties.
- Strengths: Devastating damage within 15m, can one-shot enemies with body shots, creates fear in tight spaces. Excels inside compounds and boss lairs.
- Weaknesses: Useless beyond medium range (30m+). Slow reload times. Ammo is scarce if you miss. Requires aggressive play and good map knowledge to force close encounters.
- Playstyle: Run toward gunfights, use doorways and corners to close distance. Learn compound layouts to ambush from unexpected angles. Use traps to block exits chokepoints. After getting a kill, immediately loot ammo or switch to a secondary pistol.
- Recommended Weapons:
- Tools: Concertina or Poison Traps (to control entrances), Alert Trip Mines (to warn of flankers), Choke Bombs (to block lines of sight).
- Consumables: Flash Bomb (to blind enemies before rushing), Dynamite Stick (to break through campers), Vitality Shot (for instant heal before a push).
- Traits (Must-Have):
- Team Synergy: The Shotgunner should stick close to a Rifleman or Support to cover the team’s six when pushing into compounds. The Shotgunner takes point inside lairs, while the Rifleman provides covering fire from outside.
- Strengths: Keeps the team alive and fully supplied. Can heal/revive faster, carry extra consumables, and provide area denial. Reduces downtime between fights.
- Weaknesses: Often less combat-oriented, may rely on mediocre weapons. If the Support is killed, the team loses sustain. Cannot outfight a dedicated damage dealer in direct combat.
- Playstyle: Stick with teammates, always have a healing item ready. Use traps to protect flanks. Call out enemy positions and use consumables strategically (e.g., Antidote Shot before a Spider boss fight). Prioritize reviving downed teammates safely.
- Recommended Weapons:
- Tools: Medkit (essential), Choke Bombs (to put out burning teammates), Electro-prompt? No — use a Flare Pistol (to ignite anything) or Tirel? Best: Syringe (revive), Fuse (to take down armored?). Actually, Support should bring Concertina Traps to block doors, Alert Mines to detect. Or use Throwing Knives to kill AI safely.
- Consumables: Vitality Shot (large), Antidote Shot (immunity to poison), Ammo Box (shared), Stamina Shot (for extended runs).
- Traits (Must-Have):
- Team Synergy: The Support is the backbone of any team. Works well with any other role. In trios, one Support can carry the team through multiple engagements by ensuring everyone stays healed and trap-reliant.
- Strengths: Can move almost silently, kills monsters without noise, scouts enemy positions without alerting them. Uses poison and traps to ambush.
- Weaknesses: Low damage per second in open combat. Limited range. Relies on catching enemies off-guard. If spotted first, easily outgunned.
- Playstyle: Avoid direct confrontation; use cover and sound discipline. Always stay in bushes or shadows. Use silenced weapons to take down AI and grunts without attracting attention. Listen for enemy footsteps and plan ambushes. Place traps along expected paths.
- Recommended Weapons:
- Tools: Poison Trip Mines (kills AI and slows enemies), Chaos Bombs (makes noise to distract), Decoy Fuses (sound like gunshots). A Knife or Knuckleknife for melee.
- Consumables: Flash Bombs (to blind then run), Sticky Bomb (melts bosses silently? No explosion sound but big damage). Stamina Shot (to keep moving).
- Traits (Must-Have):
- Team Synergy: A stealthy player can scout ahead and relay information to the team, then flank enemies when they engage the rest of the team. Pair with a Rifleman for long-range support.
- Strengths: Effective at most ranges, no glaring weakness. Adaptable to any situation. Great for new players and for filling gaps in team composition.
- Weaknesses: Jack-of-all-trades, master of none. May be outclassed in specialized situations (e.g., snipers at long range, shotguns up close).
- Playstyle: Stay with the team, engage enemies at medium range (30-60m), and use your secondary or tools to handle close or long threats. Always carry a versatile loadout that can handle pve and pvp efficiently.
- Recommended Weapons:
- Tools: Medkit (mandatory), Choke Bombs (versatile), Tomahawk (if you have throwing axes), Dynamite Stick (emergency AOE).
- Consumables: Vitality Shot (small), Frag Bomb, Ammo Box.
- Traits (Must-Have):
- Team Synergy: Fits into any team comp. In a trio, an All-Rounder can reinforce whichever teammate is under pressure.
- Ranged Overwatch: 1 Rifleman + 2 Shotgunners/All-Rounders. The Rifleman stays on the perimeter while the others push compounds. Works well on open maps like Stillwater Bayou.
- Aggressive Push: 3 Shotgunners with traps. Blitz through compounds, forcing close-range fights. Risky but devastating.
- Stealth Squad: 1 Stealth/Recon + 2 Riflemen. The Recon silently marks enemies and places traps, while Riflemen pick off targets from distance.
- Balanced Trio: 1 Rifleman + 1 Shotgunner + 1 Support/Medic. Covers all ranges and has sustain.
Key Point: You can turn any Hunter into any role by simply equipping the right weapons, tools, consumables, and traits. The skin does not matter for gameplay.
---
Major Roles (Playstyles)
Below are the five most common and effective roles in Hunt: Showdown. Each role is defined by preferred weapon ranges, tool/consumable choices, and synergizing traits. Note that these are guidelines, not strict rules — hybrid builds are also viable.
#### 1. The Rifleman (Ranged Precision)
- Primary: Sparks LRR (best single-shot rifle), Mosin-Nagant (with or without Marksman scope), Lebel 1886 (high capacity), Vetterli 71 Karabiner (slightly faster, medium range). The Springfield 1866 is a budget alternative.
- Steady Aim (reduces sway when aiming down sights — essential for scoped rifles)
- Marksman Scopesmith (faster scope-in)
- Deadeye Scopesmith (if using Deadeye variant)
- Bulwark (reduces explosive damage — you'll be targeted by explosives)
- Determination (faster recovery from stamina drain after aiming)
#### 2. The Shotgunner (Close Quarters Brawler)
- Primary: Romero 77 (best single-shot damage, very tight spread), Specter 1882 (longer effective range), Caldwell Rival 78 (semi-auto, good fire rate) — handcannon or full-size. The Crown & King (full auto, high DPS, but expensive). The Slate (lightweight, fast follow-up).
- Secondary: Caldwell Conversion Pistol with Fanning (for backup if your shotgun runs dry) or a medium pistol like the Nagant Officer.
- Iron Devastator (faster levering action — not for shotguns, but for lever-action pistols? Actually, this trait reduces spread for lever-action shotguns? No, there is no lever-action shotgun. Use Lightning Lizard? Better choices: Lightfoot (silent movement), Hornskin (10% blunt damage reduction), Vulture (loot more consumables from dead hunters).
- Gator Legs (faster movement in water — Bayou is full of it)
- Salveskin (reduces fire damage — you’ll be near burning barrels often)
#### 3. The Support / Medic (Utility Focus)
- Primary: Winfield M1873C (fast, large magazine), Centennial (medium range, fast fire rate), Officer Carbine (full auto). All-rounders that keep you effective but not specialized.
- Secondary: Nagant M1895 Officer (fast backup) or Hand Crossbow with poison bolts (area denial).
- Doctor (heals twice as much with first aid kit)
- Physician (faster healing animation)
- Packmule (increase consumable and tool slots? Actually gives extra tool/consumable capacity? No, it lets you loot more items from dead hunters — good for resupply)
- Frontiersman (gives you an extra tool and consumable slot? No, it makes traps deploy faster? Actually, it reduces trap placement time and increases inventory capacity? Wait: Frontiersman reduces the cost of tools and consumables? Not sure. Better: Vulture (loot more), Greyhound (move faster outside of combat).
#### 4. The Stealth / Recon (Silent Hunter)
- Primary: Suppressed Nagant M1895 (silent pistol, low damage), Crossbow (silent, high damage but slow reload — use special bolts like explosive or poison). The Bow (if available? Not yet in base game).
- Secondary: Hand Crossbow with poison bolts (area denial).
- Silent Killer (makes melee attacks nearly silent)
- Whispersmith (reduces weapon swap noise? No, there is no such trait. Use Lightfoot (silent movement)
- Greyhound (faster sprint)
- Gator Legs (faster in water)
- Beastface (animals ignore you? Actually, Beastface is for?) Note: There is a trait called Beastface (reduces noise from running over branches?) Not in current game. Better: Determination (stamina recovery).
#### 5. The All-Rounder (Flexible)
- Primary: Winfield M1873 (great iron sights, high fire rate, large magazine), Centennial (slightly longer range, same fast fire), Vetterli 71 (medium damage, good irons).
- Secondary: Caldwell Pax (good all-round pistol) or Nagant Officer (fast follow-up).
- Fanning (increases pistol fire rate — great for close range)
- Levering (for lever-action rifles — turns Winfield into a close-range beast)
- Steady Hand (reduces sway for ironsight rifles)
---
Team Composition Synergies
While Hunt: Showdown is famously unforgiving, having a well-balanced team increases survival odds significantly. Common compositions include:
Duo Tips: In a duo, both players should cover each other’s weaknesses. Avoid both being snipers; one should have a close-range option. Communication is key — call out enemy positions and your reload status.
---
Notable Legendary Hunters (Lore & Suggested Roles)
While Legendary Hunters are purely cosmetic, they often have backstories that hint at a preferred style. Here are some of the most iconic, with suggestions for role assignment based on their theme:
| Legendary Hunter | Lore Background | Recommended Role | Suggested Loadout |
|---|---|---|---|
| The Reverend | A defrocked priest who hunts demons with faith and a shotgun. | Support/Medic (heals and blesses? Actually, just cosmetic) | Shotgun (Romero) + Medkit + Consumables |
| The Sheriff | A lawman turned bounty hunter, known for his iron will and reliable weapon. | All-Rounder | Winfield + Pax |
| The Mountain Man | A feral trapper who survives alone in the wilderness. | Stealth/Recon | Crossbow + Traps |
| The Carcass Gunrunner | A former weapons dealer using experimental rifles. | Rifleman | Sparks LRR + scoped variant |
| The Bone Doctor | A surgeon who dissects the undead for research. | Support/Medic | Medkit + Syringe + Scrapbeak's? |
| The Phantoms | A pair of twin hunters (duo skin) from the 1896 Battle of Shiloh. | Shotgunner or All-Rounder | Shotgun + Fanning pistol |
---
Final Tips for Choosing Your Role
- New Players: Start as an All-Rounder with a Winfield. It forgives mistakes and teaches sound fundamentals.
- Intermediate Players: Experiment with Rifleman and Shotgunner to learn compound and map flow.
- Advanced Players: Specialize in Support or Stealth to master utility usage and team coordination.
- Always Adapt: Your role can change mid-match. If you lose your primary weapon, pick up a fallen enemy’s gun and adjust your playstyle.
Remember: In Hunt: Showdown, your loadout defines your role — not your character skin. Use this guide to build effective loadouts and synergize with your team for the best chance at claiming the bounty and extracting alive.