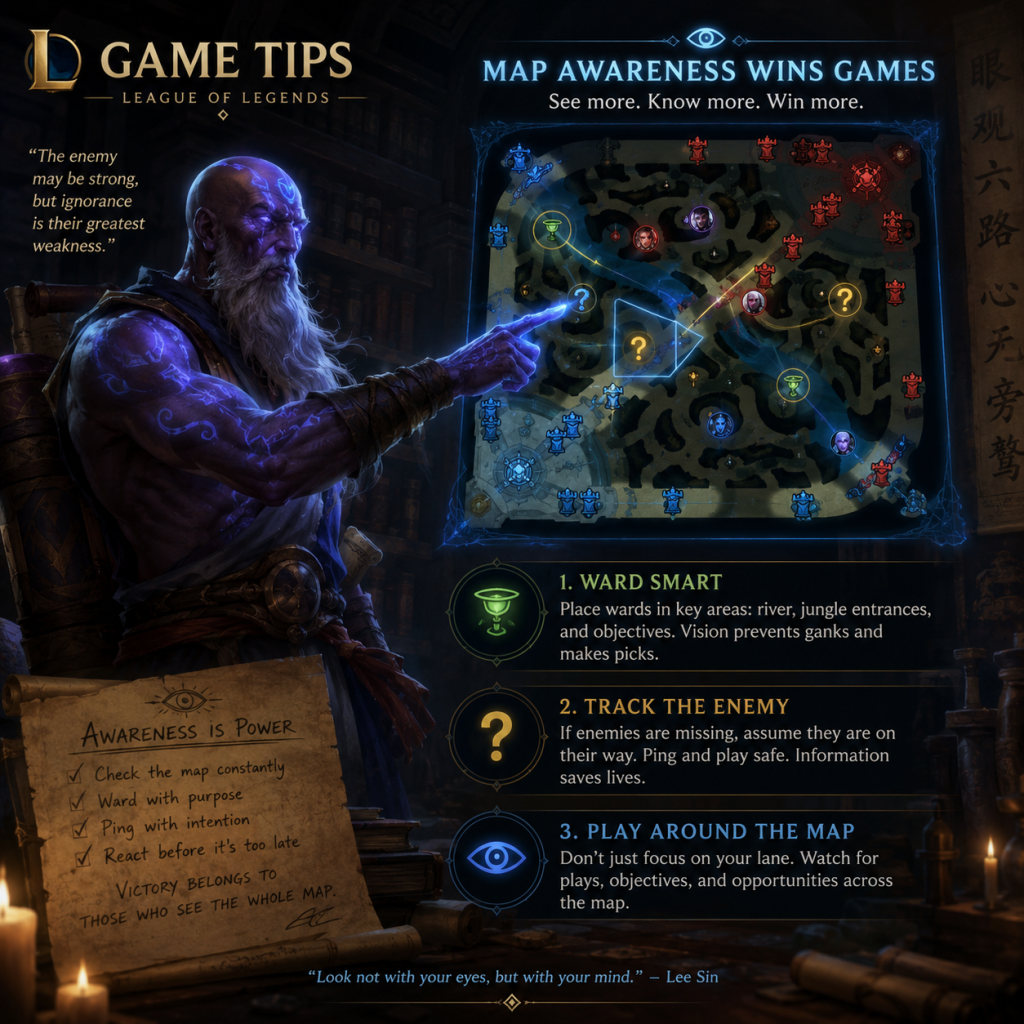
Game Tips
League of Legends Game Tips
Introduction
This guide provides a comprehensive collection of tips for League of Legends, organized by gameplay category. Whether you are a beginner learning the basics or an advanced player seeking optimization, these insights will help you improve. Each tip includes a clear explanation of why it works and when to apply it.
---
Combat Tips
#### Beginner: Last Hitting Minions
- Tip: Focus on landing the killing blow on minions to secure gold. Do not auto‑attack minions randomly.
- Why It Works: Only the player who deals the final hit receives gold. Consistent last hitting builds a gold lead that translates into stronger items faster.
- When to Use: Every wave, especially in the laning phase. Practice patience and time your attack before your minion attacks land the killing blow.
- Tip: Attack the enemy champion when they step forward to last hit a minion. Use an auto‑attack or ability, then back off.
- Why It Works: The enemy cannot attack back simultaneously while last hitting. This is called a “trade” and grants free damage if timed correctly.
- When to Use: Whenever the enemy is about to last hit a high‑value minion (cannon, siege) or is in a vulnerable animation.
- Tip: To freeze the wave, keep 3–4 enemy caster minions alive and tank them until your next wave arrives. To slow push, leave enemy minions alive and kill only the enemy wave’s melee minions.
- Why It Works: Freezing denies the enemy gold and experience while making them vulnerable to ganks. Slow pushing builds a large wave that can dive the enemy under tower or set up a roam.
- When to Use: Freeze when ahead but unable to kill under tower; slow push before recalling or when preparing for an objective.
- Tip: Place your trinket ward in the river bush near your lane at 3:00–3:30 (average jungler clear time).
- Why It Works: Most junglers finish their first buff and look for a gank around this time. The ward gives you time to react.
- When to Use: Every laning phase, especially if you are pushed up.
- Tip: When Baron or Dragon is spawning, place a Control Ward in the pit and clear enemy wards with a Sweeper Lens.
- Why It Works: Denying vision around an objective allows your team to engage unexpectedly or steal it safely.
- When to Use: 1:30 before any major objective (Dragon, Rift Herald, Baron). Coordinate with support and jungler.
- Tip: Wards placed in the enemy jungle (e.g., at their buff camps or entrance) reveal when the jungler is pathing toward you. Time your wards to match their camp respawn timers (every 5 minutes for buffs).
- Why It Works: Knowledge of the enemy jungler’s position lets you play aggressively or safely, and allows your team to invade or counter‑gank.
- When to Use: After you have lane priority (pushed wave) and are not at risk of dying. Supports should buy a Pink Ward and place it deep.
- Tip: Cannon minions grant 90 gold (base) and significant experience. Prioritize killing them over other minions.
- Why It Works: Missing a cannon costs you roughly two melee minions worth of gold. The bonus experience also delays level spikes.
- When to Use: Whenever a cannon wave arrives, focus them immediately, especially if under tower.
- Tip: Recall when you have enough gold for a key item component (e.g., Noonquiver for ADCs, Lost Chapter for mages) and when the wave is pushed to the enemy tower.
- Why It Works: Returning with a stronger item gives you a power advantage in the next trade. Pushing the wave ensures minimal minion loss.
- When to Use: After killing the enemy laner, forcing them to recall, or when you have 1200+ gold early.
- Tip: Zone the enemy away from the minion wave after you hit level 2 or 3. Stand between them and the wave to deny experience if you have a health advantage.
- Why It Works: Experience is more important than gold early. A two‑level lead can be game‑deciding. Zoning denies them experience without direct combat.
- When to Use: After hitting a level spike first (e.g., Level 2 on Lucian, Level 6 on Annie). Be careful not to take tower shots or minion aggro.
- Tip: Use a recommended build from websites like U.GG or OP.GG. Complete your Mythic item first (e.g., Kraken Slayer, Liandry’s Torment).
- Why It Works: Mythic items provide a huge power spike and unique passive. Building them first ensures you are strong in mid‑game fights.
- When to Use: Every game until you understand situational adjustments.
- Tip: Buy armor penetration (LDR) if the enemy has two or more tanks; buy magic resist (Maw, Banshee’s) if fed AP. Build Grievous Wounds (Executioner’s Calling, Morellonomicon) against healers.
- Why It Works: A standard build fails against specific threats. Adapting counters the enemy’s strengths. For example, Mortal Reminder vs. Soraka prevents her from healing your kills.
- When to Use: Check the enemy team during loading screen. Adjust your second or third item accordingly.
- Tip: Upgrade boots to Plated Steelcaps or Mercury’s Treads early (first back) if against heavy AD/CC, or wait for Berserker’s Greaves for attack speed. Swifty Boots if you need to dodge skillshots.
- Why It Works: Early boots give movement speed to dodge abilities and roam. Specific boots counter enemy damage types (armor vs. AD, tenacity vs. CC).
- When to Use: Against AD assassins (Zed, Talon) build Steelcaps; against CC mages (Lux, Morgana) build Mercs. Rushing boots is strongest before level 9.
- Tip: The jungler gets gold and experience from camps and kills. Do not steal their camps early unless you are a lane that scales with farm (e.g., Karthus, Yi).
- Why It Works: Junglers need camps to stay relevant. Taking them sets your jungler behind and can tilt them.
- When to Use: Let your jungler clear their camps. Only take a camp if the jungler is dead and you need a few seconds to push.
- Tip: If the enemy team is starting Dragon, and your team cannot contest, take Rift Herald or an outer tower instead.
- Why It Works: Every objective has a risk/reward ratio. Trading denies the enemy a full lead and keeps gold/tempo even.
- When to Use: Whenever you see the enemy focusing an objective and you are outnumbered or weak. Ping your team to rotate.
- Tip: Track your personal gold per minute (GPM). Aim for 400–500 GPM as a laner, 600+ as a carry. Minimize time spent idling—always be farming, fighting, or doing an objective.
- Why It Works: Higher GPM means faster items, leading to earlier power spikes. Idling (recalling with nothing to buy, walking aimlessly) wastes resources.
- When to Use: Review your ingame stats; use the replay system to identify downtime. Practice clearing jungle camps between waves in the mid‑game.
- Tip: After laning phase (15–20 minutes), group with your team for Dragon and Baron. Do not stay alone in a side lane when an objective is up.
- Why It Works: 4v5 or 3v5 fights often lose objectives. Your presence increases odds of securing the buff.
- When to Use: Ping “on my way” to objectives at the 30‑second mark before spawn. If you are split pushing, only do so if you have teleport or the objective is not contested.
- Tip: Start Baron with your team but do not commit fully. If the enemy comes to check, back off and wait for them to face check a bush. Then engage.
- Why It Works: This capitalizes on the enemy’s panic. They may blow crucial cooldowns trying to rush vision, giving you a free engage.
- When to Use: When your team has a health advantage but cannot fight 5v5 directly. Works best with strong burst champions (e.g., Syndra, Rengar).
- Tip: In the mid‑game, slow push a side lane (top or bot) by killing only the ranged minions. This builds a massive wave that will crash into the enemy tower in 2–3 minutes.<br>
- Why It Works: The enemy loses farm and is forced to split resources. Your team gains a numbers advantage.
- When to Use: When you have teleport or you are a split‑push champion (Tryndamere, Fiora). Coordinate with your team to disengage from fights you cannot win.
- Tip: Use your stun (passive at 4 stacks) to secure kills. Flash > Tibbers > Q > W combo catches enemies off guard.<br>
- Why It Works: Annie is a burst mage; her stun guarantees your skillshots land. Roaming on cooldown spreads her gold lead to the team.<br>
- When to Use: At level 6 after pushing wave. Look for opportunities mid‑game.
- Tip: Build Sheen (350g component) on first back if you have 400g. Sheen’s passive procs on Ezreal’s Q, doubling his damage output.<br>
- Why It Works: Ezreal’s Q applies on‑hit effects; Sheen adds 100% base AD bonus damage. This spikes his trades significantly.<br>
- When to Use: Against any lane opponent. Delay finishing Essence Reaver or Trinity Force until you have Sheen + Manamune components.<br>
- Tip: Use W (Safeguard) to a minion or ally behind the enemy, then R (Dragon’s Rage) to kick them into your team. Practice the flash variant: Flash behind target > R immediately.<br>
- Why It Works: Lee Sin’s ultimate displacement can instantly delete a carry from a fight. The “Insec” kick is a core mechanic to master.<br>
- When to Use: In mid‑game skirmishes or teamfights. Use when the enemy ADC is out of position or you need to force a pick.
- Mute Toxic Players: Use /mute all at the start of the game to avoid distractions. Focus on your own gameplay.<br>
- Ping Smart: Use the Alt + click to ping danger, assistance, or “on my way.” Frequent pings improve coordination.<br>
- Practice Tool: Spend 10 minutes daily practicing last hitting without items in Practice Tool. Gradually increase difficulty by adding a bot opponent.<br>
- Watch Your Replays: After every loss, watch the first 10 minutes to identify three mistakes. Focus on fixing one at a time.<br>
- Mental Game: If you lose two games in a row, take a 15‑minute break. Tilt reduces decision‑making quality.<br>
#### Intermediate: Trading Stance in Lane
#### Advanced: Wave Management for Freezes & Slow Pushes
Map Awareness & Vision (Exploration) Tips
#### Beginner: Ward the River Bush
#### Intermediate: Control Wards for Objective Vision
#### Advanced: Deep Wards & Jungle Tracking
Resource Management Tips
Gold & Experience
#### Beginner: Don’t Miss Cannon Minions
#### Intermediate: Back Timing for Item Spikes
#### Advanced: Experience Manipulation with Lane Baiting
Build & Itemization Tips
#### Beginner: Follow a Core Build Order
#### Intermediate: Adapt Build to Enemy Team Comp
#### Advanced: Optimize Boots Choice & Timing
Economy & Objective Control Tips
#### Beginner: Understand the Jungle Economy
#### Intermediate: Objective Trading
#### Advanced: The “Gold per Minute” Efficiency Mindset
Macro Strategy Tips (Rotations & Team Play)
#### Beginner: Group for Major Objectives
#### Intermediate: Baiting Baron with False Assault
#### Advanced: Wave Manipulation for Side Lane Pressure
While that wave pushes, group with your team mid to force a fight or objective.<br>
When the enemy sends someone to catch the wave, either dive the remaining 4v5 or take a tower mid.
Champion‑Specific Tips (Examples)
#### Beginner: Annie – Roam Setup
After landing, roam bot with your jungler to get a double kill.<br>
#### Intermediate: Ezreal – Sheen Timing
#### Advanced: Lee Sin – Insec Kick Combos
Miscellaneous Pro Tips
Closure
Mastering League of Legends requires continuous learning. Apply these tips one at a time, starting with the beginner ones, and gradually integrate intermediate and advanced strategies. Consistency will turn knowledge into habit and elevate your rank.
---
This guide was written for version 14.x. Mechanics may change with patches; always verify current meta items on trusted sites.