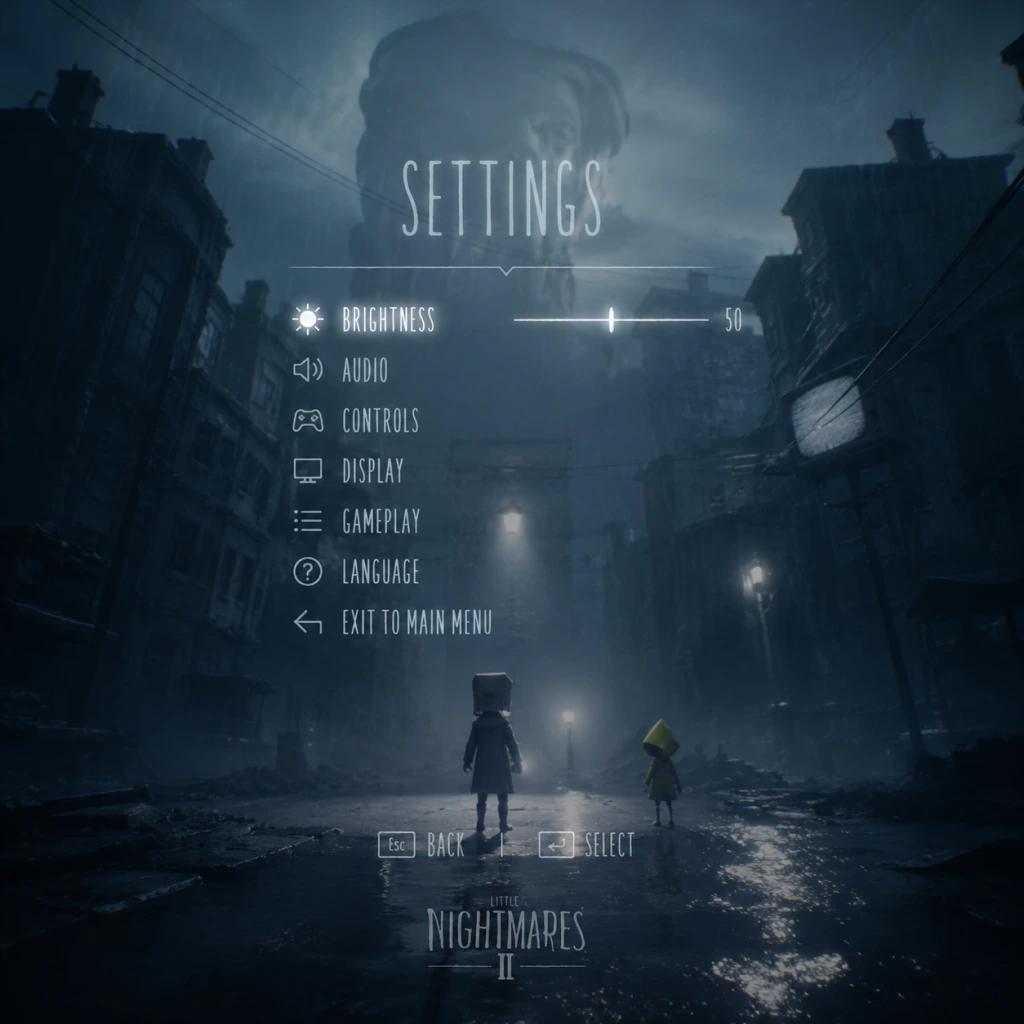
Game Settings
Overview
_Little Nightmares II_ offers a focused but essential set of settings menus to tailor your experience. Most options are accessible from the main menu or in-game pause screen. The game is primarily a single-player experience, so network settings are minimal (only related to achievements and cloud saves on PC). This guide covers every major category—Graphics, Audio, Controls, Accessibility, Language, Network, and Gameplay—with platform-specific notes and optimized presets for different hardware levels.
Graphics Settings
Graphics settings heavily impact performance and visual quality. _Little Nightmares II_ uses Unreal Engine 4 and has a stylized, dimly lit art style where details matter. The following table lists all available options, their effects, and recommended values for Low, Medium, High, and Ultra hardware targets.
| Setting | Description | Low (30 FPS) | Medium (60 FPS) | High (60 FPS) | Ultra (60+ FPS) |
|---|---|---|---|---|---|
| Resolution | Native display resolution. Lower = sharper but more GPU load. | 1280×720 | 1920×1080 | 1920×1080 | 2560×1440 or 4K |
| Display Mode | Fullscreen, Borderless, Windowed. Fullscreen yields best performance. | Fullscreen | Fullscreen | Fullscreen | Fullscreen |
| VSync | Synchronizes frame rate with monitor refresh; eliminates tearing but can add input lag. | Off (cap at 30) | Off (cap at 60) | On | Off (use G-Sync/FreeSync) |
| Frame Rate Limit | Caps maximum FPS. | 30 | 60 | 60 | Off or 144 |
| Resolution Scale | Renders at a lower internal resolution and upscales. 100% = native. Lower = better performance. | 75% | 100% | 100% | 100% |
| Anti-Aliasing | Smooths jagged edges. Options: Off, FXAA, TAA. TAA best quality. | Off | FXAA | TAA | TAA |
| Texture Quality | Detail of surfaces. High VRAM required. | Low | Medium | High | Ultra |
| Shadow Quality | Shadow resolution and distance. Low = no shadows. | Low | Medium | High | Ultra |
| Post Processing | Enables bloom, depth of field, motion blur. | Low | Medium | High | Ultra |
| Ambient Occlusion | Adds contact shadows for depth. | Off | Low | High | Ultra (SSAO) |
| Motion Blur | Blurs moving objects. Can cause nausea. Personal preference. | Off | Off | Per Object | On (personal preference) |
| Depth of Field | Blurs distant objects. Cinematic but reduces clarity. | Off | Off | On | On |
| Bloom | Glow from bright lights. Adds atmosphere. | Off | On | On | On |
| Volumetric Fog | Dense, volumetric lighting. Heavy performance impact. | Off | Low | Medium | High |
| Reflections | Screen Space Reflections (SSR) quality. | Off | Low | High | Ultra |
| Grass Quality | Detail of vegetation. | Low | Medium | High | Ultra |
| Decal Density | Number of persistent marks/decals. | Low | Medium | High | Ultra |
| Tessellation | Adds geometric detail to surfaces (displacement). | Off | Off | On | On |
Hardware Tier Recommendations
#### Low-End (GTX 1050 Ti / RX 560, 8 GB RAM, SSD)
- Resolution: 720p or 900p
- Resolution Scale: 75%
- Preset: Custom (Low on most, Medium on Textures)
- Target: 30 FPS stable
- Disable: Volumetric Fog, Tessellation, Ambient Occlusion, Reflections, Motion Blur, Depth of Field
- Resolution: 1080p
- Resolution Scale: 100%
- Preset: Medium
- Target: 60 FPS (cap at 60)
- Enable: TAA, Medium Shadows, Low Volumetric Fog, Off Motion Blur (optional)
- Resolution: 1080p or 1440p
- Resolution Scale: 100%
- Preset: High
- Target: 60 FPS (uncapped if monitor >60Hz)
- Enable: TAA, High Shadows, Medium Volumetric Fog, On Depth of Field, Off Motion Blur (or Per Object)
- Resolution: 1440p or 4K
- Resolution Scale: 100%
- Preset: Ultra
- Target: 60+ FPS (uncapped)
- Enable: All options maxed out including Volumetric Fog, Tessellation, Ultra Reflections. Personal preference on Motion Blur.
#### Mid-Range (GTX 1060 / RX 580, 16 GB RAM)
#### High-End (RTX 2060 / RX 5700, 16 GB RAM)
#### Ultra (RTX 3070+ / RX 6800+, 16+ GB RAM)
> Note: The game is not especially demanding; a modern integrated GPU (e.g., Intel Iris Xe) can manage 720p Low at 30 FPS.
Audio Settings
Audio is critical for immersion and horror cues (e.g., listening for footsteps, creaks). The settings menu is straightforward.
| Setting | Options | Notes |
|---|---|---|
| Master Volume | 0–100 | Controls overall volume. |
| Music Volume | 0–100 | Background score. Set lower if you want to hear ambient sounds. |
| SFX Volume | 0–100 | Sound effects like footsteps, puzzles, monsters. Keep high for gameplay cues. |
| Voice Volume | 0–100 | Subtle character sounds, grunts, and cries. |
| Cinematic Volume | 0–100 | Audio during cutscenes. |
| Output Device | Default, Speakers, Headphones | Select Headphones for spatial audio benefit. |
| Dynamic Range | Low, Medium, High | Controls loudness range. High = greater contrast between quiet and loud sounds. Recommended: Medium or High for headphones. |
| Audio Language | English, French, German, etc. | Affects voice-over in cinematics. Game has very little dialogue; most is environmental. |
| Subtitles | Off, On | See Accessibility section. |
Controls Settings
Controls can be remapped on PC. Console versions have fixed layouts but support controller customization for some actions.
PC Keyboard and Mouse
| Action | Default Key | Notes |
|---|---|---|
| Move | W/A/S/D | Can rebind to arrow keys. |
| Look | Mouse | Sensitivity adjustable. |
| Interact / Pick Up | E | Also used for pulling levers. |
| Run | Left Shift | Hold to sprint. |
| Crouch | Left Ctrl | Toggle or hold? Default toggle. |
| Jump | Spacebar | |
| Attack / Use Item | Left Mouse Button | Only when holding an item. |
| Flashlight | F | Toggle. |
| Pause | Escape | |
| Inventory | I | Shows held items (rarely used). |
- Mouse Sensitivity (1–100): Default 50. Lower is better for precise platforming; higher for panoramic looking. Recommended 30–50.
- Invert Y-Axis: Off (most players).
- Controller Vibration: On/Off (only applies if using a controller).
Controller (Xbox / PlayStation / Switch Pro)
The game is best played with a controller due to its precise platforming and analog movement.
| Action | Default Button (Xbox) | Notes |
|---|---|---|
| Move | Left Stick | |
| Look | Right Stick | |
| Run | Left Stick Click (L3) | Hold to sprint. |
| Crouch | B / Circle | Hold or toggle? Default toggle. |
| Jump | A / Cross | |
| Interact / Pick Up | X / Square | |
| Attack / Use Item | Right Trigger (RT) | |
| Flashlight | Left Bumper (LB) | Toggle. |
| Pause | Start / Options | |
| Inventory | Select / View |
- Look Sensitivity (1–100): Default 50. Recommended 40–60.
- Aim Sensitivity (controls walking speed? – actually not present; the game has no aiming).
- Dead Zone: Can be adjusted for sticks to reduce drift. Default is fine for most controllers.
> ⚠️ Easy to Misconfigure: _Run/Crouch Toggle vs Hold_ – The game defaults to toggle for crouch; many players prefer hold for quick ducking in stealth. Check the Controls menu to switch if needed. _Keyboard Mouse Sensitivity_ – Setting it too high makes camera jerky during chase sequences.
Accessibility Settings
Little Nightmares II includes several options to improve accessibility.
| Setting | Description | Recommended |
|---|---|---|
| Subtitles | Display dialogue and sound descriptions (e.g., "creak", "footsteps"). | On (especially for hearing impaired) |
| Subtitle Size | Small, Medium, Large | Large for easier reading. |
| Subtitle Background | Off, On (dark box) | On improves readability against bright backgrounds. |
| Colorblind Modes | Protanopia, Deuteranopia, Tritanopia | Adjusts puzzle colors (important for signal puzzle in Chapter 4). |
| Camera Shake | Off, Reduced, Full | Off reduces motion sickness; Full for cinematic feel. |
| Screen Flash | Off, Reduced, Full | Some sequences have bright flashes. Reduce or off for photosensitivity. |
| Controller Vibration | On/Off | Off for sensory sensitivity; On for tactile feedback. |
| High Contrast Mode | Off, On (PC only?) | Increases contrast between Mono and backgrounds. Helps visibility. |
| Auto-Aim | Off, On (only for throwing mechanics) | Not present; no ranged combat. |
Language Settings
| Setting | Options | Notes |
|---|---|---|
| Text Language | English, French, German, Italian, Spanish, Portuguese, Japanese, etc. | Affects menus, subtitles, UI. |
| Audio Language | English, French, German, etc. (subset) | Only affects a few spoken lines in cutscenes. Subtitles follow text language. |
Network Settings
Little Nightmares II is a completely offline single-player game. There are no online multiplayer or multiplayer modes. The only network-related functionality is:
- Achievements / Trophies: Synced online.
- Cloud Saves: On Steam and Epic Games Store, automatic.
- Leaderboards: None.
Therefore, there are no in-game network settings. If you are on console, ensure you are connected to the internet for trophy syncing, but the game itself does not require an internet connection to play.
Gameplay Settings
These settings affect how the game plays but are not about difficulty (there is no difficulty slider). They are mostly related to control and camera.
| Setting | Description | Recommendation |
|---|---|---|
| Camera Auto-Centering | On: camera slowly repositions behind Mono. Off: you control camera always. | Off gives more control, especially when looking for hidden secrets. |
| Camera Speed | 1–5 (or slider). Default 3. | 4 for faster look. |
| Invert Camera X/Y | Off by default. | Keep default unless you are used to inverted. |
| Aim Assist | Not present. | N/A |
| Quick Turn | On/Off (console only? PC keyboard has no binding). | On helps in chase sequences to quickly turn around. |
| Input Buffer | Not adjustable. | The game has a small input buffer for jumps and interactions. |
Special Attention Points During Setup
1. First Launch Brightness Calibration: The game prompts you to adjust brightness so that the logo is barely visible. This is important for the dark horror atmosphere. Make sure your room lighting is consistent. If you set it too bright, you lose shadow detail; too dark, you can't see paths.
2. Controller vs Keyboard: The game was designed for a controller. If using keyboard, rebind keys for comfort (e.g., Sprint to Space, Jump to Right Click). Many players report mouse-only camera feels slippery.
3. HDR Settings (PC/PS5/Xbox Series): If your display supports HDR, enable it in the system settings, then toggle HDR in the game. The game's HDR implementation is subtle but enhances the contrast of the flashlight. Adjust HDR brightness (paper white) to 200–300 nits for best results.
4. Disable Steam Overlay / Discord Overlay: These can cause stuttering in Unreal Engine 4 games. Turn off overlays for smoother performance.
5. Audio for Headphones: Select the Headphones output device and set Dynamic Range to High for the best spatial awareness—you'll hear which direction the Thin Man or other enemies are approaching.
By following these settings, you will have the optimal gameplay experience whether you're aiming for buttery-smooth performance or maximum visual fidelity. Adjust to your personal comfort, especially regarding motion blur and camera shake.