Game Tips
Game Tips: Monster Hunter: World
This guide collects essential tips for hunters of all skill levels, organized by category. Each tip includes a clear explanation and a deeper analysis of why and when to use it.
---
1. Combat Tips
#### Beginner Tips
- Always eat before a hunt.
- Use the Radial Menu for quick item access.
- Sheathe your weapon to sprint and use items.
- Learn monster tells and punish openings.
- Use environmental hazards often.
- Mounting is a game-changer.
- Master the i-frames of the roll.
- Flinch Shot abuse (Iceborne only).
- Elemental damage > Raw damage for fast weapons.
- Always carry a map and look for scoutflies.
- Climb vines and use wed beetles.
- Learn the layout of each locale for shortcuts.
- Use the Slinger to interact with environment.
- Master the use of Ghillie Mantle for traversal.
- Fishing and catching pets for tailrider gadgets.
- Always harvest materials as you run past them.
- Use the Farm at the Botanical Research Center.
- Craft ammo and coatings at the camp.
- Use Tailraider Safari for rare materials.
- Optimize item loadouts for different fights.
- Manage your inventory space while mining and gathering.
- Prioritize Health Boost skill over damage early.
- Always upgrade your armor defense.
- Build around one core weapon skill.
- Use the “Defense” skill for survivability vs large monsters.
- Maximize Weakness Exploit (WEX) and Critical Eye.
- Master the “Safi’jiiva” and “Fatalis” (endgame) sets.
- Sell monster parts you don’t need.
- Complete bounties for Armor Spheres and Zenny.
- Use the Steamworks (Iceborne) to get Gold Eggs and items.
- Trade in excess monster gems for decorations.
- Efficient farming routes in Guiding Lands.
- Invest in the “Plunderblade” gadget for extra loot.
- Use the SOS Flare for tough fights.
- Set your auto-shoutouts to be helpful.
- Learn the “life powder” and “wide range” cleric builds.
- Coordinate status effects with your team.
- Use the “Assess” function to share research.
- Master the “clutch claw” teamwork (Iceborne).
- Change the camera speed in options.
- Use the Training Room to practice combos.
- Read the Hunter’s Notes for monster weaknesses.
- Always eat for “Insurance” or “Safeguard” in difficult quests.
- Use the “Slinger Burst” to interrupt monster attacks.
- Farm “Investigations” for better loot.
- Why: The canteen at the Gathering Hub provides temporary stat boosts (HP, Stamina, Attack, Defense).
- Analysis: A meal is the single most cost-effective preparation. For early game, prioritize Chefs Choice (HP +50, Stamina +50). Later, stack Attack (L) or Defense (L) from Fresh ingredients. Without eating, you risk one-shot kills and lower damage output.
- Why: Customizing the radial menu (Options → Customize Radial Menu) lets you use potions, sharpen, or fire a Slinger shot with one button.
- Analysis: During combat, scrolling through the item bar wastes precious seconds. The radial menu reduces input lag and keeps your focus on the monster. Example: Set a Big Potion to a quick slot for emergency healing.
- Why: With weapon drawn, you move slowly and cannot use consumables. Press the sheathe button (default R1 on PS4, RB on Xbox, or the weapon special button to sheathe automatically after some attacks).
- Analysis: Many new hunters die because they try to heal while slow. Always sprint away from the monster, sheathe, then drink a potion. The Sheathing skill speeds this up, but early on, just be mindful.
#### Intermediate Strategies
- Why: Every monster has distinct wind-up animations for attacks, leaving brief windows for counterattacks.
- Analysis: Instead of mindlessly attacking, wait for the monster to commit. For example, Anjanath rears back before its forward bite – roll to the side and punish its legs. The game rewards positioning over button-mashing. Practice with low-threat monsters like Great Jagras first.
- Why: The New World is full of traps like vine traps, boulders, and flashbugs.
- Analysis: Luring a monster under a hanging rock and firing your Slinger at it deals massive damage and topples the monster. In the Ancient Forest, you can trigger a dam to wash away a monster. This saves ammo and creates free knockdowns. Check your map for interactive points (shown as sparkles).
- Why: Attacking a monster from ledges or clutch claw (not in base game without Iceborne) sends you into a mount state where you must hold on and stab until it falls.
- Analysis: A successful mount knocks the monster down for 10+ seconds, allowing your whole team to wail on a weak spot. Look for cliffs or slide down slopes to initiate a jump attack. In solo, mount once per fight to control the pace.
#### Advanced Optimizations
- Why: Dodging in Monster Hunter has a few invincibility frames (i-frames) at the start. With Evade Window skill, you can roll through roars and attacks.
- Analysis: At base, you have about 13 frames (0.2 sec) of invincibility. With Evade Window +5, it jumps to ~36 frames. Practice rolling through Nergigante’s dive bomb – timing is tight but it saves you from needing Guard or superman dive. Use the Training Room pole to practice.
- Why: The Clutch Claw allows you to grapple onto a monster and use a Flinch Shot (weapon attack) to turn it, or if the eye icon is yellow, you can slap it to enrage it.
- Analysis: In endgame, you can chain Flinch Shots to wall-bang monsters, dealing huge damage and creating openings. The strategy: soften a part, then Flinch Shot into a wall (requires monster not enraged). This is essential for speedruns and breaking tough parts like Shara Ishvalda’s head.
- Why: Weapons like Dual Blades, Bow, and Sword & Shield benefit more from element because of high attack rate.
- Analysis: Raw attack is multiplied a fixed amount per hit, while elemental damage adds a flat value per hit. For a bow spamming Power Shots, a high-elemental bow (like Anja Arch III for fire) outperforms raw bows. Check a weapon’s element cap (maxed at Free Element skill). Use the Training Room to compare DPS with different builds.
---
2. Exploration Tips
#### Beginner Tips
- Why: Scoutflies guide you to the nearest monster tracks, and following them reveals the monster’s location on the map.
- Analysis: If you lose the monster, open the map and set a waypoint – scoutflies will lead you. Collect tracks, footprints, and mucus to increase the scoutfly level, which permanently improves tracking for that monster species. In the Ancient Forest, focus on Rathalos tracks early.
- Why: Many areas have climbable ivy or wed beetles that let you zip across gaps.
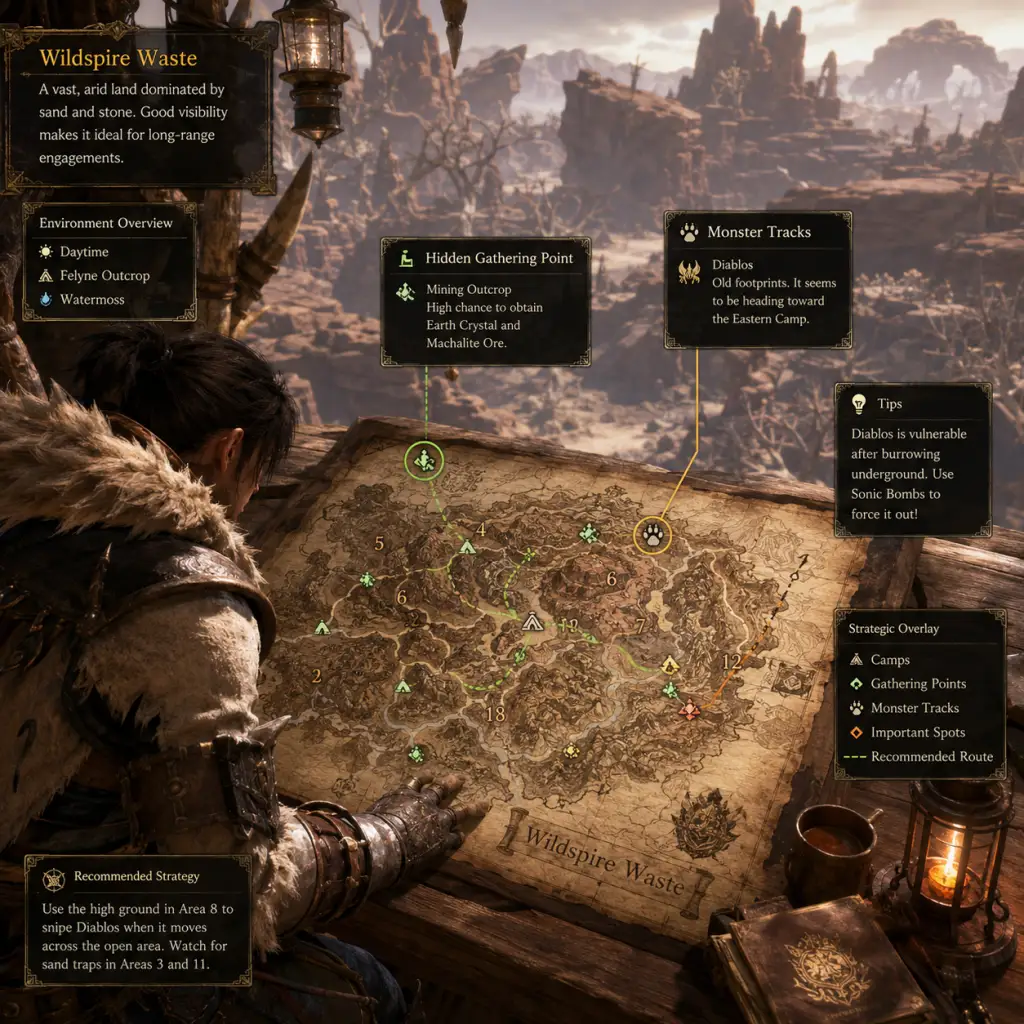
- Analysis: Vines can be scaled quickly by holding R1 (PS4) while moving toward them. Wed beetles are small pink beetles that, when fired with your Slinger, create a grapple point. Use them to reach high ledges or escape monsters. Example: In Wildspire Waste, use wed beetles to reach Diablos’ nest without going through the long tunnel.
#### Intermediate Strategies
- Why: Each map has hidden paths, camp shortcuts, and ancient tunnels that connect zones.
- Analysis: Memorize the camp locations (unlock more by completing delivery bounties). For example, Coral Highlands has a path from Area 1 to Area 11 using a bug net and climbable walls. Knowing these cuts travel time and lets you intercept monsters faster. Use the map’s legend to identify climbable walls (marked with a little person icon).
- Why: Besides firing pods, the Slinger can trigger explosive barrels, shooting Torch Pods to light fires, or use Dung Pods to repel monsters.
- Analysis: Brightmoss will stick to monsters and make them visible in dark areas (Vale). If a monster starts fleeing to sleep, shoot a Dung Pod to make it change areas – useful for avoiding a turf war you don’t want. Also, trigger boulders above the monster for free damage.
#### Advanced Optimizations
- Why: The Ghillie Mantle makes you invisible to monsters, allowing you to walk safely through dangerous areas and set up traps.
- Analysis: In endgame, use Ghillie to place Mega Barrel Bombs right next to a sleeping monster before waking it. It also prevents monsters from detecting you while you sharpen. Pair with Assassin’s Hood (Iceborne) for infinite stealth.
- Why: Your Palico can be equipped with gadgets unlocked by befriending endemic life.
- Analysis: At the end of any expedition, use the Capture Net to catch rare pets like the Great Gunpowderfish. These unlock the Meowlotov Cocktail gadget, which deals extra damage. Advanced hunters keep their Palico on the “Plunderblade” gadget for extra loot (especially for rare materials like Elder Dragon gems).
---
3. Resource Management Tips
#### Beginner Tips
- Why: Herbs, honey, and bugs are the backbone of potions and traps.
- Analysis: Even if you don’t need them now, stockpile. Honey is crucial for crafting Mega Potions (regular Potion + Honey). Set the Radial Menu to auto-craft Mega Potions when you pick up honey. Never leave a node unharvested – you can always sell extras later.
- Why: After completing a few deliveries, you unlock cultivation plots where you can grow plants, honey, mushrooms, etc.
- Analysis: Set all three plots to Honey. You can increase the number of slots by completing optional quests for the botanist. Honey is the most needed resource for healing. Later, consider farming Godbugs and Bitterbugs for Ancient Potion ingredients. Check your farm every few missions; it’s free resources.
#### Intermediate Strategies
- Why: The item box at each camp allows you to craft ammo and coatings from materials.
- Analysis: If you are a Bowgunner or Bow user, you can carry raw materials and craft on the go. For example, bring Gunpowder (L) and Latchberries to craft Pierce 2 ammo mid-hunt. This extends your ammo supply without needing to restock. Use the Item Loadout to include the necessary materials.
- Why: After befriending Grimalkynes, you can send your Palico on expeditions that bring back monster parts.
- Analysis: Assign the highest-level expedition to areas containing Elder Dragons or rare monsters. This is a passive source of gems and mantles. Check the Safari after every few missions – it takes about 3-4 quests to complete.
#### Advanced Optimizations
- Why: Carrying unnecessary items wastes space. Create loadouts for specific monsters.
- Analysis: For an Elder Dragon like Teostra, bring Cool Drinks, Nullberries, and Fire Res Jewels. For Kirin, bring Thunderproof Mantle and Nullberries. Use the Item Box → “Manage Items” → “Loadouts” to save up to 10 loadouts. Include farcasters for emergency retreats. Advanced players also bring ancient potions and max potions for max healing without sheathing.
- Why: Each slot is limited; you may run out of room during a long expedition.
- Analysis: Always leave some empty slots for rare drops. Set your item pouch to carry only essentials: potions (max of 10), mega potions (10), rations or well-done steaks, powercharm and powertalon, armorcharm and armortalon (these passive items take space but boost stats). Discard low-tier bones and ores if you need space – you can farm them anytime.
---
4. Builds (Equipment & Skills)
#### Beginner Tips
- Why: The skill “Health Boost” increases max HP by +50 at level 3.
- Analysis: New hunters die quickly. With 150 HP (base 100 + meal 50 + skill 50), you survive hits that would one-shot you at 100 HP. Slot in Health Boost 3 using decorations or armor pieces like the Bone Helm. It’s a crutch you can drop later when you get better at dodging.
- Why: Armor spheres increase defense, reducing damage taken.
- Analysis: In Low Rank, upgrade your armor fully before taking on Anjanath. Use the blacksmith to spend Armor Spheres (gained from bounties and quests). Each upgrade adds 2-4 defense. In High Rank, aim for 400+ defense before Elder Dragons. Defense is more valuable than elemental resistance in general.
#### Intermediate Strategies
- Why: Each weapon type has essential skills that drastically improve performance.
- Analysis: For Great Sword, always aim for “Focus” (faster charging). For Charge Blade, “Capacity Boost” and “Artillery” are mandatory. For Long Sword, “Handicraft” extends sharpness. Pick a weapon, then look up its meta skills. Example: A basic Great Sword build: Focus 3, Weakness Exploit 3, Critical Boost 3, and Attack Boost 4. Use the series of “Dragonking Eyepatch” for Weakness Exploit early on.
- Why: Defense Boost just adds flat defense, but it also provides elemental resistances at Lv4+.
- Analysis: Against Diablos’ physical attacks, Defense Lv7 gives +35 defense, which reduces damage by about 10%. Pair with Guard skill if using a shield weapon. It’s a safe bridge until you learn the monster’s moves.
#### Advanced Optimizations
- Why: WEX gives +50% affinity for hitting weak spots (need to soften with Clutch Claw in Iceborne).
- Analysis: Aim for 100% affinity (critical hit chance). Use Critical Eye for flat affinity and WEX for situational boost. Example: if you have WEX 3 (+50% on weak spots) and Critical Eye 7 (+30%), you get 80% base + 50% on weak spots = always crits. That’s a 25% damage increase on average. Prioritize these skills over raw Attack Boost.
- Why: These armor sets have unique set bonuses that redefine builds.
- Analysis: Safi’jiiva armor gives +40% affinity when your weapon is drawn and HP is full, plus a set bonus that increases element. For bow users, 3-piece Safi + 2-piece Velkhana is meta. Fatalis armor gives True Spare Shot for Bowguns, and all skills maxed out. Farming these requires top-tier coordination. The key is to focus on one set at a time; complete Safi siege then move to Alatreon, then Fatalis.
---
5. Economy Tips
#### Beginner Tips
- Why: You will accumulate hundreds of common materials.
- Analysis: After finishing Low Rank, you rarely need Great Jagras scales. Sell them for quick Zenny. Rule of thumb: keep at least 10 of each material for future crafts, sell the rest. Later, use the Argosy (captain) to buy cheap materials for selling? Actually, better to sell unneeded parts.
- Why: The Resource Center (table near the entrance) offers bounties that reward Armor Spheres and Research Points.
- Analysis: Always have bounties active. They refresh after each quest. Focus on “Hunt 3 large monsters” or “Collect 10 bones” – these are easy and give multiple Armor Spheres. Use Research Points to farm at the Botanical Center.
#### Intermediate Strategies
- Why: During events like the Appreciation Fest, the Steamworks can be overdriven with Limited Bounties to produce huge amounts of Zenny.
- Analysis: In the endgame, you can gather Fuel from mining in Guiding Lands, then feed the Steamworks. The output includes Gold Eggs (sold for 20k Zenny each), King Armor Spheres, and rare decorations. This is the primary way to earn money in late game. Prioritize over-time bounties to get the daily bonus.
- Why: The Melder allows you to meld unwanted materials into decorations (if you have the right items).
- Analysis: For example, you can meld a Bird Wyvern Gem into a random T1 decoration. This is best used once you have duplicate gems. Advanced players meld for Armor Spheres when desperate. The weekly bounties also provide Gold Wyverian Prints for melding specific decorations.
#### Advanced Optimizations
- Why: Mining nodes in Guiding Lands drop rare bones and ores that sell high (e.g., Dragonvein Crystal for 10k+).
- Analysis: Equip Geologist skill (Lv3) to double mining/gathering yields. Then run a circuit through a level 7 region (e.g., Coral). Collect all nodes, then exit to expedition and return to reset the nodes. This yields 10-15 large dragonvein crystals per run, netting 150k-200k in 15 minutes. Combine with farming for layered weapon materials.
- Why: Your Palico can steal monster parts, including rare materials.
- Analysis: For monsters like Fatalis or Alatreon, using Plunderblade gives you extra chances at mantles and horns. Equip the tool, command your Palico to attack, and hope for steals. This reduces the number of hunts needed. Also, it can be combined with the “Meowster” skill from food to further increase loot.
---
6. Multiplayer & SOS Tips
#### Beginner Tips
- Why: If you’re struggling, fire an SOS to invite other hunters.
- Analysis: SOS summons random players who often are high-rank veterans helping out. Make sure to set the quest to “Join via SOS” before starting. You can also restrict to players who speak your language. Note that monsters scale up by 2.2x for 2 players and 2.6x for 3-4 players, so don’t SOS unless you absolutely need help – it’s easier solo for some monsters.
- Why: You can customize auto-replies for status effects like getting stunned, sleeping, etc.
- Analysis: Change them to something like “I’m stunned! Hit me!” so teammates know to knock you out. For mounting, say “I mounted! Keep attacking!” to coordinate. This improves team synergy without voice chat.
#### Intermediate Strategies
- Why: Wide Range skill lets you share potions and items with nearby teammates.
- Analysis: If you play Sword & Shield or Hunting Horn with Wide Range 5, you can heal your team while dealing damage. Bring 10 Mega Potions and 10 regular potions, plus materials to craft more. This turns a tough hunt like Behemoth into a manageable fight. The build requires “Friendship”-based decorations.
- Why: Parallel applying sleep, paralysis, or stun may overwrite each other (e.g., two sleep shots will waste).
- Analysis: Use the in-game chat or quick messages to call out when you’re applying a status. For example, “I’ll sleep it at next aura.” Then have the heavy hitters prepare a wake-up hit (Great Sword, Charge Blade SAED, or a bomb). Similarly, let the LBG user know when paralysis is ready.
#### Advanced Optimizations
- Why: Each hunter can gather tracks for the monster’s research level independently.
- Analysis: In multiplayer, spread out at the start to collect different tracks. This levels up the scoutfly level faster, revealing the monster earlier. Once at level 3, the monster’s location is shown permanently. Also, if someone mounts, everyone should stop DPS briefly to let the mounter finish – or they can continue attacking but avoid using bombs that might break the mount.
- Why: In multiplayer, softening parts requires teamwork because the monster moves unpredictably.
- Analysis: One person should focus on softening a single part (e.g., head) while others attack. Use Temporal Mantle or Rocksteady to stay latched. After softening, the monster will take extra damage from all hits to that part. Also, if everyone has the “Flinch Free” skill (Lv1), you won’t interrupt each other’s combos.
---
7. Miscellaneous Pro Tips
- Why: Default camera speed is too slow for fast monsters.
- Analysis: Increase to 3 or 4 out of 5. Also, set “Camera Distance” to Far for better situational awareness. These settings make a huge difference in tracking a Odogaron’s leaps.
- Why: The room has a training pole that takes no damage but shows numbers.
- Analysis: Practice your main weapon’s bread-and-butter combos until muscle memory kicks in. For Charge Blade, practice guard pointing. For Long Sword, practice foresight slash timing. 10 minutes before a session improves your performance dramatically.
- Why: The in-game database shows each monster’s elemental and status weaknesses.
- Analysis: Before fighting a new monster, open the map and press R3 (PS4) to view notes. If you haven’t unlocked them, research by collecting tracks. Bring the right element – for example, use Thunder vs. Legiana, Fire vs. Vaal Hazak. This triples your damage.
- Why: These food skills prevent your first faint from failing the quest.
- Analysis: For Elder Dragon investigations with only 1 faint allowed, eat for Insurance (rare) or Safeguard (from Heavy Dango in Iceborne). This gives you a second chance. Also, the “Moxie” skill prevents one lethal hit if HP is above a threshold.
- Why: Firing a Slinger pod into a monster’s face can flinch it and stop an attack.
- Analysis: For example, when Rajang is about to do a lightning beam, shoot a Bomb Pod or Thorn Pod at its face – this causes a flinch and cancels the attack. This is especially useful for bow and light bowgun users who can shoot quickly. Stock up on Scatternuts for this purpose.
- Analysis: After hunting a monster, check the Resource Center for new investigations. Prioritize those with gold and silver rewards. You can also meld prints to create investigations for specific monsters. For endgame decoration farming, run Tempered Rathalos or Tempered Odogaron investigations for Warped Feystones.
---
_Remember: Monster Hunter World is a game of preparation and practice. Each tip here builds towards making you a more efficient, knowledgeable hunter. Happy hunting!_