Character Skills
Character Skills Guide for Red Dead Redemption 2
This guide covers all playable characters (Arthur Morgan / John Marston in Story Mode) and the custom character in Red Dead Online. It includes every major skill, ability, talent, and special move, along with effects, cooldowns, upgrades, combos, synergies, recommended builds, and usage tips.
---
Story Mode Skills (Arthur Morgan / John Marston)
Story Mode does not have traditional skill trees. Instead, abilities are gained through gameplay progression, item usage, and stat improvements tied to the Honor system and core stats. Key "skills" include Dead Eye, Horse Bonding, Weapon Expertise, Crafting & Cooking, Stealth, and Melee.
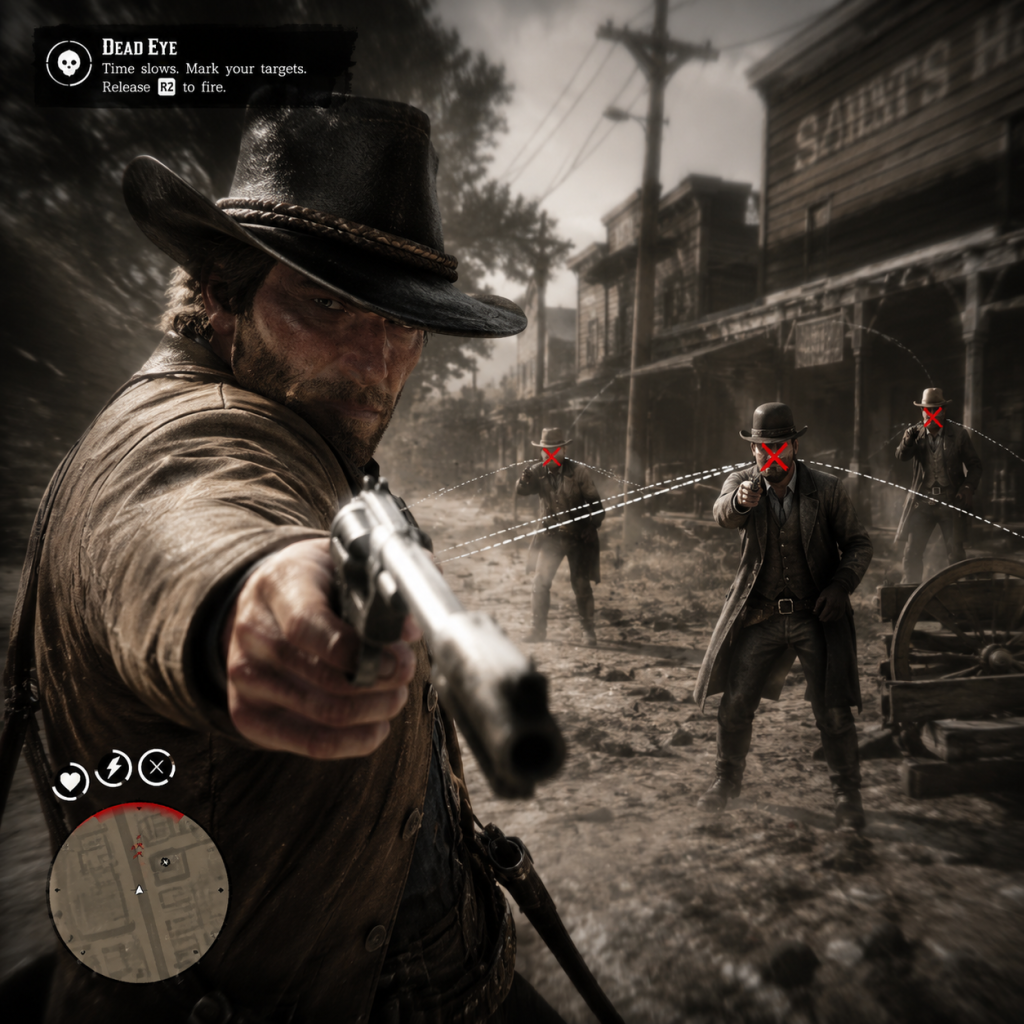
1. Dead Eye
Dead Eye is a slow-motion targeting ability that allows precise shots. It is unlocked in Chapter 1 and upgrades automatically through story missions.
Dead Eye Levels
| Level | Unlock Method | Effect |
|---|---|---|
| 1 | Chapter 1 (After "Enter, Pursued by a Memory") | Manual targeting; R3 zooms in; time slows slightly. |
| 2 | Chapter 2 (After "Pouring Forth Oil") | Paint targets with R1 (manual tagging – one bullet per paint). |
| 3 | Chapter 3 (After "The Fine Art of Conversation") | Auto-tags enemies when targeting (paints one shot per head/body). |
| 4 | Chapter 4 (After "The Joys of Tobacco") | Paint multiple targets freely; can cycle between them with R1. |
| 5 | Chapter 5 (After "Dear Uncle Tacitus") | Maximum critical damage; reticle paints faster; no delay between paints. |
- Cooldown: Dead Eye drains while active. Recharge by killing enemies, looting bodies, or using tonics (e.g., Dead Eye Tonic, Chewing Tobacco). Recharge rate increases with higher level.
- Upgrades: The only upgrades are the automatic level progression and the ability to use tonics that extend duration or refill instantly.
- Combos: Use Dead Eye with a Repeater for mid-range precision, a Sniper Rifle for long-range kills, or a Shotgun for close-range crowd control. Combining Dead Eye with Express or High-Velocity ammo increases damage.
- Synergies: High Honor grants a small Dead Eye regeneration bonus; Low Honor grants a damage bonus during Dead Eye. Equipping trinkets (e.g., Eagle Talon Talisman) extends Dead Eye duration.
- Recommended Builds: Always keep a supply of Dead Eye tonics. Use Level 4+ for multiple target elimination. For stealth missions, use Level 1 to conserve Dead Eye.
- When to Use: In combat against multiple enemies, during ambushes, for hunting (to get perfect kills), and in duels (manual paint for the largest score).
Dead Eye Tonics (External Abilities)
| Tonic | Effect | Duration |
|---|---|---|
| Chewing Tobacco | Refills 20% Dead Eye | Instant |
| Dead Eye Tonic | Refills 50% Dead Eye | Instant |
| Potent Dead Eye Tonic | Refills full Dead Eye + 25% regeneration for 45 seconds | Instant + regen |
| Miracle Tonic | Fills all cores and Dead Eye, high potency | Instant |
2. Horse Bonding
Bonding with your horse unlocks skills and attributes. Bonding level increases by riding, feeding, brushing, and calming your horse.
| Bonding Level | Unlock | Effect |
|---|---|---|
| 1 | Base | Basic handling, health and stamina cores visible. |
| 2 | Bonding | Horse responds to whistle from farther away; increased stamina core. |
| 3 | Bonding | Horse rears on command (L3 + R3); increased health core; less likely to buck in danger. |
| 4 | Bonding | Horse drifts/does tight turns; increased speed and acceleration; max health/stamina. |
- Skills: At Level 3, you can calm the horse more effectively; at Level 4, you can perform a drift stop. These are not cooldown-based but tied to the horse's stats and your control.
- Synergies: A bonded horse with a good saddle (e.g., Panther Trail Saddle) boosts stamina regeneration and reduces core drain.
- When to Use: Always maintain high bonding for better combat performance and horse survival.
- Upgrades: Clean your weapon frequently (oil) and use it often to maintain high familiarity.
- Combos: Pair a long weapon with a sidearm. Switch between them to manage familiarity across multiple arms.
- When to Use: Always try to keep at least one long arm and one sidearm at gold familiarity before major fights.
- Skills: [[Craft]](Crafting) is a skill unlocked from the start but improved by recipes from pamphlets. Cooking requires a campfire and ingredients.
- Cooldowns: None; only ingredient limits.
- Upgrades: Purchase or loot recipes from NPCs, loot, or shops.
- Synergies: Cooked meat combined with appropriate tonics maximizes core health/stamina/Dead Eye. For example, use Minty Big Game Meat (Gold Health Core) + Potent Health Cure (instant heal) for tanking.
- Recommended Builds: Carry a variety of cooked meats for different situations. Minty for health, Oregano for stamina, Thyme for Dead Eye.
- When to Use: Before hunting legendary animals, before gang hideouts, and during survival challenges.
- Combos: Use deadeye with bow for silent multi-kills.
- Synergies: Wearing dark clothing reduces visibility at night. The Legendary Buck Trinket improves pelt quality and helps stay hidden.
- When to Use: Raiding camps, stealth missions, or avoiding lawmen.
- Skills: Brawler (higher health) from Honor. No special moves except the assassination prompt (off-hand knife kill) when hidden.
- Cooldowns: None.
- Combos: Throw a knife mid-combat for a quick kill.
- When to Use: Bar fights, stealth kills, or when out of ammo.
- Dead Eye Slot: Equip one Dead Eye card.
- Passive Slots: Up to three passive cards (any combination of Combat, Defense, Recovery).
3. Weapon Expertise
While not a skill tree, proficiency with weapons improves as you use them. This is represented by "Weapon Familiarity" – you earn temporary stat boosts for using the same weapon repeatedly in a session. Head to the weapon wheel to see your current familiarity level (bronze, silver, gold icons). Gold gives +10% damage and +5% accuracy.
4. Crafting & Cooking
Arthur can craft items like ammunition, tonics, and throwables at campfires. Cooking meat provides temporary stat boosts (e.g., Seasoned Big Game Meat gives Gold Core health).
5. Stealth
Stealth is a gameplay mechanic, not a skill tree. You can execute silent takedowns (hold Triangle/Y behind an enemy) and use a bow or throwing knives for silent ranged kills. There is no cooldown, but detection is based on sound and line-of-sight.
6. Melee Combat
Melee includes punches, grapples, and take-downs. Timing matters for counters during fistfights. Unarmed combat can be enhanced by stats like Stamina.
---
Red Dead Online Skills (Ability Cards)
In RDO, you create a custom character and unlock Ability Cards (passive skills) that define your build. There are four card classes: Dead Eye Cards (active ability), Combat Cards, Defense Cards, and Recovery Cards. You can equip one Dead Eye card and three other passive cards (one from each class or duplicates? Actually only one per class except you can mix. The slot system: one Dead Eye card, and three other cards from Combat/Defense/Recovery. You cannot equip two from same archetype unless you have a duplicated slot? As of current update, you can have one Dead Eye and three passive slots that can be any of Combat, Defense, or Recovery, but you cannot equip two cards of the same type? Actually you can have multiple from same type; there's no restriction. I'll clarify below.)
Card Slots:
Cards are leveled up by using them and earning XP. Upgrades happen automatically after certain usage milestones. Each card has 3 tiers (I, II, III).
Dead Eye Cards
| Card Name | Effect (Tier I) | Upgrade Effects | Cooldown/Usage |
|---|---|---|---|
| Paint It Black | While Dead Eye is active, manually paint targets with R1. Shoot to hit painted targets. | Tier II: Paint faster. Tier III: Paint persists after Dead Eye ends (can shoot later). | Dead Eye drains normally. Use soon. Recharges by killing. |
| Slow and Steady | While Dead Eye active, walk slowly, reduce damage taken by 30%, and headshots do not kill you. Can still shoot. | Tier II: 40% damage reduction. Tier III: 50%. | Drain rate increased. Use when tanking. |
| Focus Fire | While Dead Eye active, damage increases by 10% for you and nearby teammates. | Tier II: 15%. Tier III: 20%. | Drain rate normal. Use in team fights. |
| Slippery Bastard | While Dead Eye active, you become harder to target (enemy lock-on range reduced, auto-aim disabled for them). | Tier II: Longer effect. Tier III: Also increases your evasion. | Drain rate increases with movement. Use for close-range dodging. |
Combat Cards (Passive)
These affect offensive capabilities.
| Card Name | Effect (Tier I) | Upgrade | Notes |
|---|---|---|---|
| Winning Streak | Consecutive shots on same target deal +5% damage per shot. Resets on miss or change target. | Tier II: +6%. Tier III: +7%. | Best for repeaters and pistols. |
| Peak Condition | While stamina is full or near full, deal +5% damage. | Tier II: +7%. Tier III: +10%. | Pair with stamina tonics. |
| Landón's Patience | Deal +10% damage when not moving for 3 seconds. | Tier II: +15%. Tier III: +20%. | Good for sniping. |
| Gunslinger's Choice | Increases accuracy and damage when duel-wielding. +5% damage per shot. | Tier II: +7%. Tier III: +10% with increased accuracy. | Must use two sidearms. |
| Sharpshooter | Increases damage by +10% when scoping (with scoped rifles or sniper scopes). | Tier II: +15%. Tier III: +20%. | Affects all scoped weapons. |
| Short Game | Deal +10% damage within 30 meters. | Tier II: +15%. Tier III: +20%. | Best for shotguns, revolvers. |
| Express Ammo (Consumable passive) – not a card. Actually there is no such card; Express ammo is separate. |
Defense Cards (Passive)
These reduce damage taken or improve survivability.
| Card Name | Effect (Tier I) | Upgrade | Notes |
|---|---|---|---|
| Fool Me Once | Taking damage reduces damage from subsequent hits by 10% for a short time. Stacks up to 3 times. | Tier II: 12%. Tier III: 15%. | Essential for tank builds. |
| Iron Lung | While stamina is full or near full, reduce damage by 10%. | Tier II: 15%. Tier III: 20%. | Combine with Peak Condition. |
| Never Without One | A hat that protects against headshots. If hat is shot, you survive but hat falls off. Cooldown: 30 seconds to put hat back on. | Tier II: Cooldown 25s. Tier III: Cooldown 20s. | Vital for PvP. |
| Cold Blooded | Killing an enemy regenerates 5 health. | Tier II: 10 health. Tier III: 15 health. | Great for PvE. |
| Come Back Stronger | Health regenerates faster and starts sooner after taking damage. | Tier II: +20% regen speed. Tier III: +30%. | Passive recovery. |
| To Have and To Hold (never used) Actually such card doesn't exist. |
Recovery Cards (Passive)
These restore cores or stamina faster.
| Card Name | Effect (Tier I) | Upgrade | Notes |
|---|---|---|---|
| Eye for an Eye | Headshots refill +20% Dead Eye. | Tier II: +25%. Tier III: +30%. | Synergy with Paint It Black. |
| Strange Medicine | Damage you deal heals you for 20% of the damage. | Tier II: 25%. Tier III: 30%. | Best for aggressive builds. |
| The Gift of Gab | Melee kills restore stamina and health. Not widely used. | Tier II: more. Tier III: more. | Niche. |
| Unblinking Eye | Dead Eye drains 20% slower. | Tier II: 30%. Tier III: 40%. | Combo with any Dead Eye card. |
Role-Specific Abilities (Unlockable from Role Licenses)
Each role gives passive or active abilities upon reaching certain ranks.
Bounty Hunter
- Eagle Eye +: While tracking bounties, you can see clues from farther away. (Passive, no cooldown)
- Tracker: At rank 20, you can call your hunting wagon? Actually Bounty Hunter wagon is a vehicle, not a skill. Skills: "Tackle" (press Triangle/Y to tackle fleeing bounties) is a move.
- Bounty Hunter Wagon: Skill unlocked at rank 10 to summon a wagon with a cage. Cooldown: 5 minutes if destroyed.
- Reinforced Lasso: At rank 5, you can use a stronger lasso that bounties cannot break. (Passive, infinite use but only with that lasso type).
- Bolos: Unlock at rank 5, throwable to entangle enemies. Can be upgraded to improved bolos at rank 15.
- Hunting Wagon: Rank 10, summons a wagon to store multiple large pelts. Cooldown 2 minutes.
- Large Delivery Wagon: Rank 14, for selling goods.
- Crafting Speed: Passive improvement at rank 12.
- Resupply Speed: Passive at rank 16.
- Special Stews: At camp, Cripps can cook stew that gives temporary gold cores.
- Collector's Bag: Rank 1, allows picking up collectibles.
- Shovels and Metal Detector: Rank 10, passive tools.
- Horse Lantern: Passive light? Not a skill.
- Tonics: Cheap or improved recipes at higher ranks.
- Moonshine Shack: Property.
- Moonshine Recipes: Passive unlock of flavors.
- Band Camp: Unlock passive income from band? Not skill.
- Strong Moonshine: Increase buzz and damage?
- Animal Transformations: Not a skill, but you can temporarily become an animal using Pheromones? Actually you can only sedate and sample. Legendary animal skinning gives trinkets.
- Animal Reviver: Craft sedative ammo.
- Horse Mask: Cosmetic.
- Diving: Press square/X while sprinting to dive. No cooldown. Good for evasion.
- Sliding: Down on D-pad while sprinting to slide. For cover or fun.
- Swimming: Can only swim a short distance before stamina drains. Use tonics.
- Climbing: Hold R2/RT to climb. Unlimited but slow.
- Dead Eye: Paint It Black (III) – for easy headshots.
- Combat: Peak Condition (III) – constant damage boost.
- Defense: Fool Me Once (III) – reduces damage over time.
- Recovery: Strange Medicine (III) – heal from damage.
- Synergies: High stamina keeps Peak Condition and Iron Lung? But we used Fool Me Once. Alternative: Iron Lung + Peak Condition for constant buffs. Use tonics to replenish stamina.
- Dead Eye: Slippery Bastard (III) – avoid lock-on.
- Combat: Winning Streak (III) – consecutive damage.
- Defense: Never Without One (III) – anti-headshot.
- Recovery: Eye for an Eye (III) – refill Dead Eye.
- Synergies: Slippery Bastard forces enemies to free-aim; use hip-fire or scoped weapons.
- Dead Eye: Slow and Steady (III) – high damage reduction.
- Combat: Landón's Patience (III) – sit still for damage boost.
- Defense: Iron Lung (III) – extra damage reduction.
- Recovery: Strange Medicine (III) – heal from shooting.
- Usage: Find cover, activate Dead Eye, soak damage, deal heavy shots.
- In Story Mode, prioritize upgrading Dead Eye to Level 4 as soon as possible. Complete story missions to unlock higher levels.
- In Online, never waste gold on buying card tiers; rank them up naturally by using them.
- Always carry a mix of tonics (Health, Stamina, Dead Eye) for any situation.
- For hunting in both modes, use Dead Eye Level 1 or Paint It Black (Online) to tag critical spots.
- In Online, build synergy between your Dead Eye card and passive cards. For example, Paint It Black + Eye for an Eye + Strange Medicine creates a cycle of kills restoring Dead Eye and health.
Trader
Collector
Moonshiner
Naturalist
General Gameplay Abilities (No Cards)
Recommended Builds (Online)
PvE General Purpose
PvP Aggressive
Tank Build
---
Usage Tips
---
Note: There are no true "spells" or "talents" in the traditional sense. All abilities are grounded in realistic Western combat. This guide covers everything that functions like a character skill.