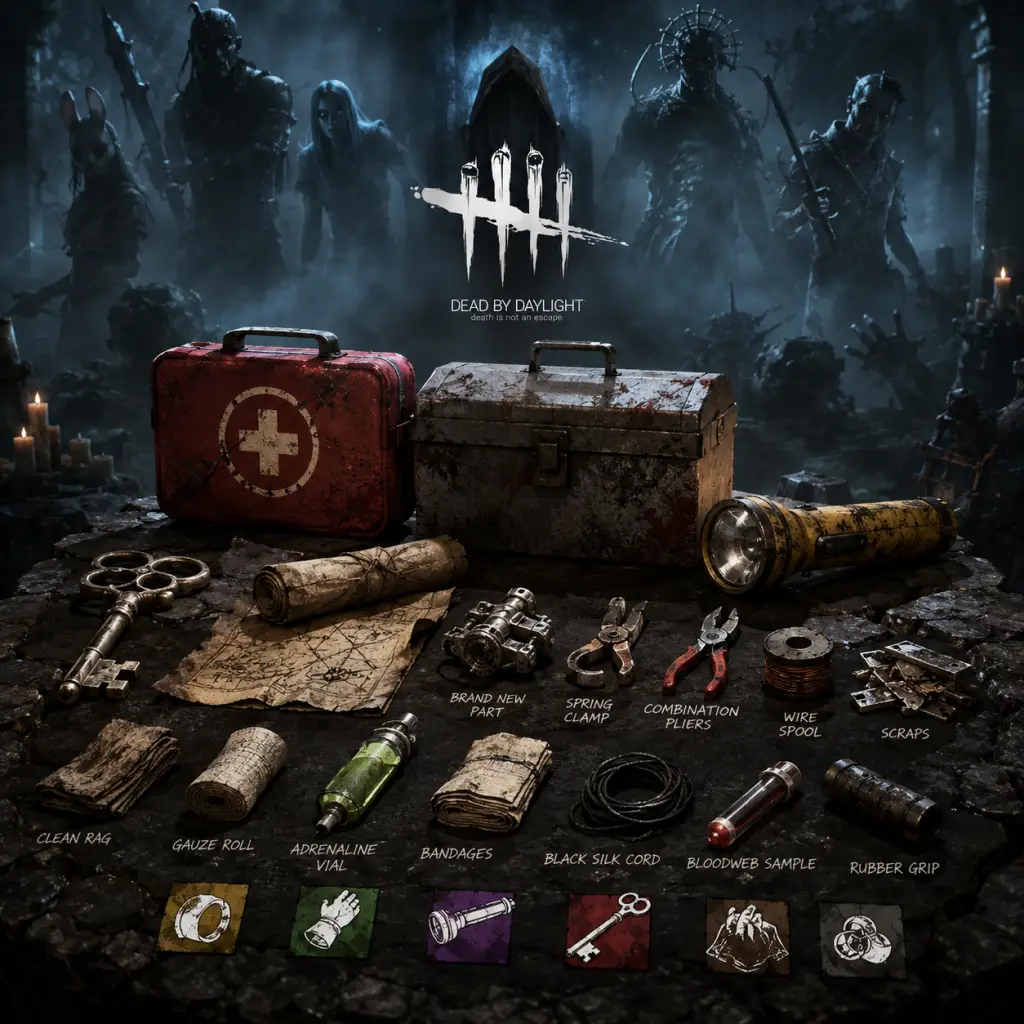
All Game Items
Dead by Daylight: All Game Items Guide
This comprehensive guide covers every item, add‑on, offering, currency, and collectible in Dead by Daylight. Items are grouped by category, with detailed explanations of function, acquisition, optimal use cases, and notable synergies.
1. Survivor Items
Survivor items are carried into the trial and can be found in chests or equipped from the inventory. Each item has a limited number of charges (durability).
1.1 Med‑Kit
- Function: Heals yourself or other survivors (fast heal or self‑care).
- Charges: 16–32 depending on rarity.
- Acquisition: Bloodweb, chests, events.
- Best Use: Emergency healing after an unhook, or healing others quickly to prevent snowballing.
- Synergies: Add‑ons like Gauze Roll (heal speed) or Anti‑Haemorrhagic Syringe (instant heal). Combos well with leader perks (e.g., We’ll Make It).
- Function: Repairs generators faster; can also sabotage hooks or trap doors.
- Charges: 16–32 (sabotage uses different charge rate).
- Acquisition: Bloodweb, chests.
- Best Use: Rush generators early game, or sabotage a key hook near a strong loop.
- Synergies: Add‑ons like Wire Spool (extra repair speed) or Instructions (bonus repair progress). Works with Prove Thyself.
- Function: Blinds the killer for a short time, or destroys their power (e.g., Nurse’s Blink, Trapper’s traps).
- Charges: 12–24 seconds of beam time.
- Acquisition: Bloodweb, chests.
- Best Use: Save a teammate from being carried, prevent a hook, or interrupt a power attack.
- Synergies: Add‑ons like Wide Lens (wider beam) or High‑End Sapphire Lens (faster blind). Works with Breakout to increase wiggle effect.
- Function: Opens the Hatch before all generators are done (requires add‑on). Broken Key cannot open Hatch by itself.
- Charges: 15–25 seconds of use for Hatch aura reading.
- Acquisition: Bloodweb, chests.
- Best Use: Escape through Hatch early if you have the key and the team is struggling.
- Synergies: Add‑ons like Blood Amber (reveal killer aura while opening) or Prayer Beads (open Hatch without sound). Combine with Left Behind or Sole Survivor.
- Function: Reveals auras of generators, traps, clues, or the killer (with add‑ons).
- Charges: 20–30 seconds of scanning.
- Acquisition: Bloodweb, chests.
- Best Use: Locate remaining generators quickly, or track killer movements with Map Add‑ons.
- Synergies: Add‑ons like Glowing Paint (show killer aura) or Red Twine (increase range). Useful for generators only when using Detective’s Hunch or similar perks.
- Firecrackers: Blind/confuse killer; single use. (Acquired during Lunar New Year events)
- Flashbang: Craftable item via perk Flashbang; creates a blinding blast after a loud noise notification.
- Emergency Med‑Kit: Event variant with faster self‑heal.
1.2 Toolbox
1.3 Flashlight
1.4 Key (Skeleton Key / Broken Key)
1.5 Map
1.6 Special/Event Items
2. Survivor Add‑ons
Add‑ons modify survivor items. They are obtained from the Bloodweb and can be attached to items in the inventory.
Med‑Kit Add‑ons
| Add‑on | Effect | Rarity |
|---|---|---|
| Gauze Roll | +10% heal speed | Common |
| Anti‑Haemorrhagic Syringe | Instant heal (consumes 20 charges) | Very Rare |
| Butterfly Tape | +25% heal speed when healing others | Uncommon |
| Sponge | +1 extra charge | Common |
Toolbox Add‑ons
| Add‑on | Effect | Rarity |
|---|---|---|
| Wire Spool | +9% repair speed | Uncommon |
| Instructions | +25% sabotage speed | Rare |
| Brand New Part | Instantly repair 15% generator progress (consumes item) | Very Rare |
| Socket Swivels | No skill checks while repairing | Uncommon |
Flashlight Add‑ons
| Add‑on | Effect | Rarity |
|---|---|---|
| Wide Lens | +20° beam width | Uncommon |
| High‑End Sapphire Lens | Faster blind time | Rare |
| Battery | +10% charge duration | Common |
| Bulb | +15% charge duration | Uncommon |
Key Add‑ons
| Add‑on | Effect | Rarity |
|---|---|---|
| Blood Amber | Killer aura revealed while opening Hatch | Rare |
| Prayer Beads | Silent Hatch opening | Very Rare |
| Scratched Pearl | Reveal killer aura when within 24 metres | Uncommon |
| Zesty Mint | +10 seconds of map reading | Common |
Map Add‑ons
| Add‑on | Effect | Rarity |
|---|---|---|
| Glowing Paint | Reveal killer aura when sweepping | Uncommon |
| Red Twine | Increase scanning range by 8m | Rare |
| Retardant Soap | Reduce skill check difficulty while scanning | Common |
3. Killer Add‑ons
Each killer has a unique power with its own set of add‑ons (up to 2 per trial). These are obtained from the Bloodweb or Shrine of Secrets. Below is a generic overview; consult individual killer guides for specifics.
3.1 Common Add‑on Types
- Increased Power Duration (e.g., Bloody Coil for Trapper – traps stay armed longer)
- Cooldown Reduction (e.g., Jim’s Boots for Hillbilly – faster chainsaw recharge)
- Tracking Enhancements (e.g., Glass Bead for Nurse – blink shows auras)
- Damage Buffs (e.g., Tiffany’s Earrings for Ghost Face – exposed longer)
- Iridescent Head (Huntress) – Hatchets instantly down Survivors but have limited ammo.
- Tombstone Piece (Myers) – Kill exposed Survivors without needing a Mori offering.
- Coxcombed Clapper (Wraith) – Essentially silent uncloaking.
- Prayer Beads (Spirit) – No sound while phase walking (very powerful).
3.2 Notable Killer Add‑ons
4. Offerings
Offerings are consumed before the trial to modify gameplay. They are placed in the offering slot and affect either Survivors or Killers universally.
4.1 Bloodpoint Multiplier Offerings
| Offering | Effect | Color |
|---|---|---|
| Escape! Cake | +100% Bloodpoints for Survivor category | Green (Event) |
| Streamer | +50% Bloodpoints for all players | Yellow |
| Honey Blossom | +100% Bloodpoints for Survivor (event) | Green |
| Bog Laurel | +100% Killer Bloodpoints (event) | Green |
4.2 Map/Realm Offerings
| Offering | Effect |
|---|---|
| MacMillan Estate Map | Increases chance to go to MacMillan Estate |
| Autohaven Wreckers Map | Increases chance to go to Autohaven |
| Coldwind Farm Map | Increases chance to go to Coldwind Farm |
| The Game Map | Forces The Game (Saw map) |
| Haddonfield Map | Forces Haddonfield (Halloween) |
4.3 Mori Offerings
| Offering | Effect |
|---|---|
| Cypress Memento Mori | Allows Killer to kill the 4th Survivor after the struggle phase |
| Ivory Memento Mori | Allows Killer to kill one Survivor after being hooked twice (rare) |
| Ebony Memento Mori | Allows Killer to kill all Survivors after being hooked twice (ultra‑rare) |
4.4 Other Offerings
- Shroud of Separation (Survivor) – Start far from each other.
- Sacrificial Ward – Blocks one map offering from the enemy team (rare).
- Vigo’s Blueprint (Event) – Reveals killer’s terror radius at start.
5. Currencies
Currencies are used to unlock characters, perks, cosmetics, and items.
| Currency | Symbol | Earning Method | Use |
|---|---|---|---|
| Bloodpoints (BP) | Bloodpoint icon | Match rewards, daily rituals, archives | Leveling Bloodweb, unlocking items/add‑ons/perks |
| Iridescent Shards | Purple shard | Player leveling, event rewards, rift | Purchase original characters, cosmetics, charms |
| Auric Cells | Yellow diamond | Real‑money purchase | Purchase licensed characters, premium cosmetics, Rift Pass |
| Event Currency (e.g., Festive Bloodpoints, Lunar Coins) | Varies | In‑game events | Limited‑time cosmetics, special items |
6. Collectibles
6.1 Charms
Small trinkets attached to survivor items or killer weapons. Purely cosmetic.
- Obtained: Archives, rift, events, store purchases.
- Types: Seasonal (Christmas skull, pumpkin), character‑specific (trapper’s mask), lore‑based.
- Head, Torso, Legs for survivors; Weapon for killers.
- Rarity: Common (green), Uncommon (yellow), Rare (purple), Very Rare (pink), Ultra Rare (red).
- Note: Cosmetics do not affect gameplay; they only change appearance.
- Bloodpoints, shards, rift fragments.
- Exclusive charms, outfits, and banner icons.
- Item Loss: Survivor items are consumed upon full use, or dropped on ground when downed (can be retrieved).
- Add‑on Consumption: Survivor add‑ons are consumed when the item is used up; killer add‑ons are consumed each trial.
- Bloodweb: The primary way to obtain items and add‑ons. Prestige a character to unlock higher‑tier items more frequently.
- Shrine of Secrets: Weekly rotation of four perks for purchase with shards – not items, but crucial for builds.
6.2 Outfits & Weapon Skins
Cosmetic sets for survivors and killers. Often sold in the store or unlocked via archives.
6.3 Archives / Tomes
Each tome contains lore entries and challenge nodes. Completing challenges rewards:
7. Important Notes
This guide covers all fundamental items in Dead by Daylight. For deeper synergy analysis or specific killer add‑on tier lists, refer to character‑specific guides.