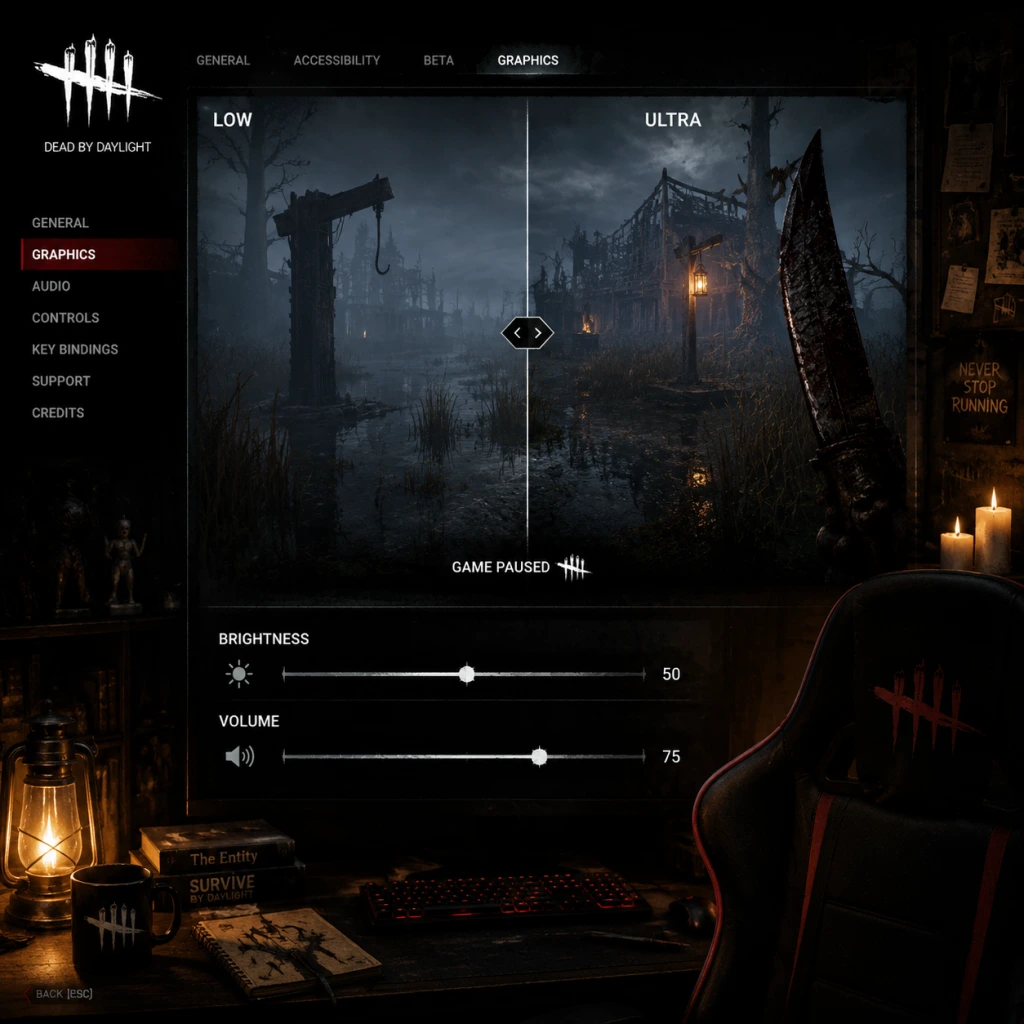
Game Settings
Dead by Daylight: Game Settings Guide
This guide covers all configurable settings in Dead by Daylight (DbD) across platforms. You'll find optimal recommendations for performance vs. quality on different hardware tiers, plus pitfalls to avoid when tweaking options.
Graphics Settings
Display
- Resolution – Set to native monitor resolution (e.g., 1920×1080, 2560×1440). For lower-end hardware, drop to 1600×900 or 1280×720.
- Window Mode – Choose Fullscreen for best performance; Borderless Windowed for alt-tabbing convenience but slightly higher input lag.
- V-Sync – Off if you have G-Sync/FreeSync or want minimum input latency; On to eliminate screen tearing (adds ~1 frame delay).
- Frame Rate Limit – Set to your monitor’s refresh rate (60/120/144 Hz). Use 60 on low-end PCs to reduce GPU strain.
- Field of View (FOV) – Only adjustable for Killers (90–110). Survivors have fixed FOV. Higher FOV gives peripheral awareness but can feel “fisheye”.
Quality Presets
| Preset | Description |
|---|---|
| Low | For integrated graphics or GPUs ≤ GTX 960 / RX 560. Major visual cutbacks but playable. |
| Medium | Balanced for GTX 1060 / RX 580. Good clarity without heavy drops. |
| High | For RTX 2060 / RX 6600 and above. Full shadows, textures, and effects. |
| Ultra | for RTX 3070+ / RX 6800+. Maxed settings with little performance loss. |
| Custom | Manual fine-tuning. Use if presets don’t fit your hardware. |
Per-Setting Recommendations
- Texture Quality – Low on VRAM-constrained GPUs. Medium uses ~2 GB; High ~3 GB; Ultra ~4 GB.
- Shadow Quality – Low for best FPS. Shadows are heavy. On console, medium is safe.
- Anti-Aliasing – FXAA if FPS matters; SMAA for sharper edges (costs ~5% FPS). TAA blurs slightly but smoothest.
- Post-Processing – Off on low-end. Includes bloom, light rays. Killer players may want them off to spot survivors more easily.
- Reflections – Off on low; Medium for decent puddle/nearby reflections.
- Ambient Occlusion – Adds depth but costs FPS. SSAO slightly less heavy than HBAO+.
- Level of Detail – Distance objects. Medium is good for balance; High costs ~10% FPS.
- Resolution Scale – Critical for performance: set 100% for 1:1; lower (e.g., 50–75%) gives big FPS boost at cost of blur. Do not go below 75% unless desperate.
- Motion Blur – Off. Makes screen clearer and reduces distraction.
- Lens Flare – Off. Unnecessary visual noise.
- Foliage Quality – Low to see survivors through bushes (Killer benefit).
- PC – All settings available on the “Video” tab.
- PlayStation 5 / Xbox Series X\|S – Preset: Quality (4K30) or Performance (1080p60). Choose Performance for smoother gameplay.
- PlayStation 4 / Xbox One – Fixed medium-low. No custom tweaks.
- Nintendo Switch – Fixed low, dynamic resolution. V-Sync always on.
- Master Volume – 100%, then adjust per-channel.
- SFX Volume – Keep at 100%. Crucial for hearing footsteps, healing, terror radius, and hatch.
- Music Volume – 0%. Music can mask important audio cues (e.g., heartbeat, chase music is less critical than footsteps).
- Voice Chat Volume – PC only (in-game voice uses proximity chat). Set to your preference.
- Subtitle Visibility – On for accessibility. Shows direction (L/R) and distance of killer sounds (e.g., “Killer breathing – left”). Helps deaf/hard-of-hearing players.
- UI Sound Effects – Keep at 100% for menu navigation feedback.
- 3D Audio – On if your system supports it (Windows Sonic, Dolby Atmos). Greatly improves directional awareness. Off if you experience cracking/distortion.
Advanced/Perf Tweaks
Per-Platform Graphics
Audio Settings
⚠ Audio Pitfall: Do not lower SFX volume. Many beginners lose the killer because they can’t hear the terror radius faintly over music. Keep music at 0% and SFX max.
Controls
PC (Keyboard + Mouse)
| Action | Default Key | Notes |
|---|---|---|
| Move | W/A/S/D | Can rebind to ESDF for more hotkey space |
| Run/Sprint | Shift (Hold) | Survivor uses shift, Killer uses shift |
| Interact | Space | Vault, drop pallet, heal |
| Ability | Ctrl (Killer) | M2 menu |
| Attack | Left Mouse Button | |
| Secondary Attack | Right Mouse Button | only survivors |
| Skill Check | Spacebar/Skill Check Button | spamming? N/A |
| Emote Wheel | B (Survivor) | Point, beckon, etc. |
| Camera Look | Mouse Movement | standard |
| Pause Menu | Escape |
Console (PlayStation/Xbox)
- Left Stick – Move
- Right Stick – Camera
- R2/Right Trigger – (Survivor) Run; (Killer) Attack
- L2/Left Trigger – Survivor: Drop item?; Killer: Secondary power
- L1/LB – Survivor: Crouch; Killer: ???
- R1/RB – Survivor: Ability (e.g., use flashlight); Killer: ???
- X/Square – Interact
- O/Circle – Leave item/palette drop
- Triangle/Y – Camera look behind while running (Survivor)
- D-Pad – Emotes
- Dead Zone – Lower it to 0–5% to eliminate stick drift. Default 20% can feel sluggish.
- Colorblind Mode – Select from Protanopia, Deuteranopia, Tritanopia to change UI colors (e.g., skill check zones, health states). If unsure, test in the lobby.
- Large HUD – Toggle to enlarge cooldowns, perk icons.
- Reduced Screen Shake – On for better clarity during chases and when the Killer breaks pallets.
- Subtitle Size – Can be increased for legibility.
- Camera Shake Intensity – Slide to 0% for stable image.
- Strobe Effect Warning – Disables intense flashing (e.g., from Demogorgon’s pounce or Doctor’s shock therapy). Useful for photosensitive epilepsy.
- Controller Vibration – Off if you find it distracting; On for haptic feedback when hit or repairing gen, but can interfere with fine aiming.
- Auto-Aim – For controllers only (console). On helps Killers land hits; Off gives more control over lunges. Many top players turn it off.
- Game Language – Can be changed in the launcher (Steam/Epic) or in-game menu (on consoles). Reboot required.
- Voice Language – Separate for character voices (English, French etc.). Affects survivor pained sounds and killer lines. Not gameplay important.
- Subtitle Language – Match to your preferred display language.
- Region – Automatic is fine. But if you experience high ping spikes, manually pick a nearby region (NA East, NA West, Europe, Asia, etc.).
- Cross-Play – On to reduce queue times. Off if you only want console players (PC players may have comp advantage).
- Bandwidth Limit – Default is 10 Mbps. Lower if your internet isn’t stable (e.g., 5 Mbps). Increase to 20+ for better hit registration but may cause lag if connection weak.
- Network Smoothing – This setting (hidden under “Advanced” → “Game”?) actually doesn't exist in DbD menu. Instead, the game auto-uses client-side prediction.
- Voice Chat – PC only. In-game voice is proximity-based; no volume slider for lobby. Use Discord for party chat instead to avoid echoing.
- Hold vs Toggle –
- Skill Check Style – Automatic (default) vs. Visual-only (sound disabled). Keep Automatic to hear the sound cue.
- Aim Assist – Controllers only. On helps shooters/demogorgon; Off for precise aiming.
- Center Killer Camera – Toggles auto-centering when hitting a survivor. Many Killers turn this Off to maintain view in chases.
- Quick Turn – Only for Survivors on keyboard. Bind a key to instantly perform a 180° turn while running. Essential for jukes.
- UI Opacity – Set to 100% for clear skill check and perk visibility.
- HUD Scale – Adjust as needed; 100% default.
Sensitivity (Aim) – Set to Medium-High (60–80) for quick 180° turns. Lower if you overshoot.
Nintendo Switch
oControls similar to other consoles but with a wider dead zone by default. Set dead zone to 5% minimum.
Accessibility Settings
Language Settings
Note: Some language packs (e.g., Korean, Japanese) may have slightly different audio timing for skill checks. Unconfirmed but anecdotal. Stick to your native language for consistency.
Network Settings
Gameplay Settings
- Run – Prefer Hold for precise control; Toggle may cause accidental sprints when releasing.
- Crouch – Toggle is easier for long crouches; Hold for quick ducking.
- Flashlight – Toggle for sustained beam; Hold for burst.
Special Attention Points
1. Resolution Scale – The biggest performance lever. Lowering to 75% gives ~40% more FPS with acceptable blur. Do not go below 50%.
2. V-Sync – Always Off for competitive play. In console, it’s forced on but enables triple-buffering on some models.
3. Motion Blur + Post-Processing – Turn both Off to see survivors more clearly through fog and maps like Lery’s.
4. Audio Balance – Many players forget to mute music. Doing so lets you hear the Killer’s breathing through walls.
5. Controller Dead Zone – Default is too high (20%). Lower to 5% for instant response.
6. Field of View (Killer only) – Set to 110 for maximum awareness. Some Killers prefer 105 to avoid distortion.
7. Cross-Play Toggle – If you’re on PC and getting outmatched, turning off cross-play doesn’t help as queue times increase; but on console, it can reduce PC tryhards.
8. Colorblind Mode – Test in the menu or tutorial. A wrong colorblind setting can make skill checks (red/green) harder.
Conclusion
Tweak these settings to your hardware and personal preference. For most players, a mix of Medium graphics, 0% music, full FOV (Killer), and low dead zone (controller) provides the best competitive edge. Remember to test changes in a custom game (with bots) before diving into live matches.
Last updated: October 2023