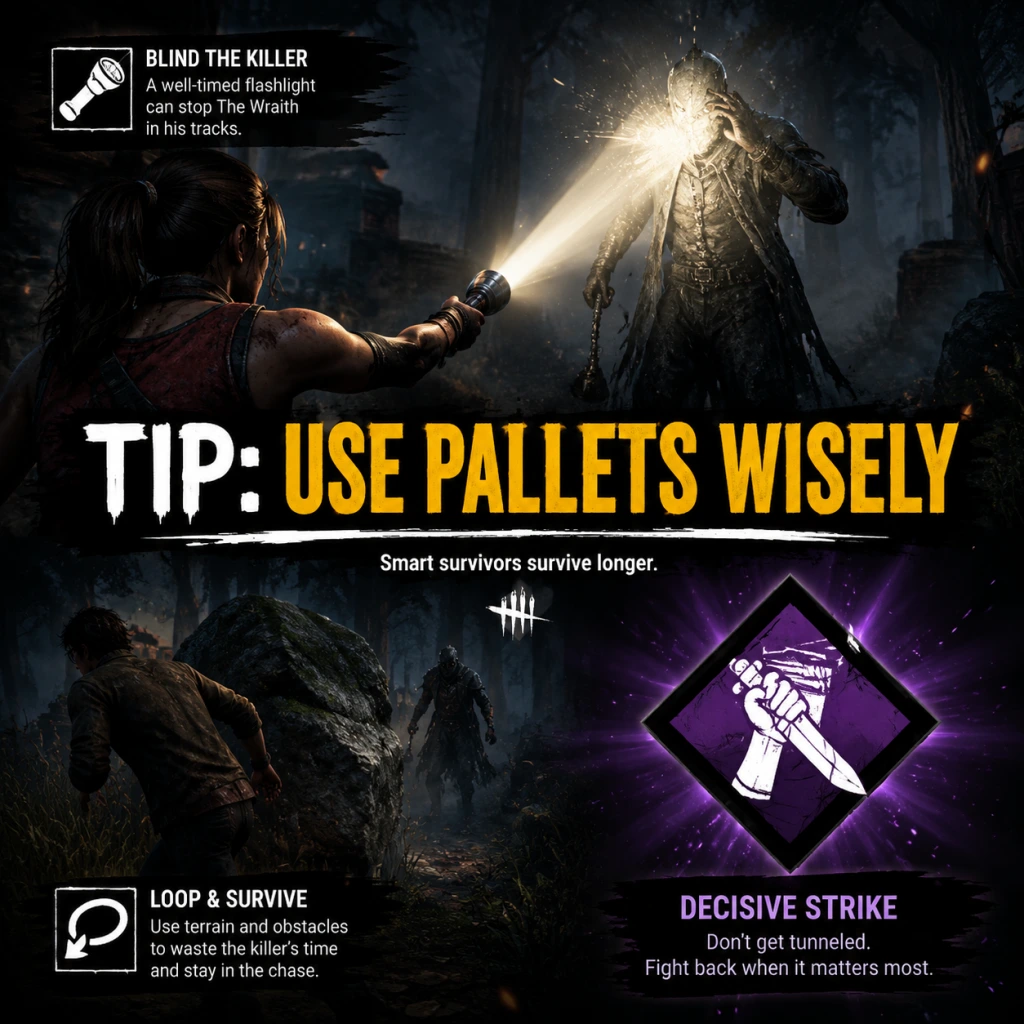
Game Tips
Dead by Daylight: Game Tips Guide
This comprehensive guide offers game tips for Dead by Daylight (DbD), covering beginner fundamentals, survivor and killer strategies, bloodweb economy, builds, and advanced optimizations. Each tip includes an explanation and deeper analysis of why it works and when to use it.
Beginner Tips
1. Stick Together but Maintain Spread
- Explanation: Survivors repair generators faster together (each survivor adds +0.5 charges per second to repair speed, stacking multiplicatively). However, grouping tightly makes you vulnerable to area-of-effect killers (e.g., The Doctor, The Nurse) and gives killers a free multi-hit.
- Analysis: Use Prove Thyself to further boost repair speed when together, but always stay at least a few meters apart to avoid simultaneous damage. If the killer has a power like The Nurse’s blinks or The Hag’s traps, split up to deny them value.
- When: Start the match spread across three far gens; only two survivors should ever be on the same gen unless saving time is critical (endgame).
- Explanation: DbD is audio-driven. Hear heartbeat (terror radius), skill check sounds, generator sounds, broken pallet splintering, footsteps, and breathing. Wear headphones for directional awareness.
- Analysis: The killer’s terror radius indicates proximity; skilled survivors can estimate distance and direction. Skill check timing can be practiced offline. Use sound to detect a killer approaching while repairing – stop repairing and hide when the heartbeat grows loud.
- When: Always use headphones. If you hear a generator skill check while injured, anticipate the killer might be near. When running, listen for your own footsteps to avoid giving away position.
- Explanation: Loops are structures with pallets and windows that let survivors evade the killer. The fundamental technique is to run around the obstacle, forcing the killer to either break a pallet or attempt a mind game.
- Analysis: Survivors have a speed of 4.0 m/s versus killers’ 4.6 m/s (varies by killer). Use pallets to create distance, but don't drop them too early – save them for when the killer is close. Vault windows at maximum speed (hold sprint) to avoid exhaustion.
- When: Always try to reach a loop when the killer is chasing you. If you are at a pallet, wait until the killer is about to lunge, then drop it. Don't drop pallets unnecessarily; they are limited resources.
- Explanation: Survivors win by completing generators and escaping, not by taunting the killer. Killers win by sacrificing survivors, not by chasing for long periods (unless they have map pressure).
- Analysis: A survivor who wastes time in a chase without doing gens is harming the team. A killer who commits to a single survivor for 60 seconds loses map pressure. Use the 3-gen strategy (defending three generators close together) for killers, but as survivor, break those gens first.
- When: If you are the chase target, run the killer away from the remaining generators. If you are safe, get on a generator. As killer, if a chase takes more than 30 seconds, consider breaking off to patrol generators.
- Explanation: Survivors can look behind them during a chase by moving the camera without changing direction. Killers can “moonwalk” to hide their red stain.
- Analysis: Constantly looking back helps survivors anticipate the killer’s moves, especially at loops. Killers can fake direction by walking backward, misleading survivors about which way they are going. Console players have a lower FOV; PC players can adjust FOV in settings (survivors only).
- When: While running in a straight line, quickly glance back every 2-3 seconds. During a chase, use camera to check if the killer is going to lunge or bait a vault. Killers: when approaching a loop, walk backward to hide your red stain, then quickly turn around.
- Explanation: Survivors must repair 5 generators to power the exit gates. Prioritize repairing generators farthest from each other to avoid a three-gen situation (last three gens clustered). Use Prove Thyself to boost repair speed when multiple survivors are together.
- Analysis: A three-gen is a death sentence if the killer defends them. Always try to split repairs across the map. If the killer has a mobility power (e.g., Nurse, Blight), they can quickly patrol the remaining gens – break that side first.
- When: At the start, spawn separate and head to opposite sides of the map. If you see a gen already started, join it if it’s safe (use Bond to see teammates). Never be the third survivor on a gen – go find another.
- Explanation: A 360 is spinning around to dodge a killer’s lunge. Window vaults can be fast (holding sprint) or slow (walking). Killers can mind game by faking a vault.
- Analysis: Timing a 360 requires the killer to be very close. Practice turning your camera 180 degrees while pressing the opposite direction. For window vaults, survivors have two vault speeds: fast (clicking vault while sprinting) and medium (clicking while walking). Killers can only medium vault windows; survivors can fast vault, creating distance. Interacting objects (pallet drops, window vaults) grant a brief speed boost (0.5 seconds).
- When: Use a 360 when the killer is about to lunge and you have no pallet or window nearby. Use fast vaults to quickly pass through windows, but beware of the killer predicting and swinging at the vault point. Slow vault is quieter – use when the killer is far away.
- Explanation: Survivors have options: hide in lockers, crouch in bushes, or be aggressive and run. Each has costs and benefits.
- Analysis: Stealth perks like Urban Evasion (crouch walk faster), Lightweight (no scratch marks while sprinting), and Distortion (remove aura reading) help avoid detection. However, being too stealthy can waste time – you need to be on gens. Aggressive play (taking aggro, looping) is valuable but risky if you can’t survive.
- When: If you are injured with no healing, stealth until healed. At the start, don't hide – rush to a gen. If the killer has BBQ & Chilli (shows auras after hook), be near a gen but not on it to avoid aura reading. Mix between being on gens and hiding when needed.
- Explanation: Perks that complement each other create powerful combos.
- Analysis: Sprint Burst gives a 150% speed boost for 3 seconds when starting a sprint – pair with Fixated to see your own scratch marks and walk faster. Adrenaline heals one health state and gives a sprint burst when the last gen finishes – pair with Resilience to increase repair speed while injured. Better together: Deliverance allows self-unhook after a safe hook rescue – pair with Slippery Meat for extra attempts, but more importantly with Decisive Strike to punish tunnelers.
- When: Always consider synergy when building loadouts. For new players, Bond + Prove Thyself helps with gen efficiency. For looping, use Dead Hard + Sprint Burst (exhaustion management) or Lithe + Dance With Me.
- Explanation: Items (flashlights, toolboxes, medkits, maps, keys) can be used once per match unless you have add-ons. Use them wisely.
- Analysis: Flashlights can blind killers to stop a hook, break a grab, or hinder a pick-up. Toolboxes speed up generator repair (commodious toolboxes are best). Medkits allow self-heal without a teammate. Keys open the hatch early or after the hatch spawns.
- When: Save flashlights for decisive moments – save a teammate from being hooked, or blind the killer during a pickup to force them to drop the survivor. Don’t use a medkit if you have a teammate near who can heal you (faster, no item waste). Use toolboxes on the last generator to speed finish. Keys are lottery – use them when the hatch spawns or if the game is going badly.
- Explanation: Map pressure is the ability to threaten multiple survivors or generators simultaneously. Without pressure, survivors finish gens quickly.
- Analysis: High-mobility killers (Nurse, Blight, Spirit, Hillbilly) naturally apply pressure. Use teleports, dashes, or stealth to appear unexpectedly. For low-mobility killers (Trapper, Myers, Leatherface), use perks like Corrupt Intervention (blocks three farthest gens for 120 seconds) or Tinkerer (triggers notification when a gen reaches 70%). Patrol your generated trigger points.
- When: At match start, immediately head to the gen furthest from you to check for survivors. If you see scratch marks, chase only if it’s quick. Otherwise, keep moving between generators. Use your killer power to cover ground (e.g., Blight’s rush, Spirit’s phasing). Never stay at one area for more than 20 seconds.
- Explanation: A killer’s lunge multiplies attack range (usually from 4m to ~7m for a few meters). Mind games involve faking directions at loops to catch survivors off guard.
- Analysis: At a pallet loop, you can walk backward to hide the red stain, then quickly turn and lunge. At a window, you can fake a vault by walking up to it and backing off. Surviving killers often “moonwalk” (walk backward while looking forward) to confuse survivors about which way you are going. Lunge attacks: you press attack while sprinting; the lunge covers extra distance. Use it when you are close enough to hit the survivor even if they start to dodge.
- When: Use the lunge when the survivor is about to vault a window or drop a pallet. For mind games, if the survivor is waiting at a pallet, walk toward them then suddenly back up – they may drop the pallet prematurely, leaving you with the chance to break it. At a window, if the survivor is on the other side, fake a vault and they may vault back into you.
- Explanation: After hooking a survivor, you have options: camp (stay near the hook), patrol (check nearby generators), or slug (leave the survivor on the ground instead of hooking).
- Analysis: Camping is generally ineffective against good teams – they will do generators while you watch a single hook. Patrolling is better: hook a survivor, then walk towards a nearby generator. Slugging is strong when multiple survivors are injured – disable multiple survivors to snowball. Perks like Deerstalker (see downed survivors auras) and Knock Out (obscure auras for other survivors) synergize with slugging.
- When: If the exit gates are powered, camping can secure a kill. Early game, patrol. If you have a good chase and down a survivor near a generator, hook them quickly to force survivors off the gen. Slug if you down a survivor while another is healing nearby – go after the healer. Don’t slug too long unless you have a build supporting it (e.g., The Oni).
- Explanation: Meta killer perks increase pressure, notification, or survival. The best perks often are BBQ & Chilli (aura after hook), Tinkerer (gen progress warning), Corrupt Intervention (delay gen rush), Pop Goes the Weasel (reduce gen progress when you hook).
- Analysis: BBQ gives bloodpoints and location info – extremely valuable for patrolling. Tinkerer tells you when a gen is at 70% and makes you undetectable for 12 seconds – perfect for ambushing. Corrupt Intervention slows early game. Pop Goes the Weasel requires hooking to regress a gen by 20% of current progress; use it after a hook. Other strong perks: Save the Best for Last (reduce cooldown on non-obsession hits), No Way Out (block exit gates after door opens).
- When: For beginners, use BBQ + Tinkerer + Corrupt + a fourth perk like Hex: Ruin (regresses gens if survivors aren’t on a gen). For advanced, adapt to your killer: for Nurse, Nurses Calling + Thanatophobia works. For Huntress, Iron Maiden + BBQ + Bitter Murmur + Corrupt.
- Explanation: Good survivors use perks like Dead Hard (immune to damage while dashing), Decisive Strike (stun if unhooked survivor is picked up), Borrowed Time (45 seconds of deep wound protection after unhook). Killers need to counter these.
- Analysis: Against Dead Hard, wait for the survivor to use it (they become exhausted) and then hit them. Against Decisive Strike, slug the unhooked survivor for 60 seconds to let the timer run out. Against Borrowed Time, don't hit the unhooked survivor immediately – wait for the deep wound timer to start, then hit to down them. Use Lightborn to counter flashlights, Franklin’s Demise to knock items out of hand.
- When: If a survivor has been unhooked, assume they have Borrowed Time – either hit them once to trigger deep wound and wait, or ignore them and chase the unhooker. If you suspect Dead Hard, bait the dash by stopping your swing and then lunging after they dash. Use Franklin’s Demise item drop to deny flashlights and toolboxes.
- Explanation: Bloodpoints (BP) are earned in matches and spent in the Bloodweb to unlock perks, items, add-ons, and offerings. Prestiging a character resets their bloodweb but unlocks tiered charms and legacy cosmetic sets.
- Analysis: Prioritize unlocking teachable perks for your main role first. Once you have all generic perks, go for perks specific to your favorite survivor/killer. Spend BP on level 20-25 nodes that give yellow items early. Avoid buying expensive add-ons unless you need them. Prestiging gives bonus perks on other characters – prestige 1 each character for their teachable, then consider prestige 2/3 for legacy effects.
- When: New players should focus on one survivor and one killer to level 50 to unlock their teachables. After that, level other characters to get their teachables. Use Bloodpoint offerings (e.g., Survivor Pudding, Escape Cake) during double BP events to maximize gain. Don't prestige until you have unlocked all the perks you use.
- Explanation: Some perks are universally powerful and should be unlocked for all characters.
- Analysis: For survivors: Borrowed Time (from Bill), Dead Hard (David King), Sprint Burst (Meg Thomas), Unbreakable (William “Bill” Overbeck), Prove Thyself (Dwight Fairfield). For killers: BBQ & Chilli (Leatherface/The Cannibal), Tinkerer (The Hillbilly), Corrupt Intervention (The Plague), Hex: Ruin (The Hag), Pop Goes the Weasel (The Clown).
- When: As soon as you can, level these characters to 30-40 to unlock the teachable. Then find the perk in other characters’ bloodwebs. Prioritize these before spending on niche perks.
- Explanation: A meta survivor build focuses on survival, gen speed, and anti-tunnel. Example: Sprint Burst, Borrowed Time, Unbreakable, Prove Thyself. Variations: use Dead Hard instead of Sprint Burst, or use Adrenaline for endgame escape.
- Analysis: This build gives you speed to reach a loop (Sprint Burst), safety after unhook (Borrowed Time), self-recovery if left on ground (Unbreakable), and gen boost (Prove Thyself). The combination covers nearly all scenarios. For a stealth build, use Urban Evasion, Spine Chill, Lightweight, and Distortion – this helps you avoid detection and hide.
- When: Use the meta build when you expect a strong killer or in swf. Use stealth build when learning or when playing solo queue with bad teammates.
- Explanation: Killers have unique powers that synergize with certain perks. General meta: BBQ, Tinkerer, Corrupt, Pop. For specific killers: Nurse builds often include Nurses Calling, Thanatophobia, Sloppy Butcher, and Shadowborn. Huntress uses Iron Maiden (faster reload), BBQ, Bitter Murmur, and Corrupt. Blight uses the same meta but may swap Pop for something like Hex: Blood Favor.
- Analysis: BBQ gives map awareness and BP. Tinkerer catches survivors on gens. Corrupt slows early game. Pop maintains gen progress after hooking. For Nurse, her mobility makes Thanatophobia strong (healing slower, repair slower). For Huntress, Iron Maiden speeds up reload and can reveal survivors in lockers.
- When: Always bring Corrupt on slow killers (Trapper, Myers). On fast killers, you can substitute for something else. If survivors tend to heal, use Sloppy Butcher or Nurse’s Calling. Adapt your loadout based on what you face.
- Explanation: Moonwalking is walking backward while facing the camera forward. This hides the killer’s terror radius red stain from survivors at loops. 360s are spinning dodges.
- Analysis: Killers: walk backward around a corner – survivors cannot see your stain, making it harder to predict your direction. Survivors: a successful 360 requires predicting the lunge. Practice turning the camera sharply while pressing the opposite movement key. Timing: as the killer lunge, turn 90 degrees left or right – the lunges have a narrow hitbox.
- When: Killers use moonwalking when approaching a loop where the survivor is watching the corner. Survivors use 360 when the killer is close and you have no pallet. It works best against slower killers; against Nurse or Spirit, it’s less effective.
- Explanation: Each tile has patterns: Shack has a window and pallet. T&L tile has two windows and a pallet. Jungle gym has a central rectangle with windows and pallets.
- Analysis: At Shack, the killer can mind game the window by walking one direction then quickly turning the other. Survivors can double-back inside. At T&L, if the killer is on one side, go to the opposite window. At jungle gym, survivors can run around the rectangle and fake dropping the window. Killers can outplay by walking through the building to cut off.
- When: Recognize these tiles. As survivor, know that the killer will often try to cut you off – watch the building walls. As killer, learn the patterns: e.g., at Shack, if the survivor runs through the front window, you can go straight and vault after them, but be ready for a fake.
- Explanation: By observing the killer’s behavior, you can predict their actions: do they always go for a certain gen after hook? Do they camp? Do they slug?
- Analysis: Notice patterns. If the killer has BBQ, they will look towards the direction of survivors after hook. If the killer uses Tinkerer, they will rush to a gen at 70%. If a killer has Hex perks, they may guard totems. You can also gauge skill by how they handle loops.
- When: After a hook, if the killer immediately moves away, they are patrolling. If they stay, they are camping – go do gens. If they slug, wait until they leave then pick up teammate. Use this to plan your actions.
- Explanation: Knowing the map layout is crucial. Maps have fixed spawns for generators, hooks, totems (bones). The hatch spawns when one survivor remains or when the last gen is done.
- Analysis: Use map offerings to force certain maps. Learn the location of totems for playing hex perks (you as killer need to know where survivors might be looking for totems). Hooks are finite – if you use them all, the next hook will spawn back after a time? Actually, hooks remain broken after being used; a new hook will spawn far away. Survivors should know where hooks are to wiggle and avoid being taken to a specific hook.
- When: As survivor, memorize the maps by playing. Use Bond or maps to see teammate locations. As killer, patrol symmetrical generator groupings. If you have spread hooks, know which hooks are closest to generators to drag survivors there.
- Explanation: DbD is cross-play but platforms differ in performance, input, and settings.
- Analysis: PC players have higher FOV and can adjust graphics for clarity. Console players have lower FOV and sometimes input lag. Mouse aiming is better for skillshots (Nurse, Huntress, Deathslinger, Trickster). Controller has aim assist? No, but survivors can 360 more easily with analog stick? Actually, movement is similar. Some killers (like Blight) are harder on console.
- When: If you play on console, invest in a monitor and wired controller to reduce lag. Use higher sensitivity for faster camera turning. For PC, lower graphics settings to maximize frame rate. Use a gaming mouse for precise hatchet throws. Cross-play can lead to skill disparity, but matchmaking should balance.
- Explanation: Totems are dull or lit. Hex perks turn lit totems into hexes; boon perks allow survivors to bless dull totems into boon totems. Destroying a hex disables the killer’s perk. Cleansing a boon removes the survivor’s boon.
- Analysis: Map layouts have 5 totems total. Survivors can cleanse totems to deny hexes (very helpful) or bless for boons (e.g., Circle of Healing allows self-heal without items). Killers can snuff out boons by stomping them. Always check totem locations near generators.
- When: As survivor, immediately cleanse any totem you find if the killer has hex perks (you can tell by the notification). If you have a boon perk, place it in a safe area (near gens but out of sight). As killer, if you have hexes, patrol those totems; use Thrill of the Hunt to slow cleansing.
- Explanation: Items (flashlights, toolboxes, medkits, maps, keys) and add-ons modify their effects. Add-ons are rarity-based (brown, yellow, green, purple, pink/red).
- Analysis: Rare add-ons are powerful but consume BP to unlock. Save them for when you really need them (e.g., a purple key with blood amber add-on to open hatch). For toolboxes, best add-ons are wire spool (increase repair speed) and socket swivels (reduce skill check difficulty). For medkits, add-ons like surgical suture increase healing speed or allow self-heal with a condition.
- When: Use brown and yellow items freely – they are cheap to replace. Green and above, use only in serious matches. For killers, add-ons can drastically change playstyle (e.g., The Hag’s scarred hand add-on removes teleport requirement). Equip add-ons that suit your strategy.
- Explanation: After the last generator is repaired, exit gates power. The hatch spawns when only one survivor remains (or if a key is used before). The Endgame Collapse timer starts when a survivor opens an exit gate or when the hatch is closed by the killer or the last survivor escapes.
- Analysis: Survivors must open gates (20 seconds) or find hatch. Killers can block gates with perks (No Way Out) or close the hatch (which triggers the Endgame Collapse at a faster rate). Endgame Collapse lasts 2 minutes normally; if the hatch is closed, it lasts 1 minute. Use this time to secure kills or escapes.
- When: As survivor, open gates near where the killer is not. If the killer has No Way Out, be prepared for blocked exits. As killer, close the hatch quickly if you see it to force survivors to open gates, making them predictable. Use Blood Warden to block gates after hooking someone during Endgame Collapse.
2. Master Sound Cues
3. Learn Basic Looping Mechanics
4. Prioritize Objectives Over Chases
5. Use Camera and Field of View (FOV) Effectively
Survivor Tips
6. Generator Repair Strategy
7. Chase Mechanics: 360s and Window Vaults
8. Stealth vs. Aggression
9. Perk Synergies
10. Item Management
Killer Tips
11. Map Pressure
12. Chase Fundamentals – Mind Games and Lunge
13. Hook Strategy – When to Camp, Patroll, or Slug
14. Killer Perk Loadouts – Meta Examples
15. Countering Survivor Perks
Bloodweb & Economy
16. Efficient Bloodpoint Spending
17. Best Perks to Unlock First
Builds
18. Survivor Builds – Meta and Variants
19. Killer Builds – Meta and Killer-Specific
Advanced Strategies
20. Moonwalking and 360s – Advanced Movement
21. Mind Games at Tiles – Shack, T&L, Jungle Gym
22. Reading the Killer’s Next Move
23. Map Awareness – Totems, Hooks, and Spawns
24. Cross-Platform Considerations
Exploration & Resources
25. Totems – Hexes and Boons
26. Items and Add-ons
27. Endgame Collapse – Exit Gates and Hatch
Conclusion
These tips cover the essentials for Dead by Daylight players of all skill levels. Practice each concept individually, then integrate them into your gameplay. Remember that DbD is a game of adaptation – what works in one match may fail in another. Keep learning and adjusting your strategies for both sides.