Game Settings
Game Settings Guide for Rocket League
This guide covers every major setting in Rocket League, explaining what each does, how to adjust it, and which options are best for performance versus visual quality. Settings are organized into seven categories: Graphics, Audio, Controls, Accessibility, Language, Network, and Gameplay. Special attention points highlight common pitfalls that can affect your gameplay experience.
1. Graphics Settings
Rocket League is well-optimized and runs on a wide range of hardware. Adjust these settings in Options → Video.
Performance vs. Quality – Quick Recommendations:
- Low-end PC (e.g., Intel HD Graphics, low-end laptops): Set everything to Performance or Low Quality; disable anti-aliasing, shadows, and motion blur.
- Mid-range PC (e.g., GTX 1060 / RX 580): Use High Quality preset, then tweak shadows to high and anti-aliasing to FXAA for a balance of smoothness and clarity.
- High-end PC (e.g., RTX 3070+): Max everything, enable High Quality and 8x MSAA if your monitor supports high refresh rates.
- Console (PS4/PS5, Xbox One/Series, Switch): The game auto-optimizes. On PS5/Xbox Series, you can toggle Performance vs. Quality in the console’s system settings (not in-game). On Switch, set to Performance for 60 FPS.
Detailed Settings Table:
| Setting | Options | Performance Impact | Recommendation |
|---|---|---|---|
| Preset | Quality / Performance / Custom | Major | Start here. Performance lowers most sub-settings. |
| Resolution | Native, Downscale, Upscale | Major | Use native resolution. Downscale can improve FPS but blurs image. |
| VSync | On / Off | Medium | Off – reduces input lag. Enable only if you see screen tearing. |
| Anti-Aliasing | Off / FXAA / 4x MSAA / 8x MSAA | High (MSAA) | FXAA for low cost; MSAA for sharp edges. On low-end, use Off. |
| Render Quality | Low / Medium / High / Very High | High | Very High is for high-end. Medium is a safe middle ground. |
| Texture Detail | Low / Medium / High / Very High | Medium | Very High uses more VRAM. Low helps on 2GB cards. |
| Shader Detail | Low / Medium / High / Very High | Medium | High improves reflections and lighting. Low is fine for competitive. |
| Shadows | Off / Low / Medium / High / Very High | Very High | Off or Low for extra FPS. High adds depth but can hide opponents. |
| Motion Blur | On / Off | Low | Off – it reduces clarity and can cause motion sickness. |
| Light Shafts | On / Off | Medium | Off for FPS and visibility. |
| Bloom | On / Off | Low | Off – makes the ball easier to see. |
| Depth of Field | On / Off | Low | Off – blurs background; distracts in gameplay. |
| Lens Flares | On / Off | Low | Off – reduces visual noise. |
| Color Blind Mode | Off / Protanopia / Deuteranopia / Tritanopia | None | Use if needed – changes ball and team indicator colors. |
- VSync: Always turn it off unless you experience severe screen tearing. VSync adds noticeable input lag, which can ruin your timing in aerials and fast turns.
- Motion Blur, Bloom, Depth of Field, Lens Flares: These are purely cosmetic and can actually make it harder to see the ball in chaotic moments. Turning them off is a competitive advantage.
- Anti-Aliasing (MSAA): 4x or 8x MSAA looks crisp but hits performance hard. On lower-end systems, use FXAA or Off.
- Shader Detail: Setting to "Low" can suppress some particle effects that might distract you, but also removes some visual cues (like car reflection on the ground). Most pros use High or Very High.
2. Audio Settings
Found under Options → Audio. Audio is crucial for hearing engine sounds, boost, and ball hits.
| Setting | Options | Recommendation |
|---|---|---|
| Master Volume | 0 – 100 | 80 – 100; keep it high enough to hear engine and boost. |
| Music Volume | 0 – 100 | 0 or low – music can distract. Many turn it off. |
| SFX Volume | 0 – 100 | 100 – essential for hearing ball touches and opponent cars. |
| Announcer Volume | 0 – 100 | 50 – useful for kickoff countdown and goal call, but can be annoying. |
| Voice Chat Volume | 0 – 100 | Adjust per preference; 50 is typical. |
| Voice Chat | On / Off / Party Only | Off or Party Only to avoid toxic voice chat. |
| Push to Talk | On / Off | On – avoids background noise from your mic. |
| Audio Output | Auto / Stereo / Surround (Headphones) / Surround (Speakers) | Set to your actual hardware. For headsets, choose Headphones mode for spatial cues. |
- Audio Output – Using the wrong mode can mess with directional audio. If you use standard stereo headphones, set to "Headphones" (not Surround) to avoid phase issues.
- Music Volume: The in-game music can be loud and may mask important sound cues. Many competitive players set it to 0.
- Voice Chat: Public voice chat is rarely useful and often negative. Turning it off (or setting to Party Only) is recommended for a better experience.
3. Controls Settings
Access via Options → Controls. These settings can make or break your mechanical consistency. Ensure your controller is connected before adjusting.
Binding Profiles: You can have multiple profiles; create one for your preferred controller (e.g., Xbox, PlayStation, Switch Pro).
Essential Bindings:
| Action | Default | Pro Recommendation | Why |
|---|---|---|---|
| Jump | A / Cross | A / Cross | Standard – keep unless you have a reason. |
| Boost | B / Circle | Right Bumper (R1) | Allows you to jump and boost simultaneously without claw grip. Many pros use this. |
| Powerslide | X / Square | Left Bumper (L1) | Lets you powerslide while boosting or jumping. Easy to fat-finger X. |
| Air Roll | (default unbound) | Left or Right Bumper (L1 or R1) | Bind air roll left/right to separate buttons for advanced aerial control. Common: Air Roll Left→L1, Air Roll Right→R1, or use standard Air Roll on L1 and boost on R1. |
| Rear View | Right Stick Click (R3) | Left Stick Click (L3) – optional | Useful for checking behind you. Some bind to L3 for quick access. |
| Scoreboard | Tab / Back | Left D-pad – easy to reach. | Not needed frequently, but keep accessible. |
| Reset Shot | L3+R3 | Same – okay. | Used in training; rarely changed. |
Controller Deadzone & Sensitivity:
| Setting | Range | Recommendation |
|---|---|---|
| Controller Deadzone Shape | Cross / Square / Circle | Circle – more intuitive for circular analog stick movement. Cross and Square can cause diagonal snapping. |
| Deadzone (Analog Stick) | 0.00 – 0.99 | 0.10 – 0.20 – lower is more responsive but may cause stick drift. 0.15 is a safe starting point. |
| Dodge Deadzone | 0.00 – 1.00 | 0.50 – 0.80 – higher prevents accidental dodges when trying to jump. Many pros use 0.50. |
| Steering Sensitivity | 1.00 – 10.00 | 1.00 – 1.50 – higher values make turning more twitchy; most pros use 1.00. |
| Aerial Sensitivity | 1.00 – 10.00 | 1.00 – 2.00 – same logic; higher is harder to control. 1.00 is common. |
| Controller Deadzone (Triggers) | 0.00 – 0.99 | 0.30 – 0.50 – prevents accidental input from light trigger resting. Adjust if you notice phantom boosts. |
- Air Roll and Powerslide bindings: Do not bind both to the same button (e.g., L1). Rockets League differentiates them based on whether you are airborne, but rebinding both to L1 can cause issues when sliding then jumping. Instead, bind Powerslide to L1 and Air Roll to L1 (they can share the same button because the game uses context). But if you want separate air roll left/right, use different buttons.
- Dodge Deadzone: Too low a value and you might dodge accidentally when trying to double-jump; too high and quick double-jumps may not register as a dodge. Start at 0.50 and adjust.
- Vibration: Off is strongly recommended for competitive play. The tactile feedback is not worth the latency.
4. Accessibility Settings
Found under Options → Accessibility. These are important for players with disabilities.
| Setting | Options | Recommendation |
|---|---|---|
| Color Blind Mode | Off / Protanopia / Deuteranopia / Tritanopia | Choose based on your color vision deficiency. It changes team colors (e.g., orange vs. blue becomes other color pairs). |
| High Contrast Goal Indicator | On / Off | On – makes the goal explosion more visible; useful for low vision. |
| Subtitle Language | Multiple languages | Adjust as needed; subtitles are for menus, not gameplay. |
| Text Size | Small / Normal / Large | Large is easier to read on small screens or for reading impairment. |
| Quick Chat Only | On / Off | On – if you want to disable all text chat and only allow quick chat. Reduces social noise. |
| Chat Filter | Off / Friendly / Strict | Friendly or Strict to hide profanity and toxic messages. |
| Camera Shake | On / Off | Off – causes disorientation; not recommended. |
| Motion Sickness Reduction | On / Off | On – reduces camera movement and effects that trigger motion sickness. |
- Camera Shake: Turn it off as soon as possible. It adds jarring screen movement on hits and demos, which can be disorienting and even cause headaches. It offers no gameplay benefit.
- Motion Sickness Reduction: If you feel dizzy after matches, enable this setting. It disables some camera transitions.
- Text Language: Interface and menus in your chosen language.
- Audio Language: Affects announcer and in-game voice lines. Usually matches text language.
5. Language Settings
Located in Options → Language. Rocket League supports major languages. Changing language will restart the game.
Recommendation: Set to your native language for easier menu navigation, but note that some community terms (e.g., "dribble", "aerial") remain in English. There is no gameplay advantage in switching language.
6. Network Settings
Found under Options → Network. These affect online connectivity and matchmaking.
| Setting | Options | Recommendation |
|---|---|---|
| Region | Auto / specific regions (NA East, NA West, Europe, etc.) | Select the region with lowest ping. If you are on the border, use Auto. |
| Matchmaking Region | Same as Region | Use the same as above. |
| Platform Matchmaking | All / Same Platform / Same Console / Same PC | Use "All" for fastest queue times, but you may face PC players with better frames. If you want to avoid PC, select "Same Console". |
| Cross-Play | On / Off | On – larger player pool. Off only for custom games or to avoid specific platform issues. |
| Lobby Voice Chat | On / Off | Off to reduce bandwidth and toxicity. |
- Region: Manually set it to your closest region. Auto sometimes picks a farther region with similar ping but may cause unstable latency. Check your ping in the start screen.
- Cross-Play: Leave on. The player base is large, but cross-play can introduce tiny desync differences. It’s negligible for most.
- Platform Matchmaking: If you are on console, limiting to "Same Console" can reduce the number of highly mechanical PC players, but queue times may increase.
7. Gameplay Settings
Access via Options → Gameplay. These tweak how the game behaves.
| Setting | Options | Recommendation |
|---|---|---|
| Camera Settings | Custom sliders (FOV, Height, Angle, Distance, Stiffness, Swivel Speed, Transition Speed) | See below – camera is critical for spatial awareness. |
| Rumble Mode | On / Off | Off for competitive; On for casual fun. |
| Extra Modes | Dropshot, Hoops, Snow Day, etc. | Personal preference. |
| Team Colors | Side-based / Player preference | Use side-based to see team colors clearly. |
| Quick Chat | All / Team Only / Quick Chat Only / Disabled | Team Only for less clutter. |
| Transparent Goalposts | On / Off | Off – solid goalposts make it easier to judge shots near the goal. |
| Game Overlay (e.g., Steam, Discord) | On / Off | On if you want; can cause FPS drops in some cases. |
| Setting | Range | Typical Pro Value |
|---|---|---|
| Field of View (FOV) | 90 – 110 | 110 – max for best peripheral vision. |
| Camera Height | 90 – 130 | 100 – 110 – higher gives more overview, but lower is better for dribbling. Common: 100. |
| Camera Angle | -5 – 0 | -3.0 – slightly downward for better ground vision. |
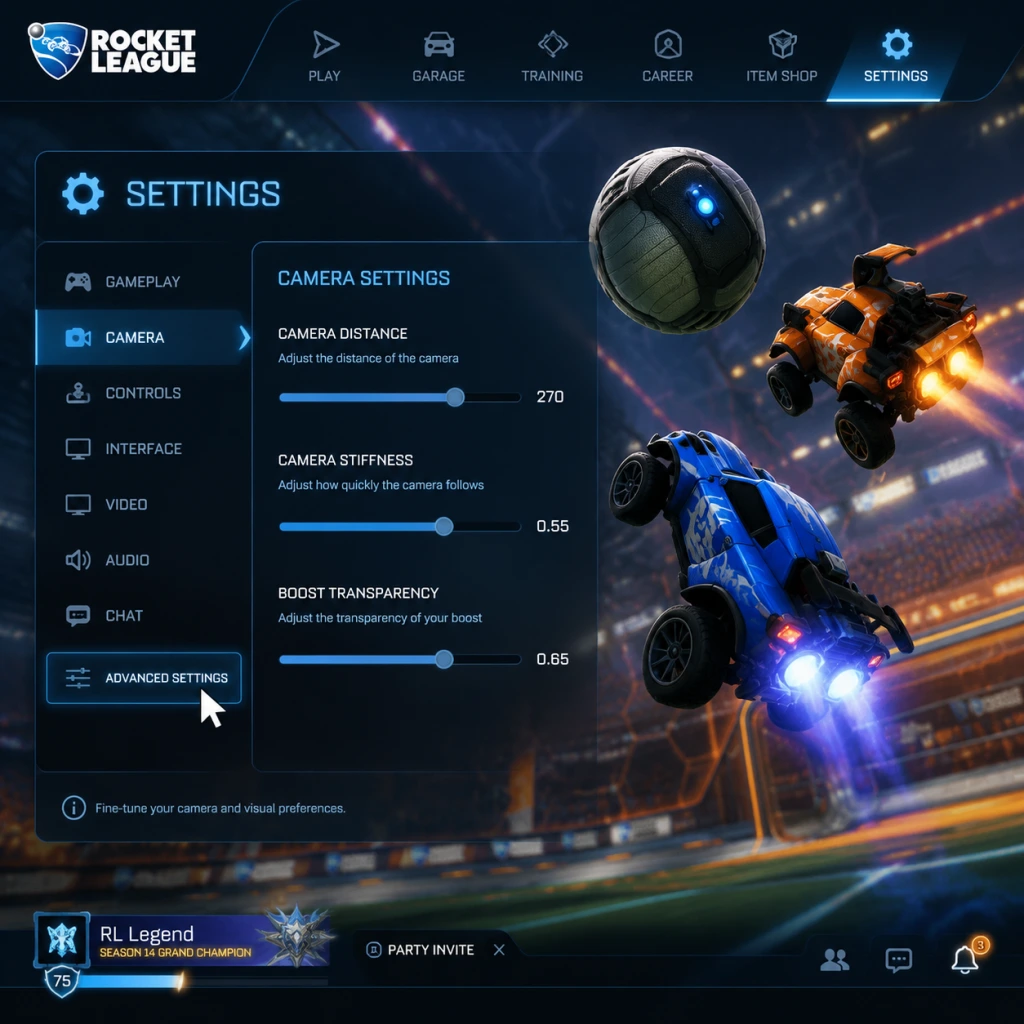
| Camera Distance | 250 – 300 | 260 – 280 – far enough to see field, close enough for control. Example: 270. |
| Camera Stiffness | 0.00 – 1.00 | 0.35 – 0.70 – higher = less camera movement. Many use 0.40. |
| Camera Swivel Speed | 1.00 – 10.00 | 3.00 – 5.00 – how fast you can look around. 5.00 is common. |
| Camera Transition Speed | 1.00 – 2.00 | 1.20 – 1.50 – smoothness when ball cam switches. 1.30 is a good middle. |
| Ball Cam | On / Off (toggle with Y/Triangle) | On by default; toggle off when dribbling or rotating. |
- Transparent Goalposts: Turn to Off. Transparent goalposts can make it hard to see the ball near the line; solid posts give a clear reference.
- Camera Settings: These are highly personal but start with the pro values above. A too-high FOV can distort edges, but 110 is standard. Adjust one slider at a time and test in free play.
- Ball Cam: Learn to toggle it. Ball cam stays on most of the time, but turn it off when you need to see your car's orientation or when dribbling.
Final Setup Checklist
1. Graphics – Reset to Performance if FPS drops below 60. Turn off VSync, motion blur, bloom, depth of field, and lens flares.
2. Audio – Set SFX to 100, music to 0, voice chat to Party Only. Use Headphones audio mode.
3. Controls – Bind boost to R1, powerslide/air roll to L1. Vibration OFF. Deadzone circle shape with 0.15 stick deadzone and 0.50 dodge deadzone.
4. Accessibility – Camera Shake OFF, Motion Sickness Reduction ON if needed.
5. Network – Set correct region, cross-play ON.
6. Gameplay – Camera FOV 110, Height 100, Distance 270, Stiffness 0.40, Swivel 5.00, Transition 1.30. Transparent goalposts OFF.
Remember that settings can be changed at any time, even during a match (except language). Take time to experiment in free play or casual matches before committing. Good luck in your Rocket League journey!